 Email article
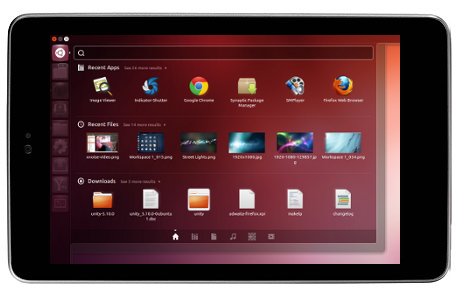 Love the Nexus 7 but not so interested in how limited Android can sometimes be? If so, you’re in luck. This guide will teach you how to install Ubuntu 13.04 directly onto your Nexus 7. After following this guide, you’ll have the power of Ubuntu on your tablet. Let’s get started.
Disclaimer: This guide is intended as a helpful “how to”. dotTech and its writers are not responsible for any gain or loss (including but not limited to bricked devices) incurred as a result of following this guide. Installing Ubuntu on your Nexus 7 is an unofficial process and, while it works if done correctly, contains certain risks, such as loss of data or bricked devices. Proceed at your own risk.
BEFORE WE BEGIN
Make sure you have your Nexus 7’s microUSB cable nearby.
The bootloader MUST be unlocked. If you have a 2012 Nexus 7, refer to dotTech’s root guide of the 2012 Nexus 7, find the section that talks about unlocking the bootloader. Once you’ve unlocked the bootloader, come back to this guide. If you have a 2013 Nexus 7, refer to the 2013 Nexus 7 root guide.
This guide is specifically for installing Ubuntu 13.04 on Nexus 7. It may or may work for later versions of Ubuntu. At the time of this writing, Ubuntu 13.04 is the latest version of Ubuntu.
Installing Ubuntu 13.04 to the Nexus 7 can only be done on a Ubuntu computer. Download and install the latest version of Ubuntu Linux to your Windows or Mac (if you are not already running it). You can download the latest version of Ubuntu by visiting this link. Be sure that you are downloading the latest version, and not long term support. The installer is very painless and easy to understand if you are technically savvy. Download the ISO of Ubuntu and burn it to a CD or DVD. If you do not want to burn a disc, there are several utilities that will make Ubuntu bootable on a flash drive. You can find the USB tool you need by visiting this link.
In order to flash Ubuntu to the Nexus 7, you’ll need to download and install Ubuntu Nexus 7 Desktop Installer on your computer. Do this by opening your terminal and entering the commands below.
sudo add-apt-repository ppa:ubuntu-nexus7/ubuntu-nexus7-installer

sudo apt-get update

sudo apt-get install ubuntu-nexus7-installer
HOW TO INSTALL UBUNTU 13.04 RARING RINGTAIL ON THE NEXUS 7
- Once you’ve unlocked the Nexus 7’s bootloader, you’ll see a message appear in red text that says “LOCK STATE – UNLOCKED”. This means that your Nexus 7 is now unlocked.
- Keep your Nexus 7 in bootloader mode and connect it to your PC via the micro USB cable.
- Press the Windows key (super key) on your keyboard and in the search bar type: nexus. Doing this will bring up the Ubuntu Nexus 7 Installer. Double click on the Ubuntu Nexus 7 Installer icon and open it.
- The Ubuntu Nexus 7 Installer will provide an easy GUI that will walk you through installing Ubuntu 13.04 to your Nexus 7. It will download the latest Ubuntu image and flash it to your device automatically. Flashing will take about 2 minutes. Be very careful as to read every detail that the Ubuntu Nexus 7 Installer tells you.
- When the flashing is completed, your Nexus 7 will reboot. After installing, first boot can take anywhere from 10 to 15 minutes. Be patient.
- After the rebooting is complete, Ubuntu is installed.
HOW TO RETURN YOUR NEXUS 7 TO STOCK ANDROID
- Before we can return your Nexus 7 to stock, we need Android-tools. This set of Android tools, when installed will give you important tools like adb and fastboot. To install Android-tools enter the command below in a terminal window.
sudo apt-get install android-tools
- After installing Android-tools, reboot your Nexus 7 into bootloader mode. You can achieve this by pressing and holding both the volume up and volume down buttons and the power button at the same time.
- Once you’ve gotten your Nexus 7 into bootloader mode, connect it to your PC. Make sure that no other mobile device is connect to your PC, as it could be erased as well.
Restoring Android To 2012 Nexus 7
- Enter the commands into your terminal window below if you’re restoring a 2012 Nexus 7.
wget https://dl.google.com/dl/android/aosp/nakasi-jzo54k-factory-973f190e.tgz&& tar zxvf nakasi-jzo54k-factory-973f190e.tgz
cd nakasi-jzo54k
sudo ./flash-all.sh
- After starting flash-all.sh, the script will flash Android 4.3 to your 2012 Nexus 7. The script may take some time. When it is finished executing, reboot your Nexus 7.
Restoring Android To 2013 Nexus 7
- Enter the commands into your terminal window below if you’re restoring a 2013 Nexus 7.
wget https://dl.google.com/dl/android/aosp/razor-jss15q-factory-4f77b811.tgz&& tar zxvf razor-jss15q-factory-4f77b811.tgz
cd razor-jss15q
sudo ./flash-all.sh
After starting flash-all.sh, the script will flash Android 4.3 to your 2013 Nexus 7. The script may take some time. When it is finished executing, reboot your Nexus 7.
CONCLUSION
Android is a great operating system for mobile devices — but it’s very limiting. Android isn’t too great for power users, at least compared to Ubuntu. Now that you’ve learned how to install Ubuntu to your tablet, the possibilities are endless. Tons of desktop Linux applications are now at your fingertips. You can even play steam games on your tablet if you choose to. Have fun!


