 Email article
 Earlier this year, Samsung released an upgraded version of the Galaxy Note 10.1 – the Galaxy Note Pro 12.2. The device came with a larger 12.2 inch Super LCD display packing a resolution of 2560 x 1600, Exynos 5 Octa processor ( Snapdragon 800 for the LTE version), 32/64 GB of internal storage, the S-Pen along with all the bells and whistles, and Android 4.4 Kit Kat on board.
If you happen to have picked up one of these awesome slates, and are looking forward to making the most out the high-end hardware and feature-packed software on it, then root is the way to go. And if you’re looking for an easy to execute method, you’ve come to just the right place. Read on to know how you can root the Samsung Galaxy Note Pro 12.2.
Disclaimer: This guide is intended as a helpful how to. dotTech and its writers are not responsible for any gain or loss (including but not limited to bricked devices) incurred as a result of following this guide. Root your device at your own risk. Rooting may void your warranty.
Requirements
This guide is intended for the Samsung Galaxy note Pro 12.2 , model number SM-P900 ( WiFi Only version with Exynos 5 Chip) and SM-P905 ( 4G / LTE Version with Snapdragon 800 chip) running Android 4.4 KitKat. You can check your device model number by going to Settings > About Device on your phone, or by checking the labels on the packaging box.
Before We Begin
A few things to download and be ready with before you go ahead and root your device:
- Samsung USB Drivers – Download and install on your computer
- ODIN 3.07 – Download and extract zip file to your desktop
- CF Auto Root Package – Download and extract to your desktop
P900 WiFi Only Model | P905 4G LTE Model - Back up all your important data and media on the phone before you proceed
How To Root Samsung Galaxy Note Pro 12.2
- Download and install the Samsung USB drivers on your PC
- Download and extract the Odin 3.07 zip to your desktop
- Download and extract the CF-Auto-Root package for your device model to your desktop. You should get a folder which contains a file with a .tar.md5 extension
- Switch off your tablet and reboot to Download Mode. To do this, press and hold down Volume Down + Home + Power buttons simultaneously. When you see a warning screen, release all the buttons. Then Press Volume Up to enter Download mode
- Open the Odin folder on your desktop and launch Odin as administrator
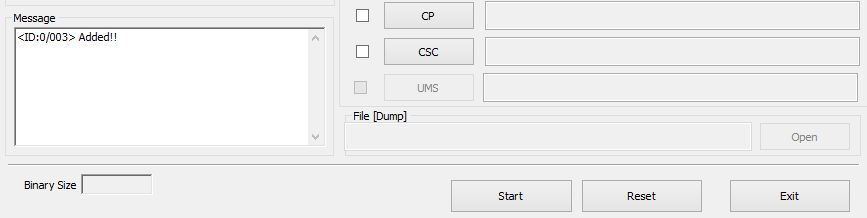
- Connect the phone to the PC via USB cable. You should now see the message Added! in Odin
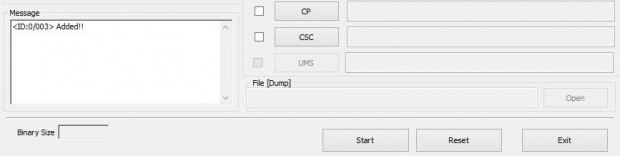
- Click the PDA button in Odin and load the CF Auto Root .tar file from the folder you extracted earlier on your desktop
- Leave everything else in Odin as it is. Auto reboot and Reset Time boxes should be checked. Re-Partition box should be left unchecked
- Click the Start button in Odin to start flashing the root package
- Once the flashing is done, your device will reboot automatically and you will see a PASS message with green background at the top left in the Odin window. It is now safe to disconnect your phone
- Once the phone has rebooted fully, you should see the SuperSU app in the app drawer.
That’s it!! Your Galaxy Note Pro 12.2 is now fully rooted and you are all set to unleash the power of your device through the plethora of root apps that are available for rooted devices. Cheers!!


