 Email article
Document files are usually moved into new folders by dragging and dropping them to new locations. However, you can add a Files 2 Folder option to the context menu which converts selected files to a new folder. Then the document files don’t have to be moved over to the new folder.
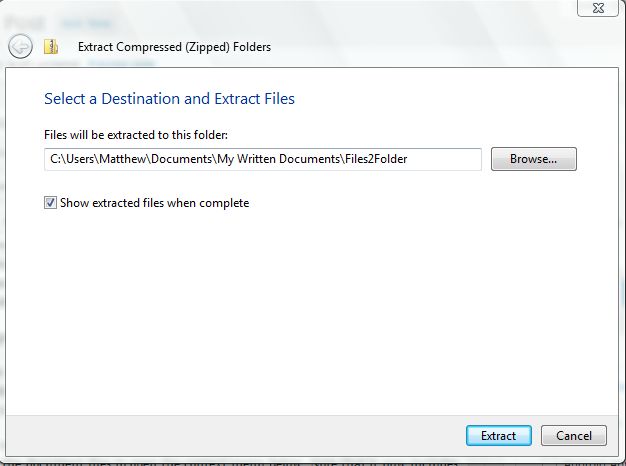
To add the option to the context menu, check out the Files 2 Folder software, for Windows XP/Vista and 7. Download it and right-click on that file, and then select Extract All to open the window in the shot below. There you should choose a suitable place for the extracted folder, and then click Extract.
Open the extracted folder, and click the Files2Folder.exe. Then a Files 2 Folder window asks, “Would you like to register this shell extension?” Click on Yes to add a File 2 Folder option to the context menu. (You will have to run as admin on Vista/7.)
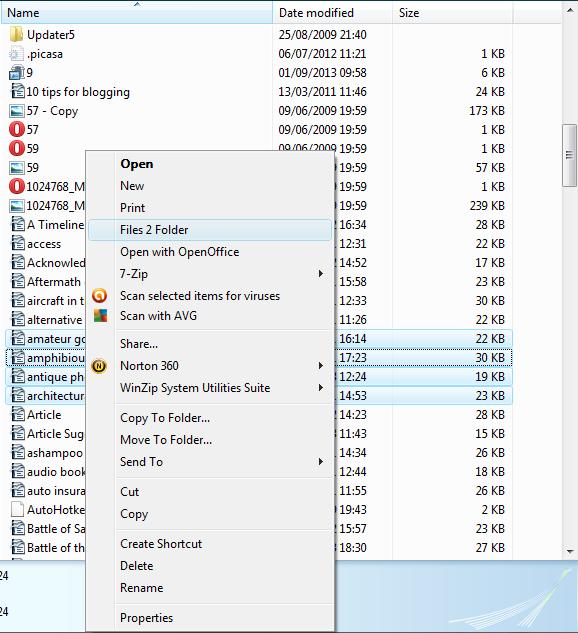
Now select a group of documents whilst holding the Ctrl key. Right-click over the document files to open the context menu below. Note that it now includes a Files 2 Folder option for you to select.
Select the option to open the window below. To set up one folder for all the documents, click on the Move all selected files into a subfolder named check-box. Then type in a folder title, and click on OK to close the window. That should set up the new subfolder with all the selected documents included within it.

To set up multiple folders for the documents, select the Move each file to each subfolders based on their names check-box. Then click on OK to close the window, and each of the files will be in separate folders with the same title as the documents included within them. Or click on the Move each file to subfolders based on their file extensions which moves different file types into alternative folders.
The Files 2 Folder software adds a great option to the context menu. With it you can both set up, and fill up, a new folder without dragging and dropping files.


