 Email article
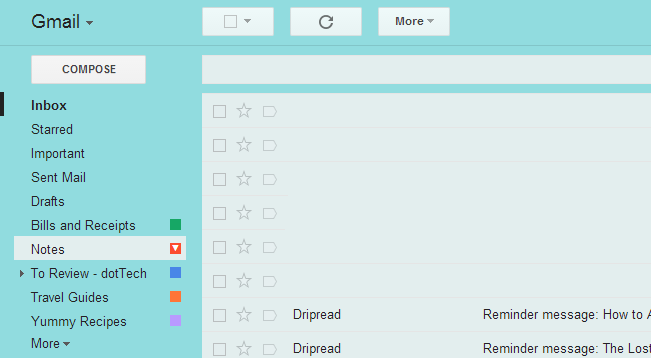
In Gmail, you can easily sort out your emails by simply putting them into different labels. Speaking of which, creating labels on Gmail is rather easy. All you need to do is to expand the menu on the left side of your inbox then click the “Create new label” option. You can even place a new label under an existing label. Apart from this, you can also change the label color. This way, you can easily recognize which label is for receipts, bills, recipes, travel, etc.
Now, when it comes to changing the label color, there’s really no need for you to learn some complex steps. There’s also no need for you to install any third-party Gmail add-on. So, if you want to learn how to change label colors in Gmail, simply read on.
Just remember that you can only change label colors in the web version of Gmail. It doesn’t work on Gmail for Android and so on.
The Steps
Step One
Using your preferred web browser, log in to Gmail by providing your username and password.
Step Two
Once you’re logged in to Gmail, you can choose to create a new label first or edit an existing label.
For this step-by-step guide, you may opt to edit an existing label.
Step Three
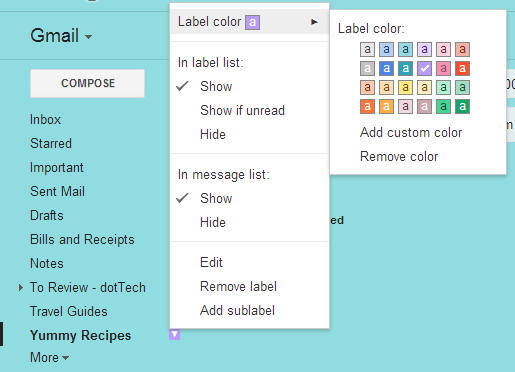
Find an existing Gmail label that you wish to edit or customize. After which, hover your mouse over that label and then click the grey/black arrow icon.
Step Four
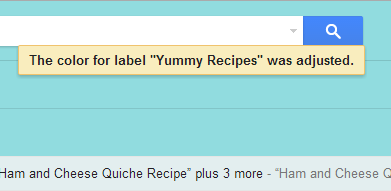
A sub-menu will appear. Select “Label color” then choose your desired color. After you’ve made your selection, the changes will be automatically applied to your Gmail account.
Step Five
If you wish to change or modify the label color that you have selected, you may always repeat the steps listed above (start from step two to four).
So that’s it. You’re done.


