 Email article
In Windows 7 MS Paint, you can choose from nine alternative brushes. However, you can also create custom brushes with alternative shapes in Windows 7. With Paint’s Transparent Selection tool you can create a variety of brushes.
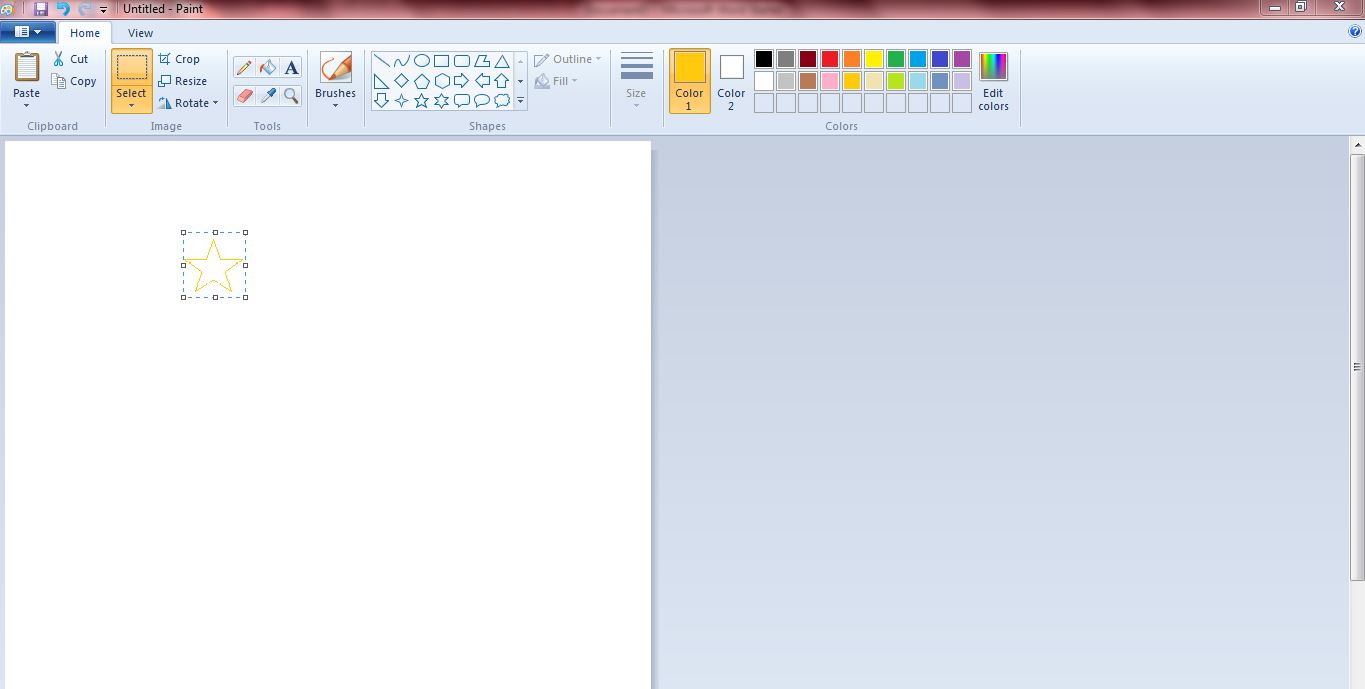
First, draw out a brush style with Paint’s pencil tool. Alternatively, you can also draw out shapes for the custom brush by selecting one of the shapes beside the Brushes option. Below, I’ve drawn out a star shape for the custom brush.

Next, click Select and the Transparent Selection option. Then you should also select Rectangular selection from the same drop-down menu. With the Rectangular selection tool select the shape that you drew as in the shot below.
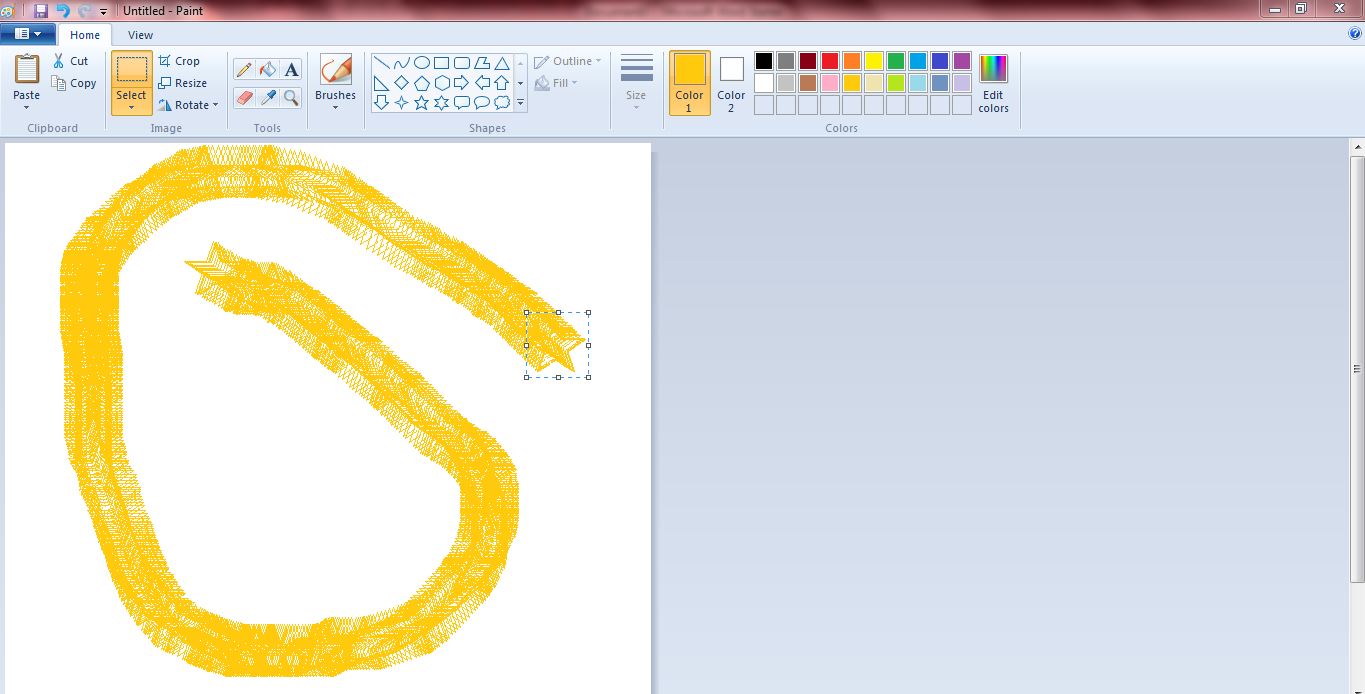
Now press and hold the Shift key and drag the selection area to paint onto the canvas with your custom brush. In the shot below the custom brush paints over the canvas with a star shape.
You can now set up a multitude of custom brushes in much the same way with the Windows 7 Paint application. However, the earlier versions of Paint don’t have entirely the same options as the revamped Paint in Windows 7. Also note that that application doesn’t have any option to save the custom brushes.


