 Email article
A mosaic is an art of creating images with an assemblage of colored stone or glass. You can add mosaic effects to your own images with Paint.NET. That includes a Mosaic plug-in which generates mosaic effects.
You can add Mosaic to Paint.NET from this page. There click on the Zip icon to save the Zip file. Then extract the Zip to Paint.NET’s Effects folder by right-clicking it and selecting Extract All. Launch the program, open an image and click Effects > Artistic > Mosaic to open the window below.
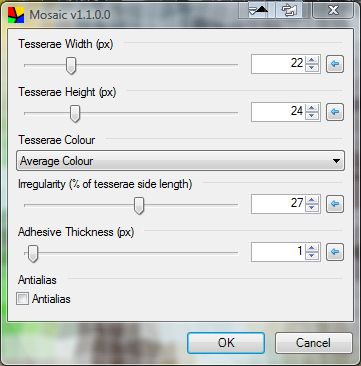
Firstly, adjust the width and height of the mosaic tesserae. Drag the two tesserae bars at the top of the window to the left and right to configure their width and height. Alternatively, enter values in the text boxes on the right of the bars.

To add some visible lines to the mosaic, drag the adhesive bar at the bottom of the window further to the right. That will add lines to the mosaic as in the shot below.

You can also adjust the shape of the mosaic. Drag the Irregularity bar further to the right to add less regular shapes to the mosaic. If you drag that bar to the far left the mosaic will consist of a series of squares as below.

Press the OK button to close the window. Then you can save the mosaic by clicking File > Save as. The shot below shows a mosaic set up with the Paint.NET plug-in.

So this Paint.NET plug-in gives us a great new art effect to apply to images. With it you can add many types of mosaic effects to your photos.


