 Email article
Once you delete a file in Android, it would be difficult to recover. It’s not like Windows wherein you can opt to send your files to Recycle Bin. However, that doesn’t mean that you cannot add a similar feature to Android. As a matter of fact, you can and it won’t even require you to root your phone.
If you want to learn how, simply read on.
Recycle bin for Android
- On your Android device, download and install a free app called “Dumpster”.
- After installing the app, open it and then tap “Agree” after reading its end user license agreement.
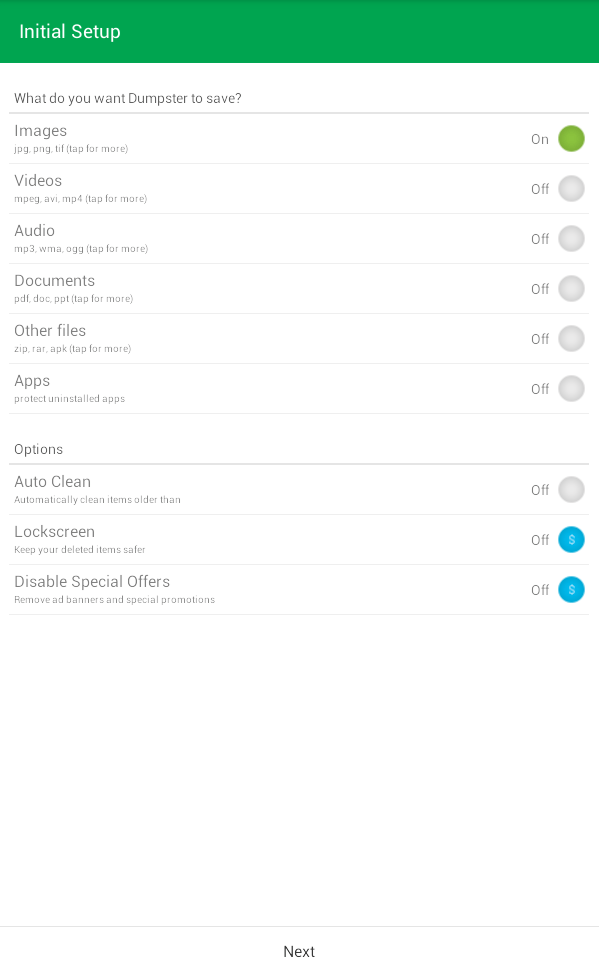
- In the app’s initial setup, you will be asked to select the type of files that you want to send to Dumpster. You can select images, videos, audio, documents, apps, .zip and .rar files, .apk files, etc. Once you’re done, tap “Next”.
- Wait until you get notified that the app is ready.

- Once it’s ready, you can check out its home menu and apparently, you will find its list empty.
- Since Dumpster works like a recycle bin for Android, all you need to do is to delete some files like photos, videos, songs, etc. You can also opt to send any file to Dumpster right within your gallery app or file manager.
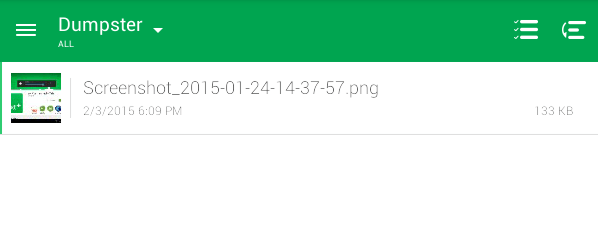
- After which, all of your deleted files will be automatically stored to Dumpster.
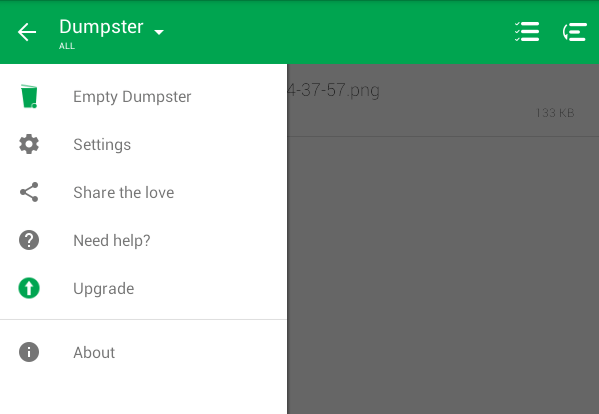
- Just like the Recycle Bin for Windows, you can choose to empty the dumpster and permanently delete your files. You can also choose to restore some files.
With Dumpster, you will have the ability to recover those files that you’ve accidentally deleted. It also supports all common file types including images, videos, audio, avi files, doc files, ppt files, PDF, zip, rar, mp3, mp4, etc.
So go ahead and feel free to check it out.


