 Email article
Have you noticed? Whenever you click and view an image in a new tab in Chrome, it usually stays on the upper left side of your tab. This is for those images that you view using their direct link. For some, this is okay but that doesn’t mean that you would just settle for something less. With that being said, you can choose to move the position of the image so that it would appear at the center of the tab.
If you want to know how to move the image that you’re viewing to the center of the tab, just read and follow the steps listed below.
How to position an image to the center of the tab in Chrome
- First, you will need to download and install a free Chrome browser extension called “Image to center”.
- Once installed, the extension will automatically open its options page.
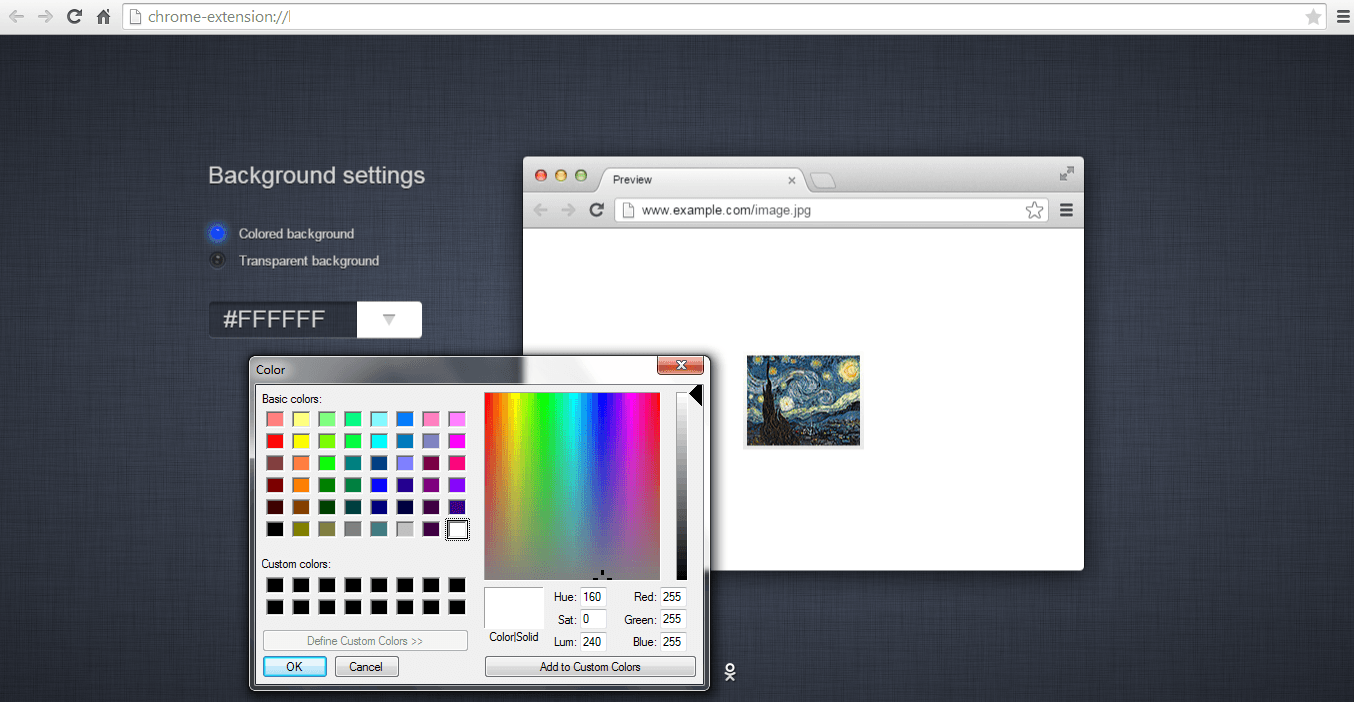
- In the options page, you can change the background settings for the image that you wish to move to the center of the tab. You can choose a colored background or a transparent background. For a transparent background, you can select from the available list of grids and grid sizes.
- Once done, you may close the options page and go to any web page or website with image.
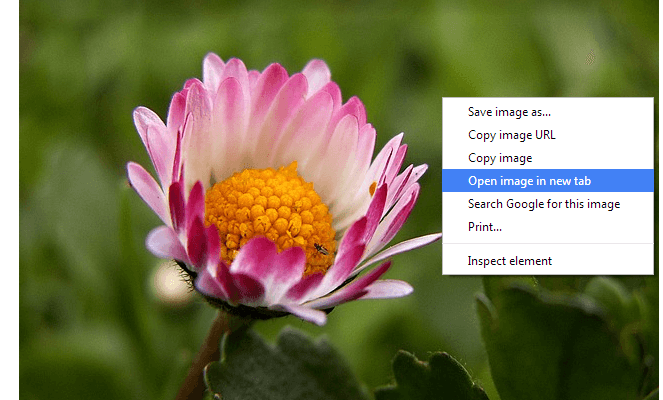
- Select the image that you would like to view in a new tab. Right-click on it then on the context menu, select “Open image in new tab”.
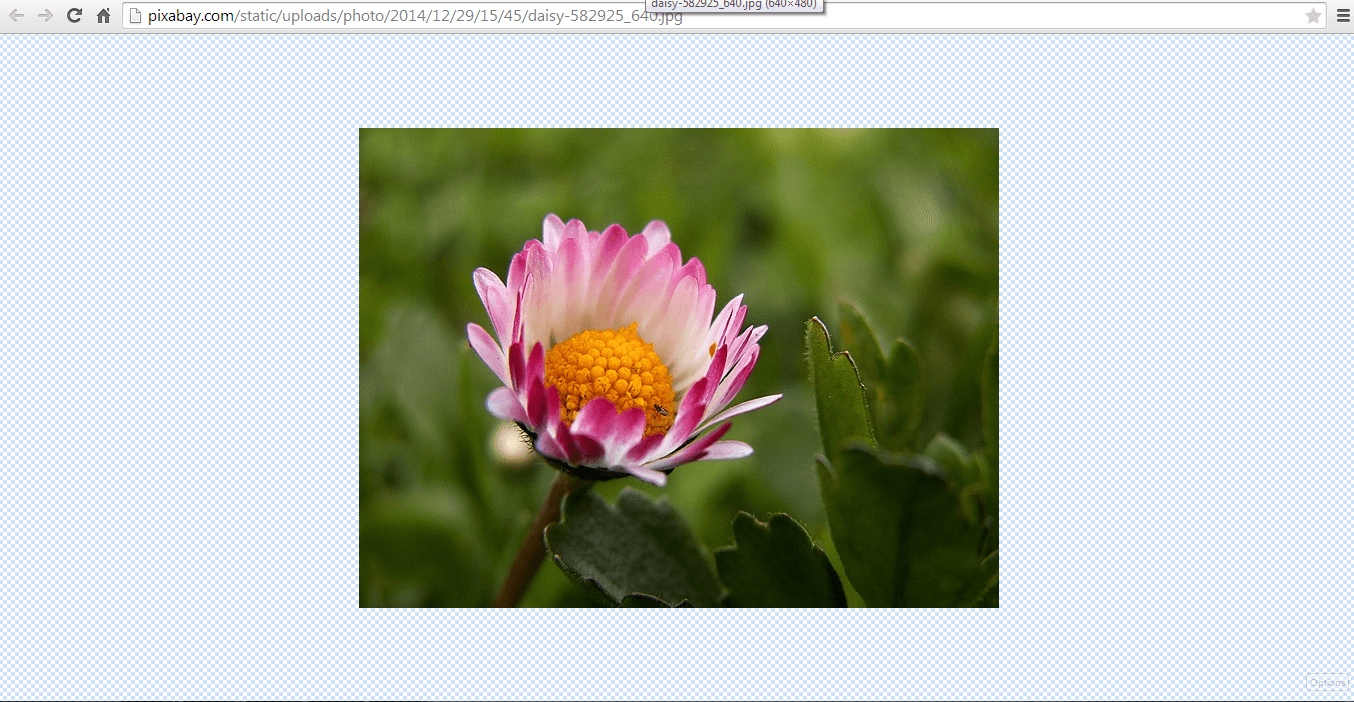
As you view the image in a new tab, you can immediately notice that it’s no longer located at the upper left side of the tab. It’s now located at the center of the tab (screen).
So that’s it. With the image being shown at the center of the tab, it looks more pleasing to the eye.


