How To: Remove backgrounds/extract objects from pictures

August 24, 2010 16 Email article | Print article

Do you need a single object from a picture, say, a beach ball or a dog?  With GIMP (a freeware, powerful image editor) and a little patience, you can extract the object from the picture.  Tell me, which of the following images is the original?

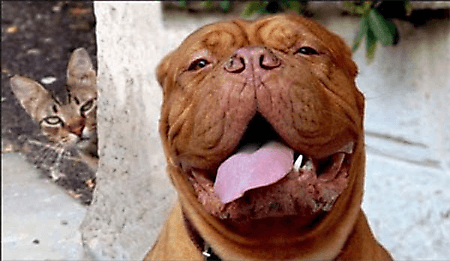
(It is the second one, in case you didn’t guess it already.)

To start, you’ll need to have GIMP open.  If you don’t have GIMP, you can download it at Sourceforge.

Once you have GIMP opened and the picture loaded, duplicate the picture’s layer with Ctrl+Shift+D; then disable the new layer by clicking on the eye (if you can’t see this dialog box, press Ctrl+L):

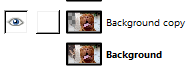
Now zoom in a lot.  You can do this with the + key (don’t need to press Ctrl this time):

Next you need to select the Free Selection Tool (). Slowly and surely go around the outside of the object while clicking to make points:

If you’re not being terribly accurate, don’t worry.  For one, you’re zoomed very far in, so it’ll look better once zoomed out; for two, you can always hit backspace to undo the last point.

When you’ve gone around the entire object, press “Enter” on the keyboard to get an actual selection of marching ants.  Now you need to reverse the selection so you’re selecting the background; go to”Select” ->”Invert”.  After you’ve inverted it, press “Delete” on the keyboard to get rid of the background.

Press Ctrl+Shift+A to clear the selection, and congratulations–you’ve removed the background:

If you want learned how to put the object on a new background, continue reading this article; if not, go practice those background deletion skills!

When wanting to insert a foreign object into an image, the first thing to do is copy + paste the object from one image into the image you want to insert it to. You can copy + paste the object by pressing Ctrl + A to select it, and Ctrl + C to copy it; then go to the image that you want to insert the object and press Ctrl + V to paste in the object. Next you need to use the “Scale Tool” (Shift+T) to scale the background and the object so they match. Lastly, if the extraction of your object was a little sloppy, you can remedy this in a few ways:

  1. Use the “Fuzzy Select Tool” to select the transparent area of the object layer.  Go to “Select” -> “Grow” and click OK (it should be on one pixel).  Now go to “Filters” -> “Blur” -> “Gaussian Blur” and blur by five pixels (you can experiment with lower or higher).
  2. You can zoom in again and delete extraneous parts of the object–it’s the slowest and hardest, but it gives the best results.
  3. Use the “Fuzzy Select Tool” to select the transparent area of the object layer.  Then go to “Select” -> “Grow” and grow by one pixel.  Last go to “Layers” -> “Transparency” -> “Color to Alpha”.  (This one will look great in some situations, and bad in others.)

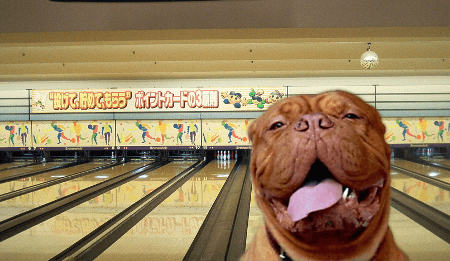
After some practice, you will (hopefully) get something like this:

If you have any tips on how to go about object extraction/background removal, feel free to share in the comments below.

16 Comments »

  1. david roper August 24, 2010 at 5:26 AM (comment permalink) -

    Well, now I know how.  Thanks for the insight.  I knew about Gimp but not how to use it.  Excellent article for anyone who has pictures and who doesn’t?

    1
  2. Bruce Fraser August 24, 2010 at 5:47 AM (comment permalink) -

    Thanks, Ashraf! I have always wondered how to do this.

    2
  3. stephen525 August 24, 2010 at 7:36 AM (comment permalink) -

    Nice tip.
    Instead of the Free Select tool, I prefer the Path tool. The Path tool lets you move the points around…
    If you use Free Select, make lots of clicks. Gimp uses some things called “math” and “science” to smooth your selection. More clicks = more math & science.
    Also when you are zoomed way in and reach the edge, just hold down the space bar to scroll the image.

    3
  4. gsagri04 August 24, 2010 at 8:46 AM (comment permalink) -
  5. ami August 24, 2010 at 8:54 AM (comment permalink) -

    Excellent work! keep it up.Gimp is a really good programme to use.it features and templates are exellent and best of all its free.Look it does waht it suppose to do, ala photoshop, just for free!

    5
  6. Katydid August 24, 2010 at 10:13 AM (comment permalink) -

    @Bruce Fraser: Yes, it was a great tutorial, but Locutus wrote it, not Ashraf.  Both are worth their weight in gold.  How much do you and Ashraf weigh, BTW, Locutus?

    6
  7. Mr.Dave August 24, 2010 at 2:00 PM (comment permalink) -

    Locutus, nice article!
    I’ve done similar things in Serif Photo Plus (used to be a great bargain but has priced itself way out of my range).  This article may finally get me to try GIMP.

    Any advice for fixing the edges when moving something from a light background to a dark one, or dark to light?  Seems like i always get background pixels in people’s hair, etc., and can’t make it look right unless I “cut off” all their hair.  Of course it doesn’t look right then, either!
    Thanks, really appreciate the “how-to” articles.


    7
  8. Jeffinprov August 24, 2010 at 3:13 PM (comment permalink) -

    Wow!  Endless thanks!  Locutus, the fine minds behind GIMP should engage you to do a series of tutorials.  This is supremely useful.

    8
  9. Locutus August 24, 2010 at 4:00 PM (comment permalink) -

    @Mr.Dave: I don’t but I’ll definitely start looking!
    @Jeffinprov: Oh I’ve just scratched the surface of how to use GIMP.  I don’t know how to use 6 of the tools!

    9
  10. Bruce Fraser August 25, 2010 at 6:09 PM (comment permalink) -

    @Locutus:
    Sorry! That’s twice now I’ve done that. Any more and I expect I’ll be banned from this site.

    10
  11. Bruce Fraser August 25, 2010 at 6:09 PM (comment permalink) -

    @Locutus:
    Sorry for not realizing it was you! That’s twice now I’ve done that. Any more and I expect I’ll be banned from this site.

    11
  12. Locutus August 25, 2010 at 6:35 PM (comment permalink) -

    @Bruce Fraser:

    Oh it’s fine!  That’s one of the perils of writing on someone else’s site.

    12
  13. IndoMK August 25, 2010 at 10:51 PM (comment permalink) -

    One thing I’ve found very helpful when cutting things out in GIMP, is to feather the edges on the selection, it really helps it blend into whatever is going to be put behind.  The amount feathered should depend on the quality of the picture – sometimes a radius of a couple pixels is enough, other times it takes more.
    Here’s an example of what I mean: http://bit.ly/ShadowsOfThePast I feathered the edges (when removing the original – light colored – background) by about 7 pixels, and it really helped the picture blend with it’s new background.

    13
  14. Jenny August 26, 2010 at 4:24 PM (comment permalink) -

    Awesome, thanks Locutus.  I’d managed part of what you described, but not as easily as this.

    14
  15. MikeR September 23, 2010 at 3:41 AM (comment permalink) -

    @IndoMK: sorry for this late post but I’ve been away most of the summer and on return am way, way behind with various stuff.

    I just wanted to say your work is amongst some of the best I’ve encountered: the treatment you’ve given to the original image is very original and very, very creative. And yes: it works brilliantly!

    ‘Feathering’ is vital to successful image manipulation so I’m glad you mentioned it in your post. What astonishes me is that this has been done in GIMP: until now, I tho9ught only Photoshop was capable of delivering results of this quality.

    Locutus: superb article — well done.

    15
  16. Latoria Hatzenbihler November 30, 2010 at 9:42 PM (comment permalink) -

Leave A Response »