 Email article
Google Docs is a great alternative especially if you do not have any access to other word processing tools like LibreOffice or MS Word. The thing with Google Docs is that it only offers a few fonts by default. As a matter of fact, there are only less than twenty fonts in its Font menu. So if you wish to use a different font that’s not from its menu, here’s what you need to do.
How to add more fonts in Google Docs
- As always, make sure to log in to your Google account first before going to any Google app or service such as Google Docs.
- Once you’re logged in, head over to docs.google.com or simply open your Google Drive account online and then create a new document via Google Docs.
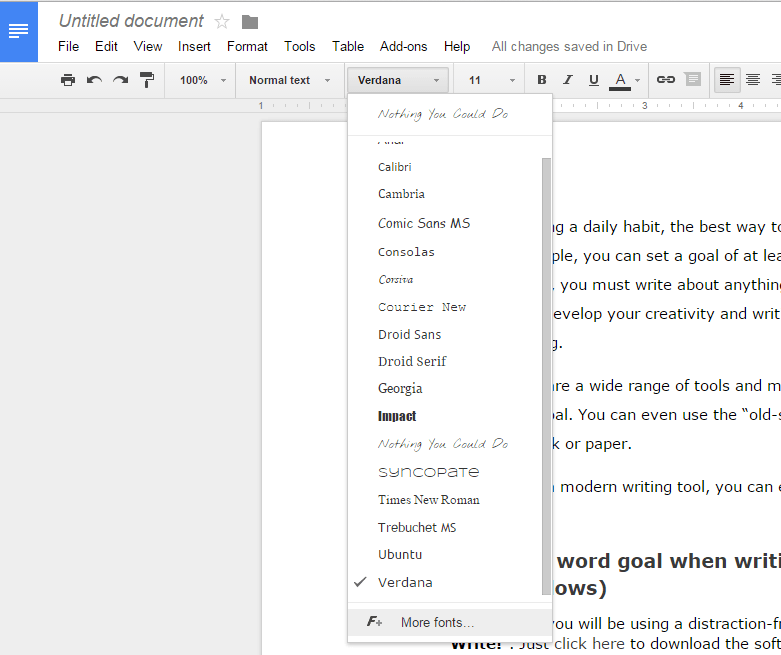
- Once you’re on Google Docs, click the “Font” tool in the toolbar to see the full Font menu.
- Once you see the menu, scroll all the way down and then select “More fonts”.
- On the overlay window that appears, you may use the search bar to search for a specific font. If you don’t have any particular font in mind, you may search for fonts by category, popularity, alphabetical order, date modified, etc.
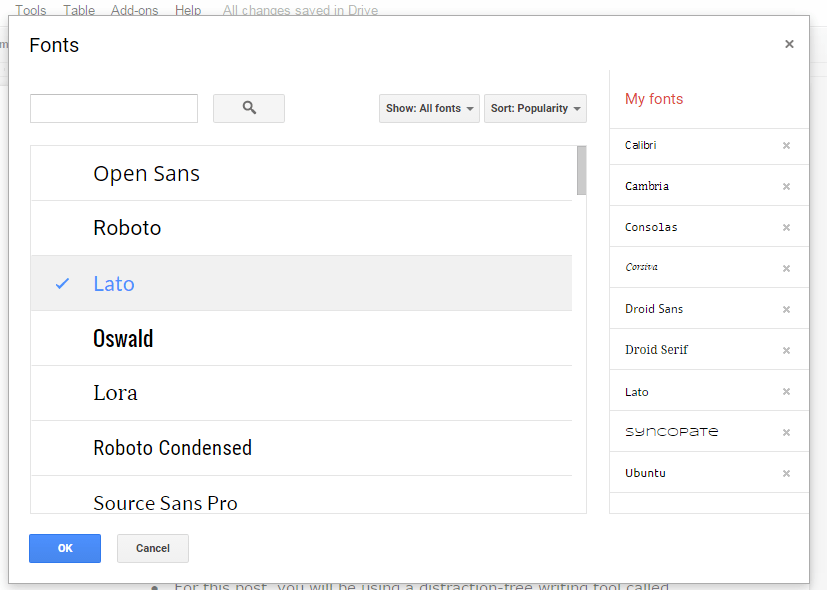
- So after finding the font that you want to add to your default Google Docs font list, just click on it and then click “OK” to confirm. The font that you have selected will be automatically added to your list.
- So that’s it. You may start using your newly added font. Simply repeat the steps above if you wish to add more fonts.
Removing a font
To remove a font, just go to your font list again and select “More fonts”. On the overlay window, there’s a side menu which lists all of your active fonts. Next to each font is a small “x” button so just click that button to remove the font.
With Google Docs, you can only use the web fonts that are available on its font shop. You cannot use the fonts that you’ve downloaded from other sites.


