 Email article
Did you know that you can actually add extensions to Chrome even if they do not directly come from the Web Store? It’s actually easy to do for as long as you know how to follow instructions. By learning how to manually install Chrome extensions, you can run them offline even if you don’t have Internet connection. You can also install extensions that come from other sources like GitHub.
How manually install Chrome extensions in Developer Mode
- First of all, you will need to get a CRX file of the extension that you want to manually install in Chrome. To get a CRX file, you have multiple options. You can go to GitHub or download a CRX version of the extension that you want from the Web Store. Remember, your CRX file must end in .crx and not in .zip, .html, etc.
- Once your CRX file is ready, just click the hamburger icon in Chrome (the menu icon) and then go to “More Tools” > “Extensions”.

- Once you’re on browser’s extensions page, make sure that the “Developer Mode” option is enabled. If not, do not forget to mark its box as checked.
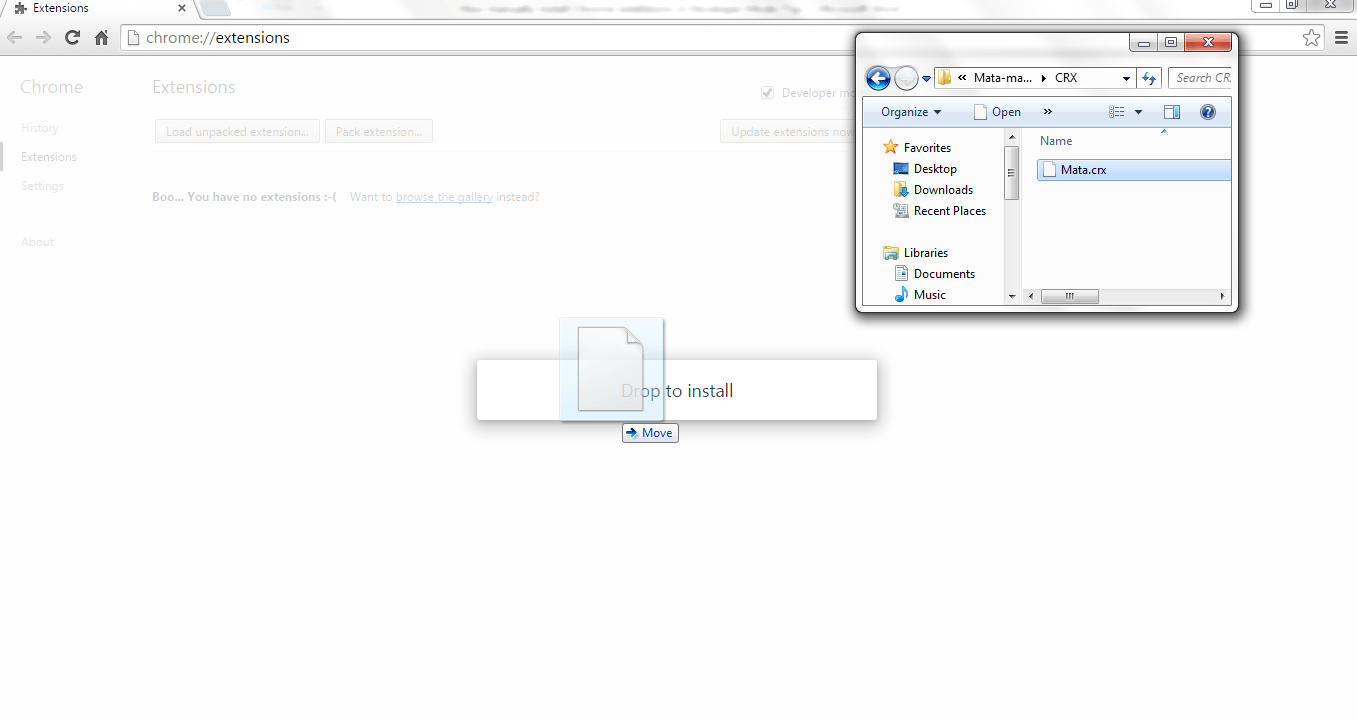
- Next, drag and drop your CRX file into your Chrome extensions tab.
- You will be asked to confirm the installation of the extension. Just click “Add” on the dialog box to confirm.
- So that’s it. After adding the extension, it will be automatically enabled. All that’s left for you to do is to test it out to see whether it’s properly working or not.
It’s that simple.


