Email article
You may still remember the horrible unusable Settings app in Windows 8 when it first came out. It was the first attempt of Microsoft to create a new Control Panel for touch-based devices. It fell desperately because of the fragment between the new Settings app and Control Panel. With Windows 10, Microsoft invests a lot of work to migrate these two. Now you won’t be sent to the old Control Panel from the Settings app too often since most popular settings are baked into Settings. However, creating and managing user account are still separated in Windows 10.
How to add a new user account in Windows 10
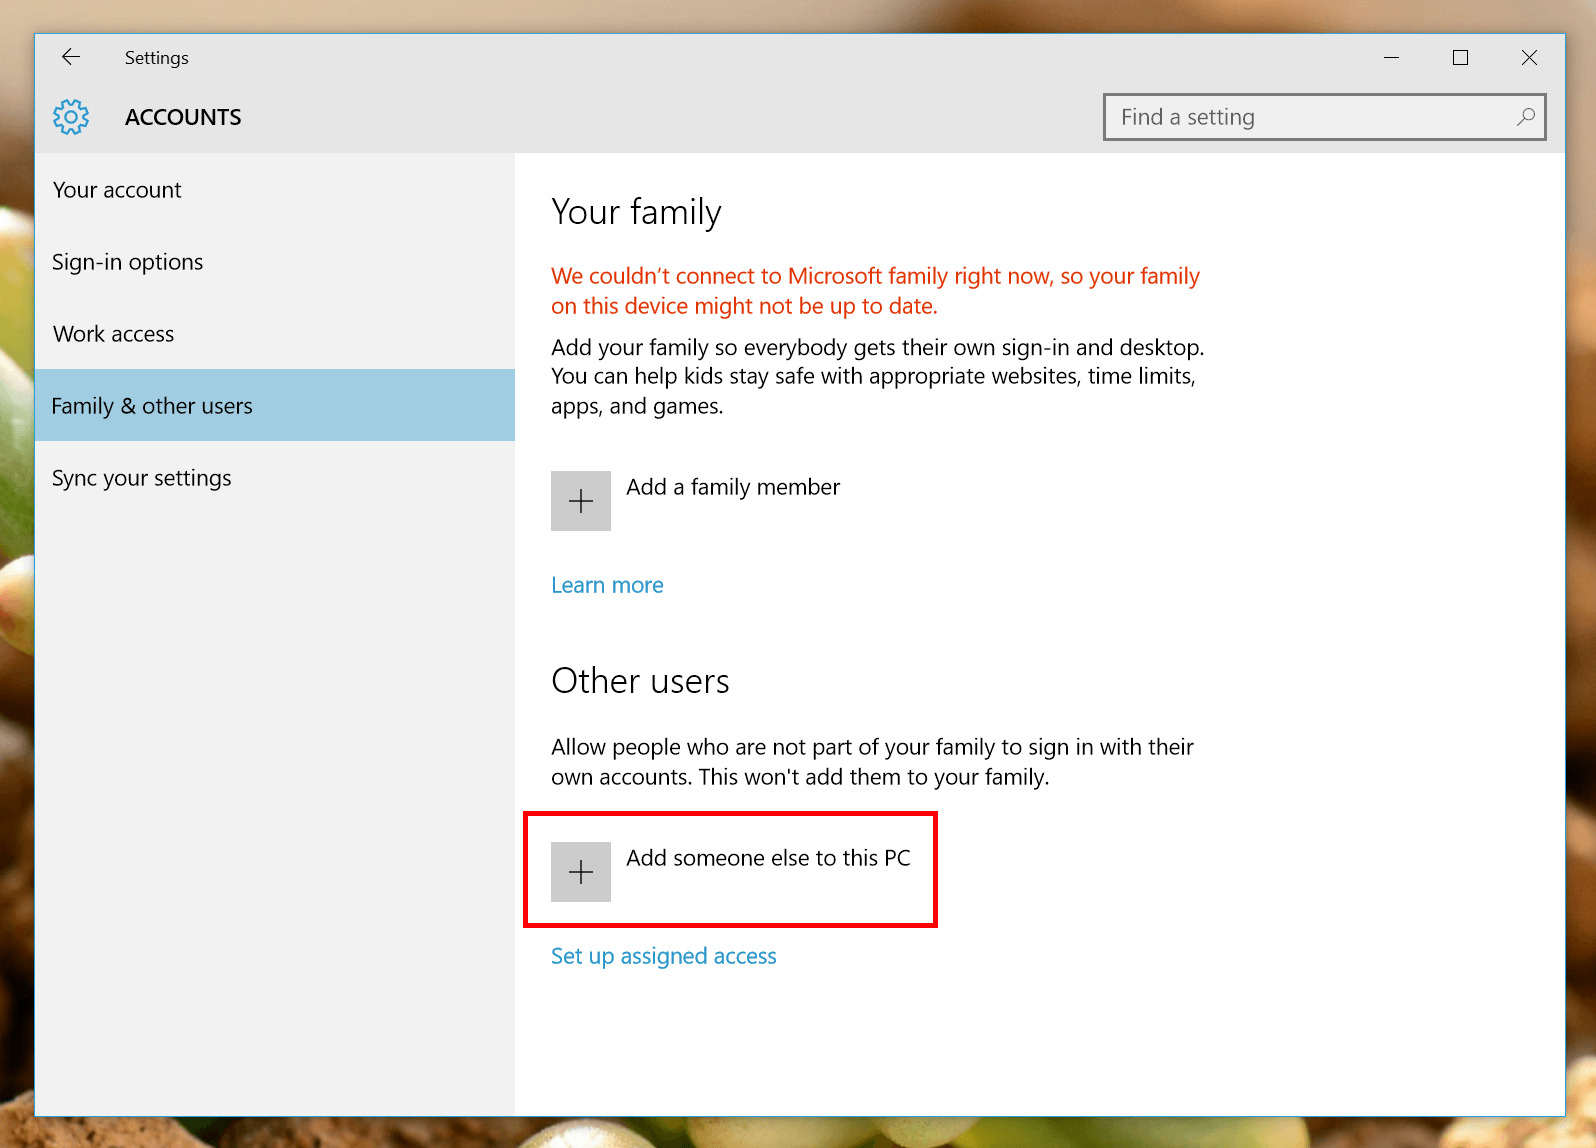
Adding a new user account in Windows 10 have to take place in Settings. Even if you navigate to the User Accounts item under Control Panel, selecting add new account option will transfer you to the Settings app. So the easiest way to add a new account is first open the Settings app. Then select Accounts category. On the left side, select “Family & other users.” Now you just need to click the plus button “Add someone else to this PC” to create a new user account.
In the pop-up window, type in your account name, password and click Next to finish.
How to manage user accounts in Windows 10
Despite Microsoft’s great work of migrating Control Panel and Settings, user accounts management is weirdly left behind. In the Settings app, you can remove and change account’s type. However, it doesn’t allow you to change the account name and password. Worse, like before these functions are buried in Control Panel. Perhaps Microsoft thinks that regular users don’t want to change their account name and password that much.
I found that Control Panel is still a good place to manage user accounts in Windows 10 because of the lack of functions in Settings.
- To quickly open User Accounts item in Control Panel, type “User Accounts” in the search box on the Taskbar and select the very first result.
- In Control Panel window, to see all the options, select “Manage another account” then choose the account you want to make change.
- Now you’ll see all the options to change the account’s name, type, and password. You can delete the account from here too.

Assigned Access
In Windows 10, Assigned Access is a new way to use a user account. As its name suggests, this feature lets you choose a user account so that it only has access to one Windows Store app. Think about the way some restaurants now use iPads to run only a specific app that customers use to order their dinner. Assigned Access is here for these situations. Using this will let you restrict what app an account can use while there’s still an Administrator account to manage it when needed.
To set up an Assigned Access, you need to do the followings.
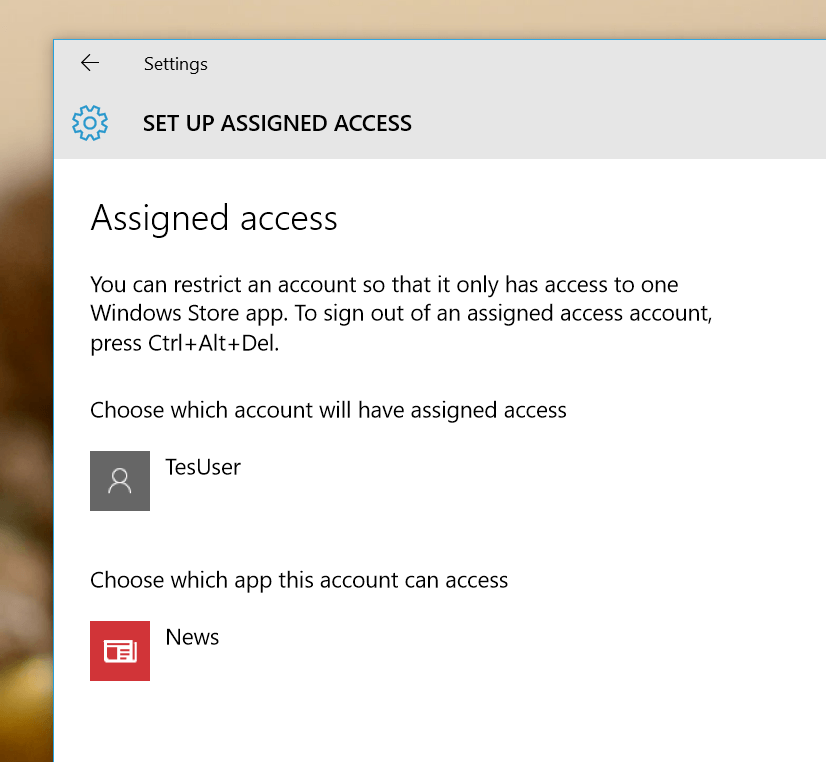
- Type “assigned access” into the search box on the Taskbar then select the result “Choose an account for assigned access.” If you want to find this feature in Settings, navigate to Accounts category, then “Family and other users.” After that, you’ll see the link “Set up assigned access” at the bottom of the page.
- On the next pane, you’ll be able to choose an account then assign a Windows Store app with it. Remember that only Windows Store apps are supported; you can’t assign a traditional desktop program with Assigned Access.
When you’re done, make sure you log out of the Assigned Access account then log back in to see the change. The assigned app will run full-screen and the only way to logout is pressing Ctrl + Alt + Del.