 Email article
OneDrive is a name some of you might not know yet as a result of Microsoft making name changes from SkyDrive, Windows Live SkyDrive and Windows Live Folders, to only then later end up as OneDrive. OneDrive is the Microsoft-owned cloud file hosting service that people with Windows 10 can use if they want to save data away from the computer hardware. There are a few reasons for doing that. The main couple of reasons include people simply run out of space on the computer and people wish to increase performance on the computer by freeing up as much space as possible.
Regardless of your reason for choosing OneDrive, you all might find yourselves with the same problem when talking about saving files to a location. This guide illustrates how to change the OneDrive save file location in Windows 10.
HOW TO CHANGE THE ONEDRIVE SAVE FILE LOCATION IN WINDOWS 10
1. Turn on the computer and right-click once on the OneDrive icon from the system tray to the right of the task bar on the bottom of the screen.
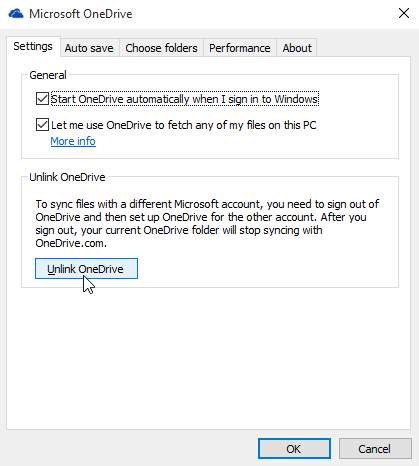
2. Click the “Unlink OneDrive” button you can see below.
3. Open your OneDrive folder from its location.
4. Highlight the OneDrive folder and click the “Move to” button you can see in the toolbar.

5. Sign into your OneDrive account once again. Windows will ask you where you want to save the folder.
6. Click the “Change” option so Windows doesn’t automatically save it to the suggested location.
7. Choose the path to where you saved the OneDrive folder.

If that sounded confusing to you, I promise it’s because it actually is and is no fault of my own. Hopefully we see some changes made on Microsoft’s behalf that makes this folder saving location easier to understand in future updates.


