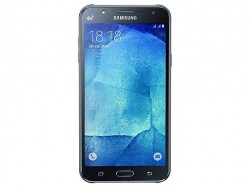
 Do you want to start installing the rooted apps from the Google Play Store like Greenify, Trasker, BusyBox, ROM Toolbox or NANDroid Manager? If so, you’ll need to root the J7 device first. Here’s everything you need to get that done:
REQUIREMENTS
- The following guide is made for the Samsung Galaxy J7 smartphone with the model number J700F only. You can check your devices model number any time by heading over to the Settings > About Device and taking a look as your digits.
- You must have installed TWRP recovery on the Samsung Galaxy J7 J700F smartphone before you can root using this guide.
BEFORE WE BEGIN
- Download the universal ADB drivers to your computer.
- Double-check the USB Debugging Mode is already enabled on your Samsung Galaxy J7 smartphone before starting the guide. Do that now by pointing to the Settings > Developer Options > Scroll down until you see the box for the USB Debugging Mode option.
- Those of you without any Developer Options coming from the Settings menu can unlock it by pointing to the Settings > About Device > tap the build number 7 or so times until it says you are not a developer. That’s the operating system’s way of letting you know the Developer Options menu is now available from the settings menu.
- You must have a Windows PC to follow this guide — the Odin flashing tool does not work unless it is installed on Windows operating systems.
- You are voiding your Samsung warranty agreements by flashing a custom recovery and rooting the Samsung Galaxy J7 device. It is not against the law or even looked down upon by Samsung, they just don’t want to fix any of your additional problems that may arise after tinkering with the device.
HOW TO ROOT SAMSUNG GALAXY J7 SMARTPHONES WITH MODEL NUMBER J700F RUNNING ANDROID 5.1.1 LOLLIPOP (XXU1AOK2 FIRMWARE)
- Download the SuperSU from this link.
- Move the SuperSU over to the desktop of the computer but do not extract or unzip the file.
- Connect the Samsung Galaxy J7 smartphone to the computer using the USB cable.
- Transfer the SuperSU file from the computer over to the devices internal storage SD card and make sure it’s on the root of the SD card.
- Unplug the Galaxy J7 from the computer once you are happy the SuperSU exploit is on the SD card.
- Reboot the Samsung Galaxy J7 device in the custom recovery mode: Power + Home + Volume Up together and select recovery from the menu.
- Now that you are in the TWRP recovery, tap the Backup option if you want to take a NANDroid Backup before proceeding.
- From the main recovery menu, tap the ‘Install’ option followed by the option to browse your device’s SD card.
- Upload the SuperSU zip file and confirm you want to install the same by swiping the confirmation bar on the bottom of the screen.
- Once the SuperSU is installed, your devices is now rooted. Next we must get back into the normal mode so you can use your operating system as you normally would.
- Tap the ‘reboot system now’ option from the main recovery menu and you’re done.
Great job; now you know how to root Samsung Galaxy J7 J700F on XXU1AOK2 Android 5.1.1 Lollipop.

 Email article


