 Email article
Since the time Windows 8 brought the OS to tablet and mobile devices, Windows has added many features and settings that only appeared on smartphones before. This helps the system accompany new device forms and mobility. These new devices often include the ability to use mobile data network. That’s why Metered connection is an important thing you should check on if you own a mobile Windows device that supports cellular data connection (3G/4G/LTE).
In Windows, a metered connection is simply an Internet connection with a data cap. It’s usually a cellular connection via 3G or 4G LTE technology. While many carriers can charge extra money if you go over the limit, other carriers may just throttle the speed of your Internet. When you set a connection as a metered one, Windows 10 will limit data usage of unnecessary things like live tiles, Windows Update, and apps update to save you some data. This not only work with system components but third-party apps can also detect your metered connection settings. So when you’re on metered connection, you may want to check a specific app’s settings to see if there’s any customization on data usage via metered connection.
But first, you need to set a connection as metered connection in Windows’ own Settings app
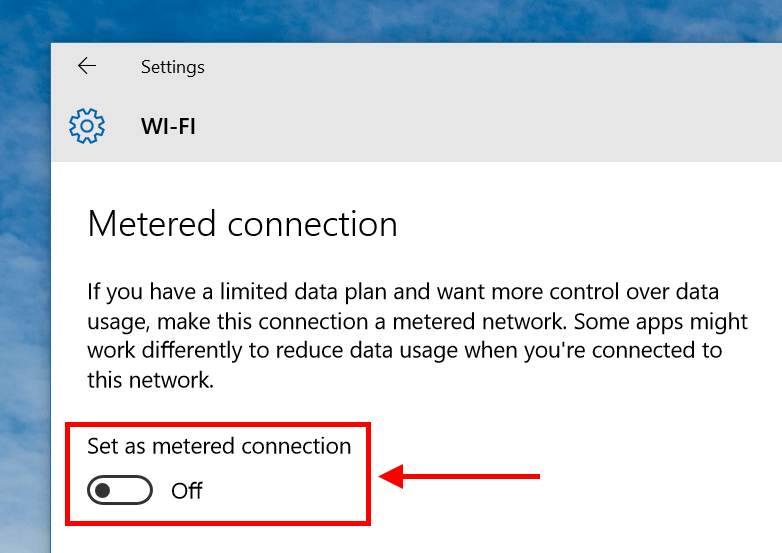
- Open Settings app and select “Network & Internet” category
- Select “Wi-Fi” on the left pane
- Make sure you get connected to a Wi-Fi you want to set as metered connection
- Click “Advanced options”

- Turn on “Set as metered connection” and you’re done
And that’s how you set a metered connection. Go ahead. Try it!


