 Email article
 When it comes to placing images online, it is important to resize and optimize images for large byte savings and improvement in the performance of your website. The fewer bytes the browser needs to download, the faster the downloads and more the savings on the website bandwidth. If you do not resize and optimize images, your site speed reduces and so the search engine rankings are likely to drop. There are many tools and websites that allow you to resize and optimize images.
Resize and Optimize Images using GIMP
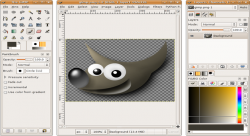
GIMP is a free tool used for image manipulation. Using this software, it is easy to resize and optimize images, as well as to perform photo re-touching, image authoring etc. GIMP is easily downloadable from the official site of GIMP. Using GIMP, you can resize and optimize images that are too large.
Steps to Resize and Optimize Images using GIMP
- The first step is to install GIMP in your computer. GIMP can be installed both in Windows, as well as in the Linux operating system. If you are using Ubuntu, then GIMP is available in its Repositories. By running the command “sudo apt-get install gimp,” you can install it.
- After installing GIMP in your system, the next step is to install the “Save for Web” plug-in.
- Once you are done with the installation of the plug-in, go to the shortcut path and run GIMP.
- After launching GIMP, go to the File menu and open the image you need to resize and optimize.
- Once the image is opened in GIMP, go to the Image menu and select the option “Scale Image.”
- A dialog box will be displayed, and in that you can set the new dimension for the image.
- Here, when you enter the width, the height will automatically be updated because the properties are set to match the aspect ratio. If you do not wish to keep the aspect ratio, you can remove it by clicking on the “chain” icon that is displayed near the height and width fields.
- Once you are done with entering the new dimensions for your image, click on the button “Scale.”
- Your image will be resized to the new dimensions. It will also reduce the overall size of the image.
- Now go to File and select the “Save for Web” option to save the image for later use. By default, the format will be JPEG. You can change it if you wish. The other format options available are “PNG” and “GIF.”
- There is no ideal quality option that you can select when saving the image. By default, GIMP will show the preview of the image so that you can make the necessary modifications, if required, before saving the image in your system.
- Once you have finished doing all the adjustments related to the quality of the image, save the image to the system. It is always recommended to keep the original image for backup purpose.
Conclusion
GIMP is an easy-to-use tool that can be used to resize and optimize images. By following the steps given above, you can resize and optimize images easily to reduce website load time, save on bandwidth and improve your search engine ranking.


