Email article
You have updated your Nexus S to Jelly Bean or Ice Cream Sandwich and now you want root access. Who do you call? No one. Just follow this guide and you should have root back on your Android 4.x Nexus S (any variant) in no time.
Disclaimer: This guide is intended as a helpful “how to”. Ashraf and dotTech are not responsible for any gain or loss (including but not limited to bricked devices) incurred as a result of following this guide. Root your device at your own risk. Rooting may void your warranty.
Before We Begin
Before we begin rooting you must have an unlocked bootloader. To unlock your bootloader, do the following:
Note: Unlocking your bootloader will wipe all data on your Nexus S and it may void your warranty. Proceed further at your own risk.
- Make sure Nexus S drivers are installed on your computer.
- Install Fastboot and ADB on your computer, if you haven’t already.
- Shutdown your phone.
- While the Nexus S is turned off hold the Volume Up and Power buttons simultaneously until the Nexus S turns on and is in Fastboot Mode. You will know your device is in Fastboot Mode when it says FASTBOOT MODE in red text at the top. Also the screen will list a bunch of information such as HW VERSION, BOOTLOADER VERSION, BASEBAND VERSION, etc.
- Connect your Nexus S to your computer.
- Open command prompt on your computer and type “fastboot oem unlock” without the quotes.
- Accept the caution on your Nexus S’s screen.
- Let the device work.
- When it is done boot back into Nexus S until you see the home screen.
Root Nexus S on Jelly Bean or Ice Cream Sandwich
The following root method should work with all Nexus S variants (i9020T, i9020, i9023, i9020A, etc.). This method is specifically for Android 4.x versions, which includes Jelly Bean or Ice Cream Sandwich.
To root your Nexus S do the following:
Note: Rooting may void your warranty. Proceed further at your own risk.
- Make sure Nexus S drivers are installed on your computer.
- Install Fastboot and ADB on your computer, if you haven’t already.
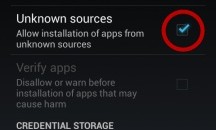
- Download SuperUser app and binary and place it on your Nexus S’ internal storage.
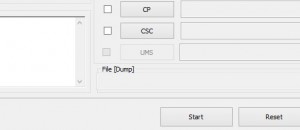
- Download custom recovery img on your computer and place it in the same C:\Android folder you placed Fastboot and ADB in.
- Shutdown your phone.
- While the Nexus S is turned off hold the Volume Up and Power buttons simultaneously until the Nexus S turns on and is in Fastboot Mode. You will know your device is in Fastboot Mode when it says FASTBOOT MODE in red text at the top. Also the screen will list a bunch of information such as HW VERSION, BOOTLOADER VERSION, BASEBAND VERSION, etc.
- Connect your Nexus S to your computer.
- Open command prompt on your computer and type “fastboot flash recovery C:\Android\recovery-clockwork-6.0.0.6-crespo.img” without the quotes.
- Wait for it to do its thing.
- Unplug your Nexus S from your computer.
- Now turn off your Nexus S (select “Power Off” from Fastboot Mode screen).
- Hold the Volume Up and Power buttons to boot into Fastboot Mode.
- Scroll to RECOVERY and press the Power button to select it.
- At the next screen scroll to install zip from sdcard and press the Power button.
- At the next screen scroll to choose zip from sdcard and press the Power button.
- Find the Superuser-3.2-arm-signed.zip file you placed in your Nexus S internal storage. Make sure it is highlighted and press the Power button.
- Confirm you want to do it.
- Let the Nexus S do its thing.
- Once it is done reboot the device and you will be back at your homescreen.
- Done.
Conclusion
Enjoy Jelly Bean or Ice Cream Sandwich with root access.