 Email article
Windows 8 comes with the new Start screen which is designed for best use with touch screen. How about desktop users? If you’re having a mouse and still confuse in how to use Start screen effectively, this article will show you some tips to master it. You can actually even use these tips for your touch-based Windows 8 device, too.
This article covers five tips:
- How to change the size of a tile on the Start screen
- How to turn off live tiles
- How to rearrange tiles on the Start screen
- How to create a group out of tiles on the Start screen
- How to unpin — or remove — tiles from the Start screen
How to modify tile size
A tile on Start screen has two different sizes for you to choose, small and large. Small size is half the size of large. Since large tiles are larger (duh), large tiles give you more information than small tiles but also take up more space. Changing a tile from large to small or small to large is easy — right-click on a tile (or long tap, in the case of a touchscreen) then choose “Smaller” or “Larger” from the App bar to change its size. 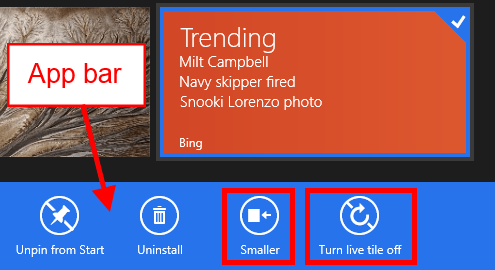 You need to repeat this for all the tiles you want to resize.
How to turn off live tiles
One cool feature of Windows 8 are live tiles. These tiles automatically update themselves to provide you with the latest information (e.g. the Bing tile automatically updates to show trending searches). As useful as they are, some live tiles, such as the aforementioned Bing tile, can be annoying; some can even be privacy hazards, in the case of the Photo and Messaging tiles. So some people may want to disable live tiles.
To disable a live tile, simply right-click on the tile (or long tap, in the case of a touchscreen) then choose “Turn live tile off” from the App bar. This needs to be repeated for all live tiles you want to disable.
How to rearrange your tiles
Rearranging tiles on Windows 8 Start screen is easy — just drag a tile (left click + hold or long tap + hold) to move it to a new place. However, this is a problem if you have over a hundred tiles on the Start screen and you want to move a tile from the end to the start or vice versa — you have to drag the tile a long way before you can release your mouse button or your tap. It’s such a painful experience, especially with all that horizontal scrolling! Thankfully, there is an easier and faster way to move tiles.
When you want to move a tile, you must drag it (again, left click + hold or long tap + hold) but instead of dragging it to a place on the Start screen, drag the to any edge or corner of your screen…

…and the Start screen will automatically zoom out. At this point, you can easily place your tile where you want without having to drag it all over the place.
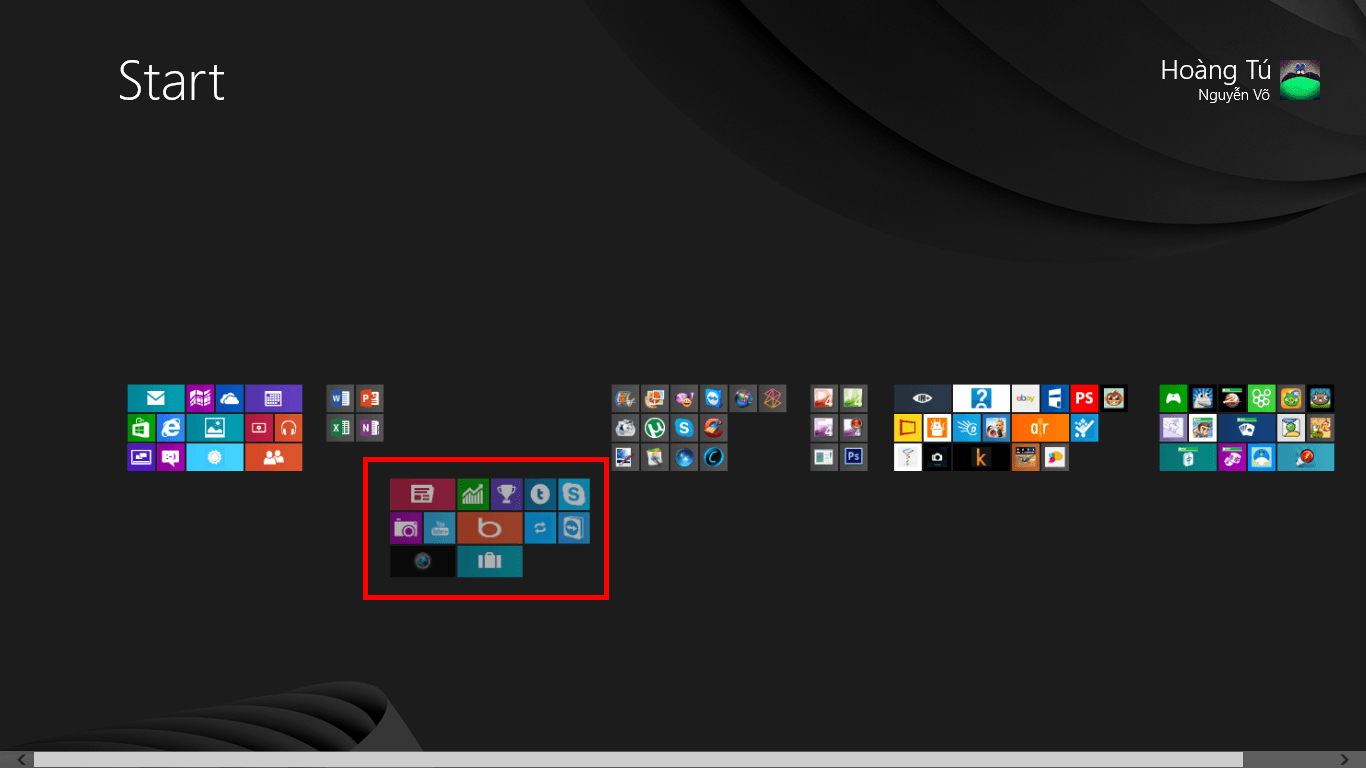
If you want to move an entire group of tiles (how to group tiles is found in tip #4 below), you need zoom out the Start screen first by clicking the minus button at the lower right corner of your screen or scrolling your mouse wheel while pressing CTRL key. Once zoomed out, drag the group to new position:
How to group tiles together
In Windows 8 Start screen, you have the ability to group your tiles together, which allows for better organization. You can even name the group.
To create a new group, you drag a tile out of its current group then release it when you see a transparent rectangle appears:

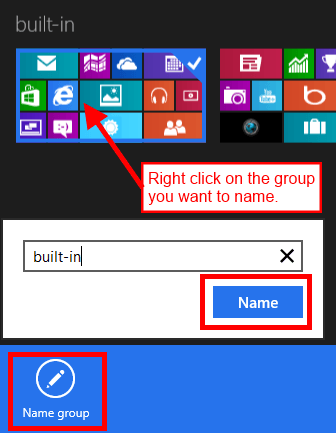
Now you need to name the new or modified group. To name/rename, you have to zoom out the Start screen by clicking the minus button at the lower right corner of your screen or scrolling your mouse wheel while pressing CTRL key. After that, right-click (or long tap) on the group you want to name and select the “Name group” button from the bottom left corner. Then enter the name you want and click “Name”.
How to unpin or remove tiles from Start screen
After installing a new program on Windows 8, the program may place one or more tile on your Start screen, akin to how programs flood the traditional Start menu on older versions of Windows. To quickly unpin (aka remove) them, you right-click (or long tap) on all the tiles you want to remove and then select “Unpin from Start” button from the App bar at the bottom of your screen:

Conclusion
Windows 8 Start screen is new and often confusing to users. Although the tips above may seem simple (because they are), they are useful to Windows 8 beginners and, hopefully, will help you better under the beast known as Start screen.


