Email article
 GNU Image Manipulation Program or GIMP for short, is a very powerful image editing tool. Let’s face it, we all need something to edit our pictures and we need something a little better than paint. Some people turn to Photoshop and some to Paint.NET, but many people will turn to GIMP. It provides you with a great set of features and hopefully by the end of this guide, you will have a little bit of GIMP-Know-How.
Before we dive right into using GIMP, it is important we discuss some of the reasons to consider GIMP and of course we will need to get you a copy installed.
When compared to Adobe’s Photoshop, GIMP has a few major Benefits
- Price – GIMP is free and open source and is available on Windows, Mac OS X, and Linux.
- System Resources – GIMP is a lightweight tool that doesn’t need over a 1GB or RAM nor does it need 5 to 7 GBs to install.
- User Friendly – GIMP is created in such a way that allows pros and new-comers alike to edit with power.
- Open Source – Because GIMP is open source, people are able to build plugins and fork updates. You get the latest and greatest.
- Batch Processing – In many cases, one may need to redo the same edits on multiple images, this feature in GIMP is far superior and expandable compared to Photoshop
- Portable – GIMP has been made into a portable app, which you can download at portableapps.com.
Installing GIMP
So now that you know a few of the benefits to using GIMP, it’s time to install GIMP. The installation process is quick and painless
Windows XP +
Windows users (XP, Vista, 7, 8, 8.1, etc.) have two options for using GIMP. The first option is a complete installation and the second is running a portable version, I would recommend a full install because there will better performance.
Full Installation
You can download GIMP here. The installation is very quick and easy. Simply follow the wizard.
Portable
If you do choose to try GIMP without installing it, you can download it here. Please remember that your performance will be affected.
Mac OS X
You can download GIMP here. To install simply open the DMG and copy GIMP.app to your Applications folder. If you use MacPorts you can install GIMP by running the command sudo port install gimp
Linux
Many Linux distribution include GIMP during the installation of your Operating System. If you do not have GIMP installed you can use your systems package system to install it. For example in OpenSuse you would use; zypper in gimp and in Ubuntu you would use sudo apt-get install gimp.
Some operating systems like CentOS or Ubuntu LTS 12.04 will not have GIMP 2.8 installed, if you want the latest version of GIMP installed you will add a custom PPA and run a distro upgrade.
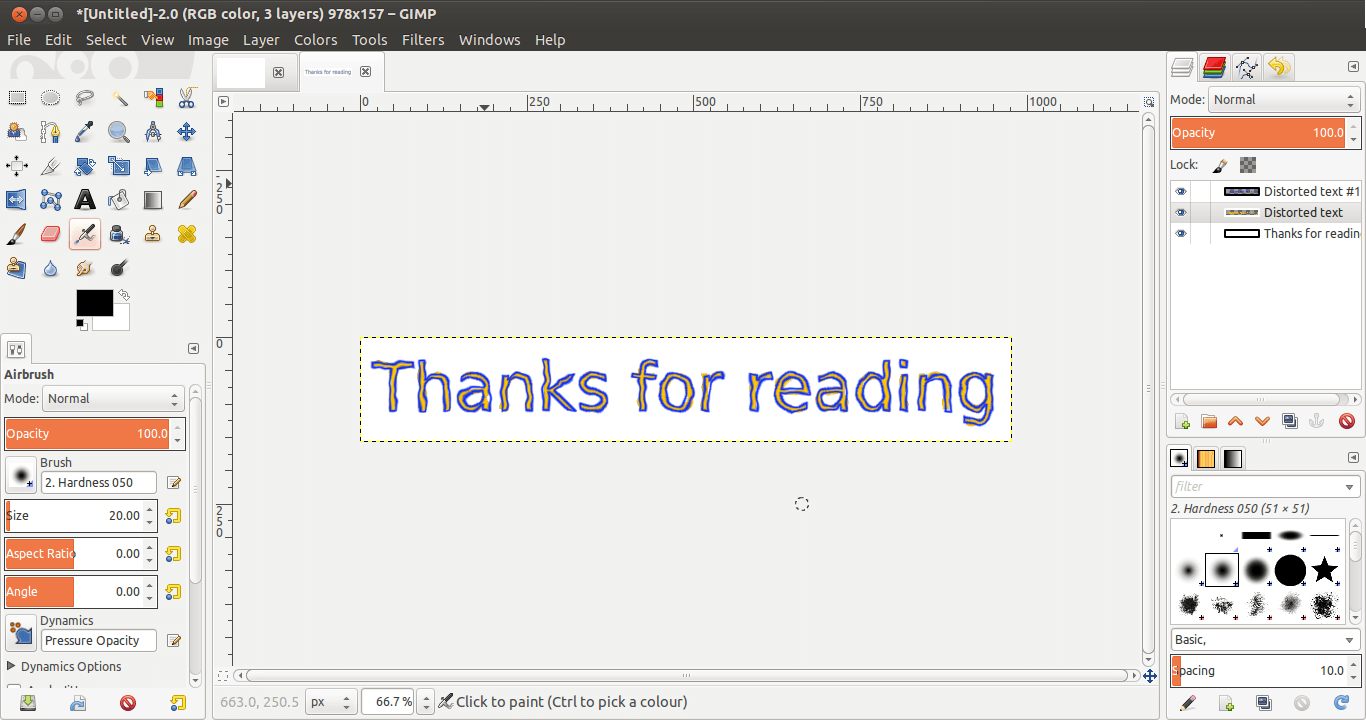
The Layout
GIMP has two different looks, you have multiple windows mode or single window mode. Most people prefer the single window mode, but for professional photographers the multiple windows mode allows editing on multiple monitors with one instance of GIMP. You can easily enter single window mode by selecting “Windows” in the menu bar and then selecting “Single-Window Mode.”
The Toolbox
GIMP has a toolbox which has most of the tools that you will need. The default location of the toolbox in on the left. Below is a list of the tools, so you know what they do.
Rectangle Select
The rectangle select tool is used to select part of many image. The main purpose is to select areas of the images to copy or delete. You can also use the keyboard shortcut of “R” to call up this tool as well.
Ellipse Select
The ellipse select tool is almost identical to the rectangle select tool, except of course for the shape. You can use the keyboard shortcut of “E” to activate it.
Free Select
The free select tool also you to select a custom shaped polygon. This tool is identical to the ellipse and rectangle select tools. You can use the keyboard shortcut of “F” to activate it.
Fuzzy Select
The fuzzy select tool allows you to select a specific colour region. For example if we wanted to keep a sharp edge and remove only a single colour, this tools is perfect for that. You can activate the tool by using the keyboard shortcut of “U”.
Select by Colour Tool
This tool also you to choose regions of the image with similar colours. You can select this tool by using the keyboard shortcut of “CTRL+O”
Scissors Select Tool
The scissors select tool is used to select regions of a similar shape. You can use this to remove stripes on a shirt. This tool can be activated by the keyboard shortcut of “I”
Foreground Select Tool
The foreground select tool allows you to select objects in the foreground of an image. For example you can remove a pole in the foreground of a farm scape.
The Other Tools
All of the other tools are fairly straight forward to use. If you have questions, let us know in the comments.
Using GIMP
If there is one thing that I have learned over the year, each person has different way of editing pictures and the best way to learn is to try. Once you get over the toolbox layout, you will understand it. Many photo editors offer transferable skills, so if you are familiar with Fireworks or Photoshop the transition will be fairly easy.
Saving your edits
GIMP has one confusing feature and that is saving you edits.If you use the common CTRL+S or the ‘Save’ option in the menu, you will notice the default extension is .XCF and not the normal file types like PNG or JPEG. To save to a common file type, you will need to export the image. Luckily this is really easy.
Export to PNG
If you want to directly export to PNG, simply press CTRL+E
Export to Other Formats
To export to other formats, simply press SHFT+CTRL+E or select ‘Export As’ in the file menu.
Conclusion
This is a very simple introduction to GIMP. I hope you enjoyed it.