{rw_text}Giveaway of the day for February 9, 2009 is:
Version Reviewed:
2.91
Software description as per GOTD:
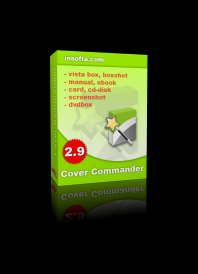
Cover Commander creates professional, custom-designed virtual boxes, books, dvd-boxes, manuals, CD disks, and screenshots. Just a few mouse clicks is all that’s necessary to get the job done. The program’s extensive light, shadow, and reflection controls will allow you to create an image of just about any complexity and see the final picture as it is being made in the real-time preview window.
The intelligent project creation wizard will do the “dirty work” for you, thus you can concentrate on the content part of your project.
————————-{/rw_text} –>
{rw_good}
- Very easy to use.
- Nice clean interface.
- You can create digital covers for multiple different things, including boxes and books.
- Has many predefined models that one can use.
- Full control over the look of the cover (size, images, shadow, light, etc.)
- “New Project Wizard” helps make creating a cover very easy.
- Multiple language support (English, German, Russian, and more).
{/rw_good} –>
{rw_bad}
- Very computer resource intensive.
- Does not have the ability to create a cover for the inside of a CD case or a book.
- Does not have a formal predefined model for magazines.
- Only supports PNG, GIF, JPG and BMP images for the covers.
- You can only save your model as a PNG, GIF, JPG or BMP file.
- There is no ability to do simple “edits” to images that you add to your models (such as rotate them) from within the program.
{/rw_bad} –>
{rw_score}
{for=”Features as Described” value=”10″}Did not find any feature that was not working or any features missing.
{/for}
{for=”Ease of Use” value=”10″}It really is just point and click.
{/for}
{for=”Usefulness” value=”5″}I don’t see this being useful for most home users.
{/for}
{/rw_score} –>
{rw_verdict}[tupr]
{/rw_verdict} –>
Registration and installation of this program went without incident. You will have to copy + paste the registration information from Readme.txt in the program. You can find the registration box at Help -> Register (you must first click “Close” at the “Welcome Screen” to access the Help menu).
f you don’t know what this software is for, chances are you probably don’t need it. The purpose of this program is help e-merchants to advertise their product. This program allows you to create virtual 3D images of product boxes/cases.
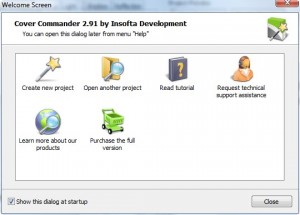
When you run the program, you will be prompted with the program’s “Welcome Screen”:
This welcome screen will appear every time you open the program unless you uncheck “Show this dialog at startup” which is located at the bottom left of that window. This welcome screen is pretty standard – you can create new projects, load preview projects, access help or visit the developer’s website. Every thing at this welcome screen is accessible from the main program window, so if you hit “Close” that will be no big deal. For reviewing purposes, lets just skip this welcome screen since I will discuss the new project wizard later on anyway.
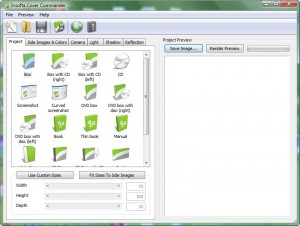
Once you get past the welcome screen, you will see the main program window (this is after I registered the program):
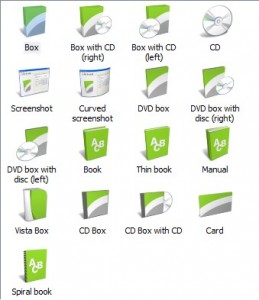
As you can see, the program has a nice clean interface. The options that allow you to customize your 3D model are on the left while the preview of the model is displayed on the right. Every thing is literally just point and click. You chose your model from the Project menu by just clicking on it. You have a choice of any of the following:
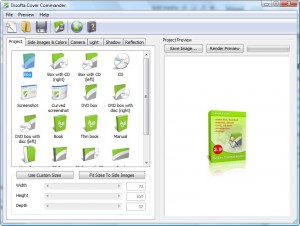
Whatever model you chose will appear in the preview window on the right:
If you chose “Box” and it is the first model you have clicked on since you opened the program, you may not see the box model displayed in the preview window. I don’t know what is up, but that is constantly happening to me. It is no big deal because all you have to do is click on another model and then click on box again to make it appear but it is annoying.
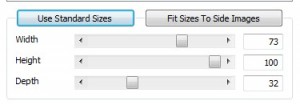
If the model size looks fine to you, you can move on to the other features. However, if you desire to alter the size of the model in terms of width, height and depth, click on the “Use Custom Sizes” button:
This will enable the “Width”, “Height”, and “Depth” options that you see right beneath the button:
By changing the value of each, you can change the look of the model. For example, if you want to have a fat model, just increase the “Depth”. Or, since this program does not formally have a magizine model, you can descrease the depth of the book model so you can pass it off as a magizine. If after you make changes to the width, height and depth you decide that you liked the original look of the model, just click the button that now says “Use Standard Sizes” to go back to the predefined sizes.
After you are happy with your model size and shape, you can get to change the settings of your model. You can change the images that appear on it (“Side Images & Colors”). You can change the angle of the model and the perspective you see it from (“Camera”). You can the alter the light source, making it more intensive, moving it further, turning it off, etc. (“Light”). You can mess with the shadow settings, changing the opacity, distance, turning it off, etc. (“Shadow”). Lastly you can also change how the reflection of the model looks or even turn it off if you wish (“Reflection”). Just go from tab to tab changing which ever settings you desire:
As you make changes to your model, the changes will automatically appear in the preview on the right of the window. There is no “Save” button that you must click after every setting, so just move on to the next tab whenever you are satisfied with the settings of the particular tab you are on.
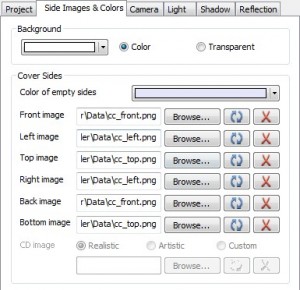
These are the settings you have control over for “Side Images & Colors”:
If the model you are building involved a CD, the “CD Image” options would be enabled that you see at the bottom. The only confusing part about these settings I found was that button that you see besides all the “Browse” buttons. The one with two blue arrows: ![]() I thought the button allowed you to rotate your images. In fact it is just the “Reload” button that you use in case your images don’t appear even after you changed them.
I thought the button allowed you to rotate your images. In fact it is just the “Reload” button that you use in case your images don’t appear even after you changed them.
This program only allows you to add PNG, GIF, JPG or BMP images. Yes I know these are the most popular image formats and chances are many people won’t find this limitation a bother, but it is still a limitation.
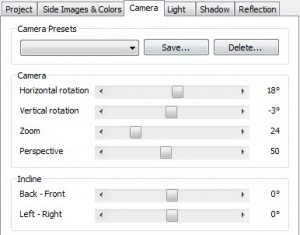
These are the settings you have control over for “Camera”:
You can manually alter all the settings, or you can chose from one of the preset settings from the “Camera Presets” drop down menu:
Choosing a preset setting does not lock your settings. What I mean is that you can chose a preset setting but still go in and alter each individual setting as you desire. If you find particular settings that you came up with your self that you really like, you can save the setting for future use: just hit the “Save” button to save your settings as a preset. Be careful with the “Delete” button – it will literally delete the preset setting you have selected. This includes the presets that come with the program.
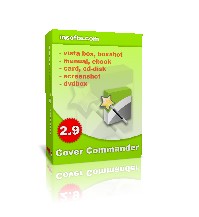
To demonstrate this feature a little, here is what the “Box” model looks like by default:
And here is what it looks like with the “Top-Right” preset settings:
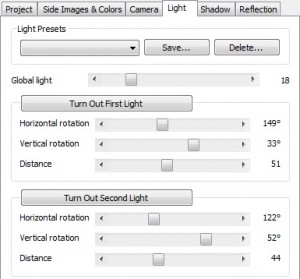
These are the settings you have control over for “Light”:
Again there are preset settings you can use if you want:
Just to give you some sort of perspective, this is what the “Box” model looks at with default light settings:
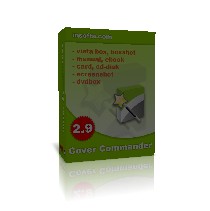
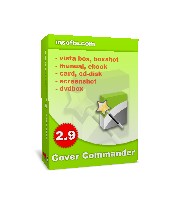
This is what the same “Box” model looks like if I turn off First and Second light (I did not alter Global Light settings):
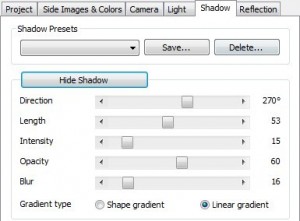
These are the settings you have control over for “Shadow”:
Again you have preset shadow settings you can chose to use:
For some perspective, this is the “Box” model with a shadow at default settings:
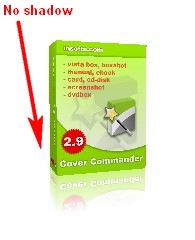
This is the “Box” model with the shadow off:
At the angle the “Box” model is at, it is hard to see the missing shadow but it is gone nonetheless.
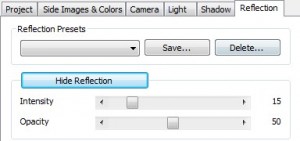
These are the settings you have control for “Reflection”:
Not as many settings to mess with for reflection, but you still have the preset settings you can chose from:
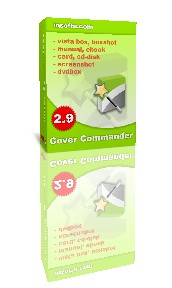
Here is what the “Box” model looks like with reflection at default settings:
Here is the model with no reflection:
And here is the model with “Full Reflection” preset settings:
So after you are done with your model and you are happy how it looks, you can export your model into a PNG, GIF, JPG or BMP image file so that you can put it on your website, or whatever you planned to do with it. Hit the “Save Image…” button:
Just an FYI for those wondering, “Render Preview” is a feature that increases the visual quality of your preview. You may notice that while making some changes to your model, the preview model looks a bit choppy and stuff. Well if you click on “Render Preview”, Cover Commander will remove all the choppiness and provide you with a high quality image. However, “Auto Preview” (under the “Preview” menu from the top) is turned on by default so “Render Preview” occurs automatically therefore you don’t need to click on “Render Preview”. But be warned that “Render Preview” uses up quite a bit of CPU (~20%ish for me) so if you have a slow CPU, you may want to turn off “Auto Preview” and only render the preview on demand.
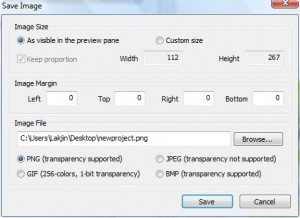
Anyway, clicking on “Save Image” will make this is the window that will pop up:
If you leave “As visible in the preview pane” selected, the program will just save your model literally as you see it in the preview window. Custom size allows you to resize it and set custom width/height. With both of these, Cover Commander saves as little background as possible – it tries to have only the model in the image. What I mean is it is like using a rectangle selection tool. Cover Commander makes the selected area only big enough to cover the model you want to save. However, if you would like Cover Commander to save some background with your model, you need to change the “Image Margin” values. Whatever value is in the respective margin box, there will be that many pixels of background shown to that respective side of the model. For example, if I put 100 for left and leave 0 for top, right and bottom, my model will have 100 pixels worth of background in between the left edge of the model to the left edge of my whole image. I know this is kind of confusing, so here are pictures to illustrate (I used black background so you can see the difference).
I saved this model with “As visible in the preview pane” image size and 0 for all the image margins:
Now I left the image size as “As visible…” but I changed the left margin to 100:
For this one I left the image size as “As visible…” but I changed all the margins to 50:
As you can tell as I change the margin value, the different amounts of background is captured.
After you save your model as an image, make sure you save the project in case you want to go back edit your model in the the future. You can do this via File -> Save Project/Save Project As).
Now there is an interesting feature in this program that can allows you to avoid most of the customization of settings I mentioned above by giving you many preset settings to choose from. This feature is called the “New Project Wizard”, which is the same thing as “Create a new project” that you saw on the welcome screen. You can run the project wizard view the “New Project” button:
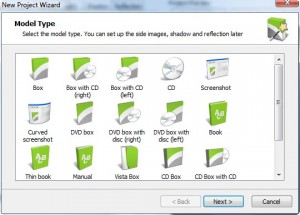
Clicking on that button will launch this:
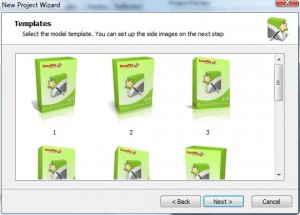
The choices of models is the same as what I showed you above. Just select the one you want and hit “Next”. You will then be brought to a screen where you must choose the “Template”:
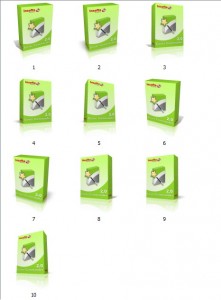
The templates vary from model to model, but these are the templates you can choose for “Box” model:
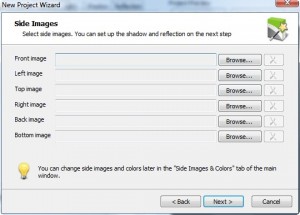
Just select the one you desire and hit “Next”. You then have to add your images:
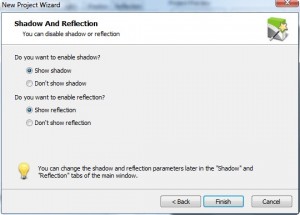
The amount and types of images you need to add will differ depending on which model you chose to work with. Hit “Next” when you are done adding images. You will then have the option to turn on/off shadow and reflection:
Hit “Finish” when you are done and your model will appear in the preview window. At this point you can save your model into an image file like how I mentioned above or you can go in and tweak the settings (via the method I described above on changing the settings) and then save your model into an image.
If you want to actual examples of what this program can do, the developer has many example models/images created with this program listed on their webpage:
You can also view this image created by Tina (you really should view it – it is nicely done).
Overall, this program is pretty good. It allows you to make e-covers for multiple different types of products and gives you control over most everything regarding that e-cover. I have to give this program a thumbs up, even though I don’t see this very well suited for a giveaway since giveaways are supposed to be for “personal use only” and this program is obviously meant for the business community.
Lastly, while my “The Bad” list contains 5-6 items, the only *major* gripe (everything else is kind of minor) I have about this program is this is very computer resource intensive:
- Sitting idle, this program uses up ~190MB of RAM and CPU usage fluctuated from 0-50% depending on what I was doing with the program.
Now being a 3D modeling program of sorts, this amount of computer resource usage is not surprising, but it is still a lot and worth mentioning because for people with slower computers, this program may be hard to run. For a reference point, I have 3GB of RAM, running Vista Home Premium 32-bit and have T8300 (2.4 ghz) Dual Core Duo processor.
Cover Commander vs eCover Engineer
eCover Engineer was a program that was also offered at giveawayoftheday.com last year. In comparison, while both programs generally do the same thing, eCover Engineer had a few extra models like the inside of a CD cover and magazine, while Cover Commander can save models into GIF format. When push comes to shove, I would have to go with Cover Commander because I find the interface more appealing and it is a bit more easy to use in my opinion. Both are great programs though.
{rw_freea}
You can create a box, a CD box and a DVD box directly from this website without ever having to install anything. However customization and options are very limited.
3D Box Shot Maker is an easy and FREE tool to virtually design quality box shot as your software box cover. It is important to present a professional boxshot to attract your potential customers to take a closer look at your products. An impressive box shot will make your software outstanding, and easily defeat your competitors at the start.
3D Box Shot Maker accepts a front image and a side image as input, and generate the final image on the fly. It can also include a shadow and a reflection in your box shot. It will show the preview image instantly as you adjust the size and other parameters.
-Developer
BoxMaker is a three dimensional virtual packaging design tool. It transforms your image artwork into a 3D box in real time using the OpenGL library supported by your PC’s graphics hardware, allowing you to rapidly prototype your packaging designs. You can easily select the cover images, rotate, pan and zoom your box in real-time. 3D Box Shot can then write high quality bitmap images of your box which can be edited for inclusion on your web site or in promotional literature.
BoxMaker can also be used to display three dimensionally rotated image.
-Developer
Virtual Hardbox Designer is a graphical tool that allows you to virtual 3D hardware boxes for digital products can be made. Im Handumdrehen haben Sie mit diesem Tool eine ansprechende Verpackung gestaltet, die Sie als Webgrafik in Ihren Online-Shop oder Ihre Homepage einbinden können. In an instant, you have this tool with an attractive packaging design that you use as web graphics in your online shop or your homepage may be. Üblicherweise müssten Sie komplizierte 3D-Software verwenden, um solche Grafiken zu gestalten – mit Virtual Hardbox Designer hingegen ist das Gestalten einer virtuellen Verkaufsbox für Ihre Software, Ihre Mediensammlungen etc. ein Kinderspiel, und im Handumdrehen präsentieren Sie digitale Inhalte auf Ihrer Website oder in Ihrem Online-Shop in einem professionellen Look. Normally you would have complicated 3D software used to create such graphics – with Virtual Hardbox designers, however, is designing a virtual Verkaufsbox for your software, your media collections, etc. a breeze, and instantly present your digital content on your website or in your Online-Shop with a professional look.
-Developer
{/rw_freea} –>
{rw_verdict2}As I mentioned above, I feel that this program is not a very good choice for a giveaway because it really is not for the home audience but as a program that helps you create e-covers, this program is great. It is easy to use, offers multiple models to use, and gives you full customization abilities. The *biggest* drawback to this program is that it is very computer resource intensive. If your computer is kind of old and you think it may not be able to run this program (see above for resource usage information), you can try 3D-Pack.com for easy on the go creation of 3D boxes without ever having to install anything. Otherwise, thumbs up for Cover Commander.
{/rw_verdict2} –>

 Email article
