 Sometimes we find that we are unable to delete a directory or file because its in use by an application, the operating system or another user on the network. Sometimes in extremely unlucky cases, we find that the file may be inserted or influenced by a virus. In these cases, an antivirus may be sufficient to deal with the problem file. In other cases you may find that a deletion tool may come in handy. FilExile is a dead simple tool that some users may find useful for a short amount of time and redundant and useless for the long term.
What Is It and What Does It Do
Main Functionality
FilExile is a simple open source deletion tool that was created for the intended purpose of deleting stubborn directories or files that cannot be deleted by normal means. Whether the path and file name is too long, invalid, the file is in use, FilExile will take care of it.
Pros
- Allows you to delete files and folders that otherwise refuse to be deleted due to a variety of errors, such as invalid path, invalid name, etc.
- Safety features to help prevent deletion of important files
- Dead simple to use
- Open source
- Lightweight and efficient
- Drag and drop supported
- Supports English, Romanian, Italian, Spanish, French, Vietnamese, and German languages
Cons
- Not system tray minimizable
- Its usage potential and scope is short
- No offline help resources
- Requires .NET Framework 4.0
Discussion
This is probably the shortest review I’ll ever write. This application does not do much. It is quite the definition of minimalism and simplicity. All it does is delete but let me walk you through the key components.
Setup is quick and easy. It gives you the usual setup wizard that grants the user the ability to select the components he/she wants to install and in which directory. It goes by in less than a minute depending on how decisive the user is.
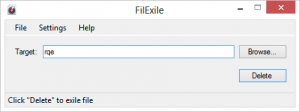
The user interface bares all which is not much at all. You get a standard menu bar with three menu items – File, Settings and Help. The only item under file is exit. Under Settings you get Options. Under Help, you get Online help and About.
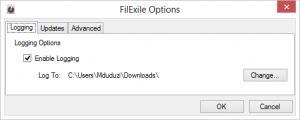
 When you click on the options menu item under the settings menu, it opens up an options screen, surprisingly larger than the parent user interface screen. Here, you get three major configurable settings and options – ‘Logging’, ‘Updates’ and ‘Advanced’.
Logging allows you to enable or disable logging and choose which directory the the application logs to. The log will usually be a file named FilExile_log and it will contain the same information that the FileExile console screen displays.
Under the Updates option screen you can choose to allow the application to check for updates on startup, Automatically download new updates and check for new updates using the ‘check now’ button. If a new update is found, it will link you to the download page on sourceforge.net where it leads the user to download fresh setup files.
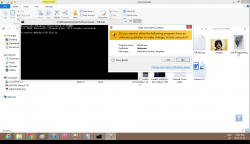
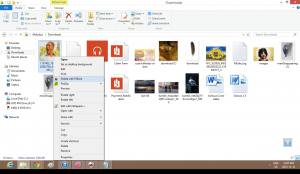
 Under the Advanced tab, you get to configure if the application displays an output and you can choose to disable safety features here. You can also choose to increase the number of threads the program uses. I’d suggest that you only increase this if you know you have enough memory and processing power to handle it cause it will have your system running slow and I doubt you’d need to do it unless you have a heavy-over-10oo file deletion job. You can also Disable/Enable the Shell Extension which adds/removes an option to the Windows context menu to delete an item with FilExile. Its a nice option in my opinion which only comes with the latest version of the application. Adding FilExile to PATH will add a system variable to the PATH list. What this does is allow the user to open FilExile from the command prompt screen and send it delete arguments. [Check screenshot on the right.] The Advanced option screen also comes with a ‘Defaults’ button which resets all the application settings back to default.
The main panel of the application only contains three major items – a text field and two buttons. What goes in the text field is the path to the directory or file you want to delete. You can either fill it in manually or browse to it. Clicking on the delete button will attempt to delete the file and clear the target text field. If it cant find the file it will prompt you with a dialogue. Older versions would delete a file and keep the path on the target directory. If you tried to delete a file twice, it would inform you that the file does not exist. It does the same major mistake with newer versions of the application that it did with older versions. It never informs the user of a successful operation. It just kind of stares at you after an operation. *Note – this application deletes files completely so be careful of how you drive it.
Conclusion and Download Link
 This application does what its told without misbehaving and it is progressing. Many people will find use in it and or use it in their code, that’s if you are a programmer or a code enthusiast. Give FilExile a try if you’re interested in a less dull deletion method that will remove a file so fast that it will give your PC amnesia. And don’t hesitate to comment on what you thought of the application if you’ve given it a try, the review and any interesting alternatives or suggestions you think I should look at and deserve a review.
Price: Free
Version reviewed: 1.51
Supported OS: Windows XP, Vista, 7, 8, 8.1, requires .NET Framework 4.0
Download size: 768 KB
VirusTotal malware scan results: 0/47
Is it portable? No

 Email article


