 Email article
Some time ago, I had reviewed VidCoder (click here) giving it two thumbs up as the easy-to-use portable freeware offers audio/video (AV) conversions supporting myriad formats, video editing and customizations. Thus, you may ask why XMedia Recode (XMR) when VidCoder is basically capable of doing the same job. Oh well, VidCoder is great, but within its own limitations. XMR may work for you better or worse, or as a good alternative. On top of that, if you have an antivirus like Symantec Endpoint Protection, you may not feel lucky with VidCoder as it turns out the latest stable 64 bit portable version of VidCoder (2.62) is not allowed by Symantec (the app cannot even be launched). So, is XMR worth considering? Let’s find it out!
WHAT IS IT AND WHAT DOES IT DO
Main Functionality
As the name implies, XMR is an AV converter (aka re-encoder or transcoder) for the most widespread, widely supported, user-friendly, modern formats, includes convenient profiles for popular mobile devices from the brands, viz., Apple, Samsung, LG, Sony, etc., and implements subtitles, chapters, and the other options.
Pros
- User-friendly interface
- Profile support: Custom, Favorites, DVD Player (Standalone), HTML5, YouTube, multiple vendors, etc.
- Format support: 3GPP, AVI, MP4, WMV, Matroska, HEVC Raw Video, ASF, WebM and many more
- MPEG-4 AVC / H.264 or HEVC / H.265 or XviD encoding plus the other options
- AAC, AC3, DTS, MP3 audio codec options (and more)
- Direct stream copy of original/untouched AV
- ‘Keep aspect ratio’ support
- A lot of filters that support video editing
- Average bitrate, 2-pass average bitrate, constant quality, constant quantizer, or custom total size choice for video
- Keep original support for video ‘Framerate’
- Chapter support
- Subtitle support
- Batch encoding possibility
- Instant source preview
- Small encoded preview clips
- Pause or resume encoding
- Freeware
- Availability of portable version
- Unicode support
- Support of multiple languages
- Stealth: Yes (if you don’t know what it is, click here)
Cons
- Windows only
- 32 bit only (but works in 64 bit systems)
- No same as source option for the audio sample rate, no auto option for the bitrate
- No checkbox to keep the original resolution (but can be had in the target)
- No 10 bit H.265 encoding
- No 4K/UHD HDR output support (input supported)
- Not functional for protected DVDs, BDs
- No keyboard shortcuts
- No drag-n-drop support
- No certainty about compliance with one or more licenses
Discussion
Video encoding: Some facts: Must read (click here) if you are new to encoding.
Disclaimer: Video conversion/encoding/re-encoding/transcoding may or may not be legal in your country. Please check before you proceed.
Video encoding: Steps & Tips, specially, for the beginners
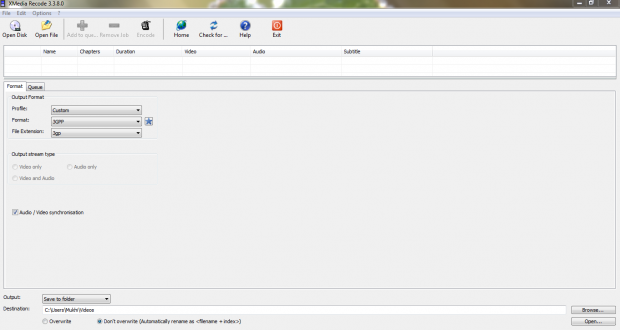
The interface looks like the following when you launch the program:
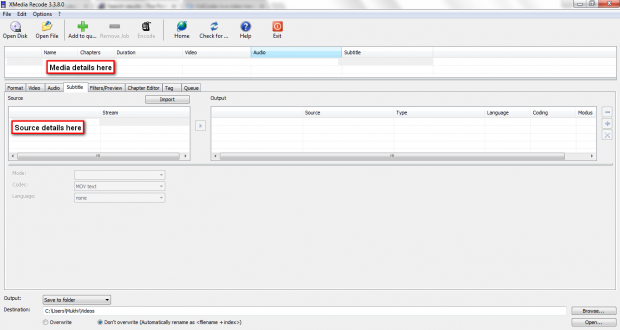
- Load the media by clicking the button Open File or Open Disk (or File > Open File or Open Disk or Open Folder). A decrypted DVD/BD folder is supported. Loading the media will bring an “Analysis” window. Once the analysis is done, the main window will return as follows:
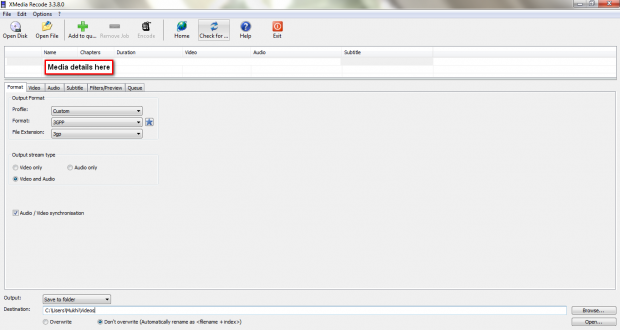
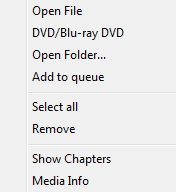
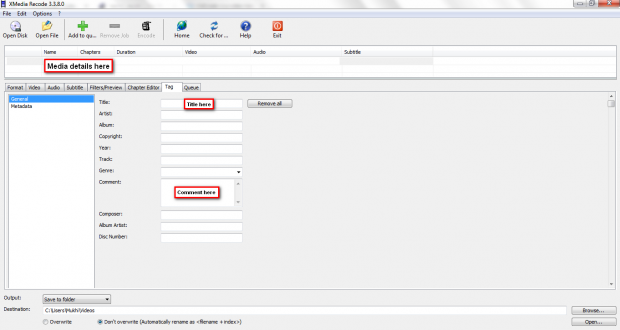
Now, you have some additional tabs, viz., Video, Audio, Subtitle, Filters/Preview. The above screenshot is showing the details of the Format tab and that of the media. Find the red rectangular box in the screenshot that says, “Media details here”. In this area, your source media details appear. If you right-click it, you can get menus like the following:
- Format: Customize the ‘Output Format’ here. Specify the ‘Profile’ and the ‘Format’ from the drop-down menus as you need (the ‘File Extension’ will be changing automatically). For instance, if the ‘Format’ is changed to MP4, the ‘File Extension’ will be mp4 accordingly, and some more tabs like Chapter Editor, Tag will show up. The ‘Output stream type’ may be Video and Audio or Video only or Audio only. ‘The Audio / Video synchronisation’ is checked by default. If you want your output compatibility to your device like the one from Apple, Samsung, Dell, Acer…, then select the desired ‘Profile’ first (aka preset). These predefined selections include (but not limited to) file format, screen size specific to a given hardware. If you are not too worried about compatibility (e.g., the latest Android devices with a media player like VLC or MX Player virtually play anything that you throw in), the default ‘Profile’ Custom can be just fine.
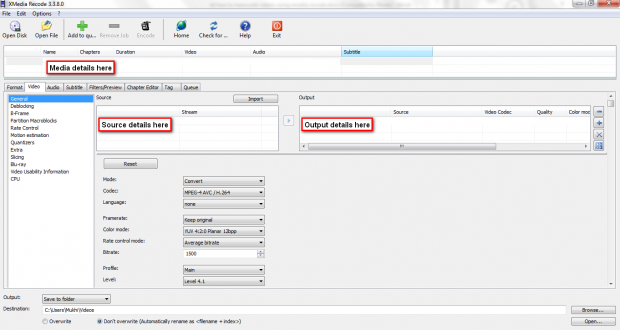
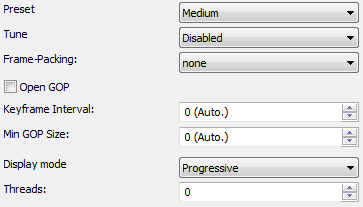
- Video: This tab allows you to handpick the video parameters, say, ‘Codec’, ‘Rate control mode’, and so on (view the screenshots below). The ‘Codec’ has to do with video compressibility, compatibility and customizability, whereas the ‘Rate control mode’ talks about video quality and size. There is a Bitrate-Calculator (from the Options menu at the top of the XMR window). The direct stream copy option copies the video stream only into the target (change the ‘Mode’ from Convert to Copy). Thankfully, numerous choices that you may be able to play with exist here in this tab. However, if you don’t know what you are doing, don’t do it here!
- Audio: You may choose ‘Codec’, ‘Bitrate’, and/or the other audio related variables here (see the screenshot below). The direct stream copy option copies the audio stream only into the target (change the ‘Mode’ from Convert to Copy).

- Subtitle: If your source has subtitles, it will be displayed in this tab (look into the screenshot underneath). If the subtitle is softcoded (not embedded in the video), it can be included in the destination file at will; if hardcoded (embedded in the video), it will spontaneously appear in the output video. You may also import a subtitle file like srt. You can add up to 32 subtitle tracks.
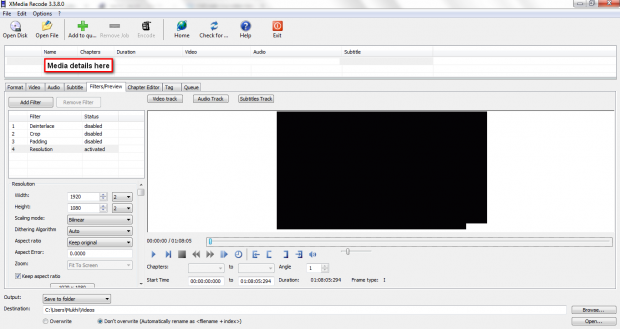
- Filters/Preview: You will be able to preview (play the whole video, or customize & play a small clip). The video editing is possible to a good extent given that plenty of filters are available (vide the screenshot below). ‘Keep aspect ratio’ is checked by default; leave it like that; else, your final video may look weird. ‘Crop’ should be Auto Crop if you would like to avoid the black bars. The video editing offer in XMR includes, but not limited to, Color correction, Denoise, Delogo, Deblocking, Deinterlace, Flip Image, ‘Start Time’, end time, Rotate, Sepia, Sharpness, Padding, Video fade in / fade out. Neophytes are recommended not to mess around with any other parameters in this tab.
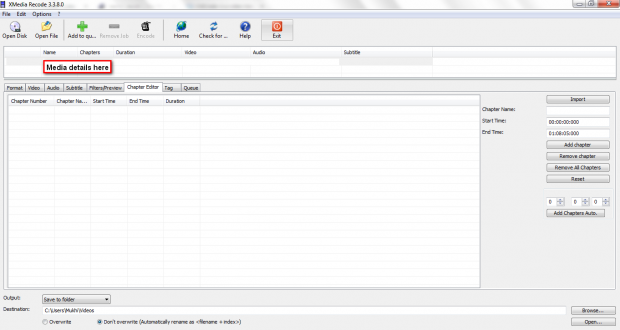
- Chapter Editor: The screenshot below indicates how the chapters may be managed. You can automatically create chapters. The chapters from the discs can be taken over automatically. Importing the chapter files (text) is another possibility.
- Tag: If tagging is important to you, this tab helps (screenshot as follows). Adding album covers and editing ID3 tags are supported.
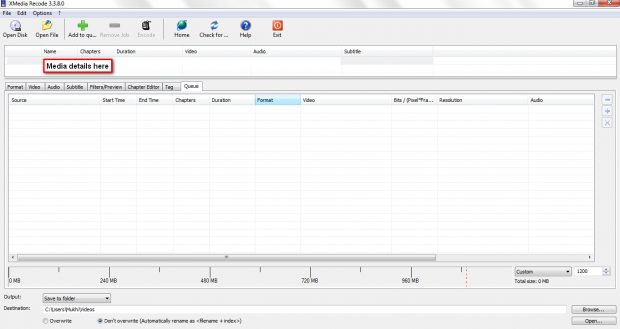
- Queue: The Queue tab doesn’t add info (like the screenshot below) until you click Add to queue (or Edit > Add to queue) once you are decided on the specifications.
- The ‘Destination’ of your choice (your favorite folder or directory for the output; just remember that it must exist beforehand as XMR won’t create it for you, and would not like either an address that doesn’t already exist) may be had by manually typing/editing the address in the box right to the ‘Destination’ text found at the bottom of the XMR window, or clicking Browse. Your ‘Output’ may also go to the Input Folder. To make sure that you don’t ‘Overwrite’ by mistake, the default is ‘Don’t overwrite (Automatically rename as <filename + index>)’.
- Recode example: Let’s assume we have a 1080p AVC AC3 5.1 MP4 video file as source (supposedly, of quite high quality and large size), and we want a 240p HEVC AAC 2.0 MP4 video file as the output. The goal is to get an output with a very small size & with the least possible compromise in quality (say, with an optimum quality/size for Facebook/WhatsApp sharing) keeping in mind that there is always a tradeoff between quality and size. After loading the media, and defining the output folder, go to the Format tab, and choose MP4 as ‘Format’ (since it is the most popular format now). The ‘File Extension’ will automatically be mp4. You will now see the ‘Mux’ option that has a checkbox for ‘Streaming – Fast Start’. Ignore it for this encode, and move on to the Video Select HEVC / H.265 as ‘Codec’ and Constant Quality as ‘Rate control mode’. HEVC or High Efficiency Video Coding offers the best compressibility; however, it may get compatibility problems with some gadgets, and right now, AVC or Advanced Video Coding may offer more tweaking than HEVC. The suggested ‘Quality’ is 18-25; 18 being the best, and 25 being the worst (let’s opt for 20 to have a good compromise between the size and the quality; oh well, at the moment). Switch to the Audio tab, and change ‘Codec’ to AAC (standard nowadays), and ‘Bitrate’ to 32. Click the Filters/Preview tab, and change the ‘Resolution’ ‘Height’ to 240 (QVGA resolution is typically 320 x 240, which is 240p), and the ‘Width’ will automatically change (don’t worry about it). ‘Keep aspect ratio’ is checked by default; keep it intact. The greenhorns should not lay a hand on the other specs. You can save the encoder settings (File > Save settings; you may open it later on by going to File > Open settings; XMR also remembers the last settings). Click Add to queue. For batch encoding, there may be a source file, and multiple destination files with different specs; or multiple source files, and multiple destination files with the same or different specs. Click Encode, and the window will be presented as follows:
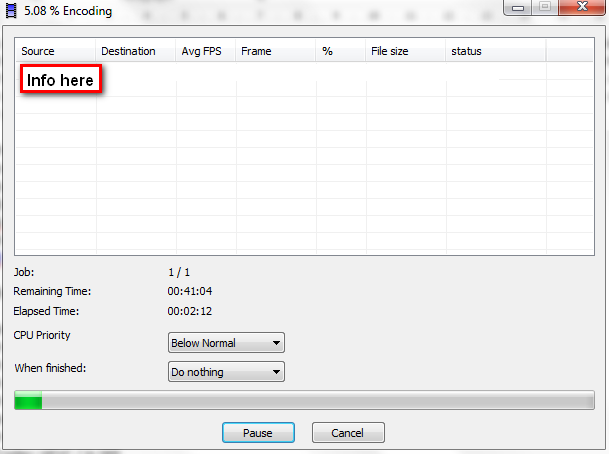
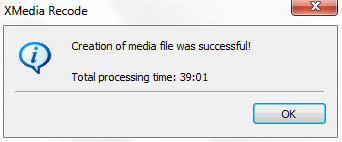
XMR is a CPU intensive software; hence, the ‘CPU Priority’ should be left as Below Normal; especially, if you don’t have a high-end machine. This may help multi-tasking; for example, you may work on your email and/or MS Word while encoding without issues. Do nothing is the default option ‘When finished’ (XMR even lets you to automatically Shutdown your computer when done). Pause or Resume of the encode is permitted as well. When done, XMR will come up with the following dialog box (hit Enter to come back to the main window):
CONCLUSION AND DOWNLOAD LINK
Like I said in the beginning, you may prefer XMR (or stick to VidCoder), or try it as a substitute. In the past (previous versions), XMR disappointed me, but this new version seems to be working and promising. You will be right in saying that it still has limitations; for example, it doesn’t do 10 bit encoding, or work on encrypted discs, or support 4K/UHD (Ultra-High-Definition) HDR (High Data Rate) output, but folks, there barely exist freeware I know that do have all of these options.
So, would you like to try XMedia Recode (if not done already)? Questions or troubleshooting? Let us know in the comments!
Price: Free (for non-commercial use)
Version reviewed: 3.3.8.0 (x86) (32 bit) portable
Supported OS: Windows 7/8/8.1/10 (Windows XP/Vista support in the 3.2.7.1 portable version)
Download size: 14.2 MB
VirusTotal malware scan results: 1/61
Is it portable? Yes


