 Email article
Even though Windows Update has been around since Windows Vista and Windows Server 2008, it wasn’t uncommon to not know a whole lot about what Windows Update was before Windows 10 arrived. Windows 10 has seen many changes, and the Windows Update feature is one that saw a massive overhaul. Using the Windows Update area has never been better from a user standpoint, but it’s also apparent that Microsoft wants to be rolling out automatic updates to as many computers as possible. You can tell that by the way they have hidden the options for stopping the automatic updates and have put them on a schedule instead.
Similar to smartphone operating systems, Windows now automatically rolls updates out over the air through the Windows Update feature. The way the Windows 10 updates work is Windows periodically checks if there is an update available rather than Microsoft automatically sending the update in your direction as soon as they have developed something new. If you want to be getting updates as soon as possible, you’ll need to be clicking on the “Check for updates” button that is available from Windows Update.
If you haven’t done much research into how these updates work, you might think that there is nothing that can be done about the automatic updates rolling out to your computer since Windows Update doesn’t offer any obvious solutions. In any event, there is a way for you to enable and disable the automatic updates that Windows Update always wants to push out to you from the Windows 10 Home by using the Registry Editor, and the Professional and Enterprise editions can get the job done from the Local Group Policy Editor. The process is easier if you own either the Windows 10 Professional or Enterprise versions, but there are some workarounds for those with the Windows 10 Home edition also.
Automatic Device Driver Installation
Microsoft has changed the way it handles driver updates and what users can do with them a few times now. There weren’t many people could do about the drivers, to begin with, but in more recent versions of Windows, there have been some changes. Depending on what version of Windows 10 you have running, you might be able to turn off the driver updates from the Settings app. If you aren’t running on a version of Windows 10 that has that available, then you can still enable and disable the driver updates from the Local Group Policy Editor if you want. You can check out more about both of those options by reading our how to turn on/off driver updates using Windows Update in Windows 10 article.
Metered Network Connection
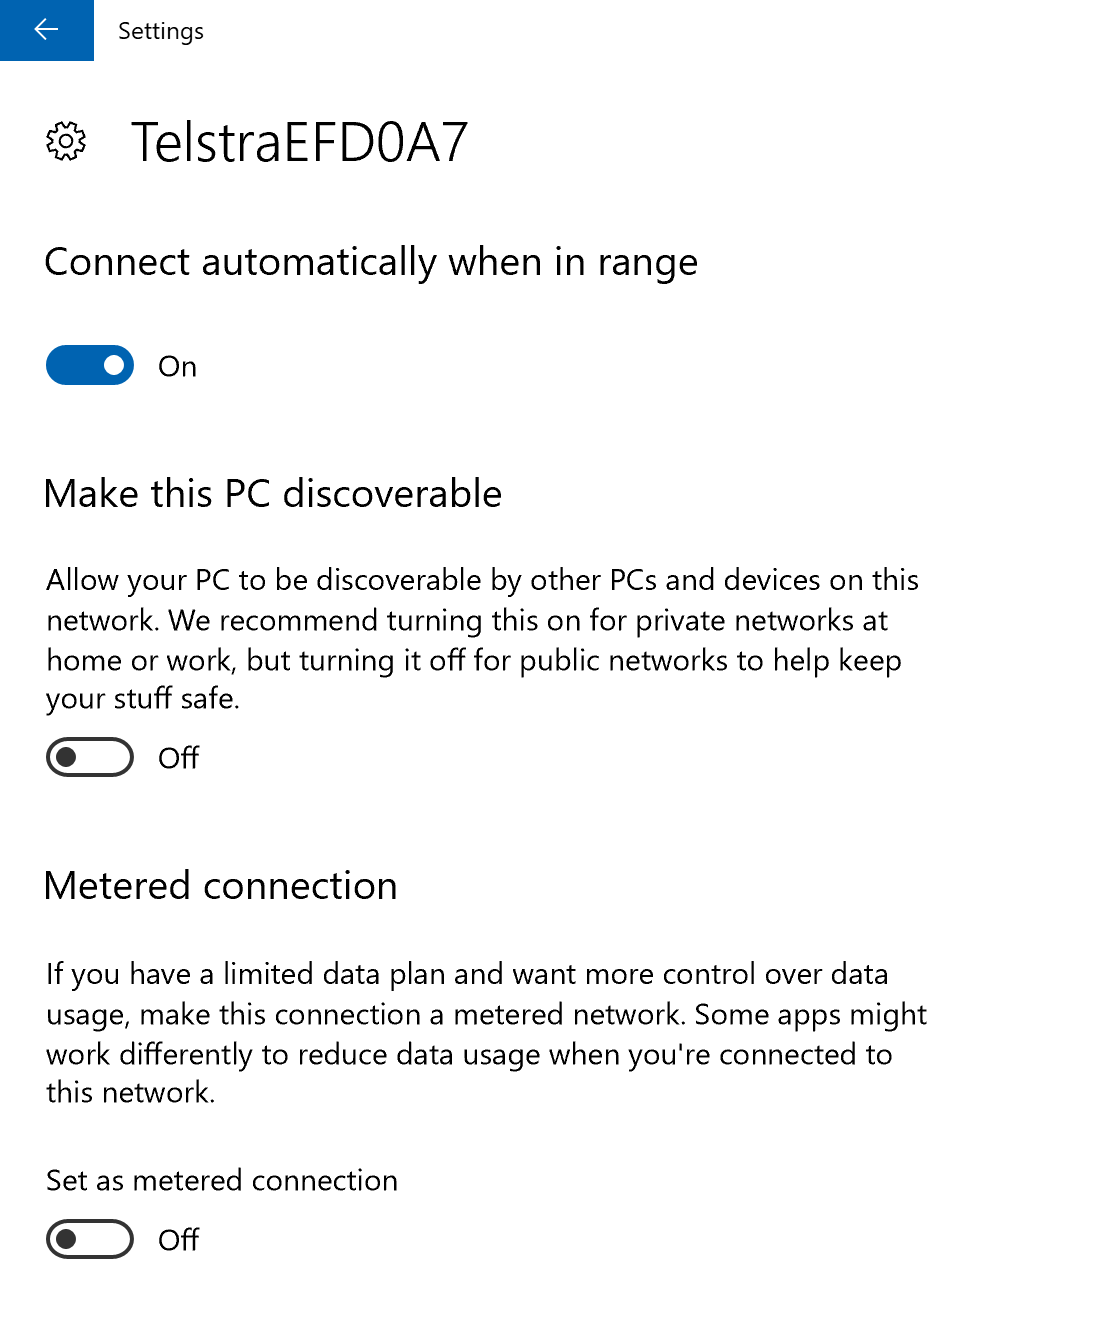
In Windows 10, you also have the option of setting up a metered network connection. With the metered network connection setup, Windows Update will not always download available updates automatically. Everyone—whether you have the Home, Professional, Enterprise, or any other editions of Windows 10—can always set up a metered network connection. We went into more detail earlier about what a metered network connection is and how to set one up if you want to give it a shot.
Administrative Tools
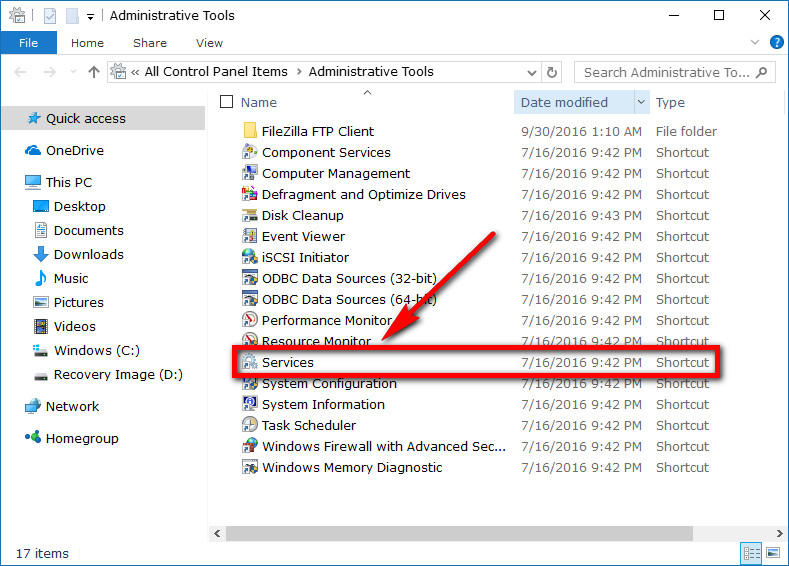
The Administrative Tools available from the Control Panel in Windows 10 is also capable of enabling or disabling the automatic updates that you get from the Windows Update service. To do that, start by opening the Control Panel with the small icons showing and then click on the “Administrative Tools” link. Once inside admin tools, click on the “Services” link.
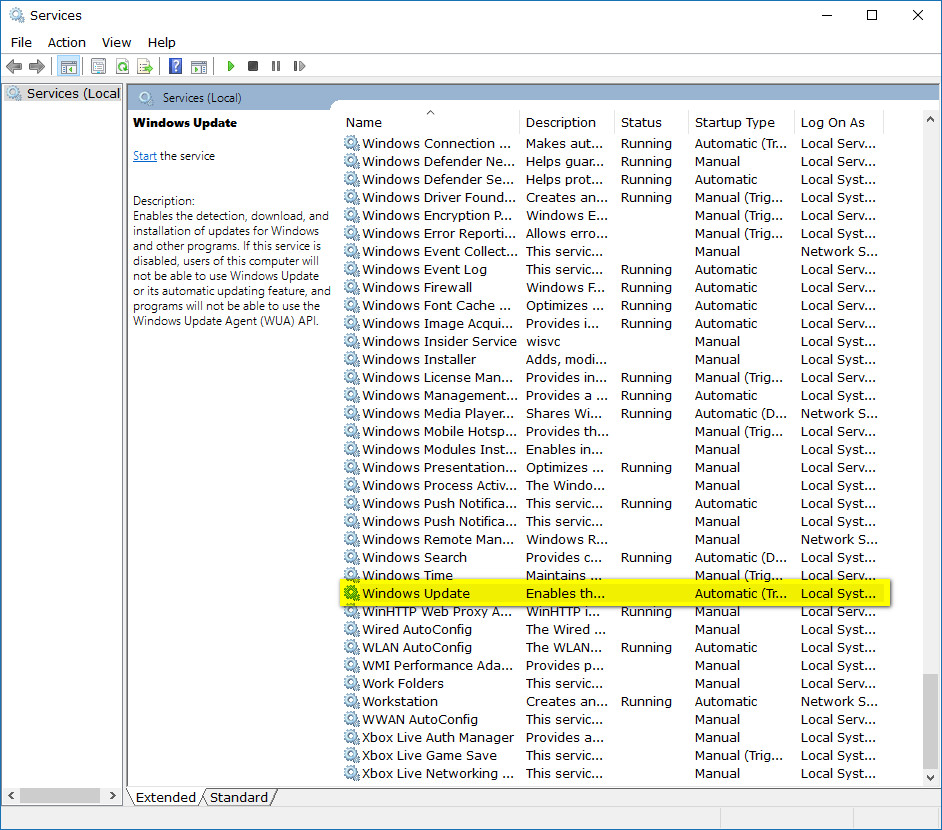
Scroll down the list of services and then double-click on the “Windows Update” service when you get to it.
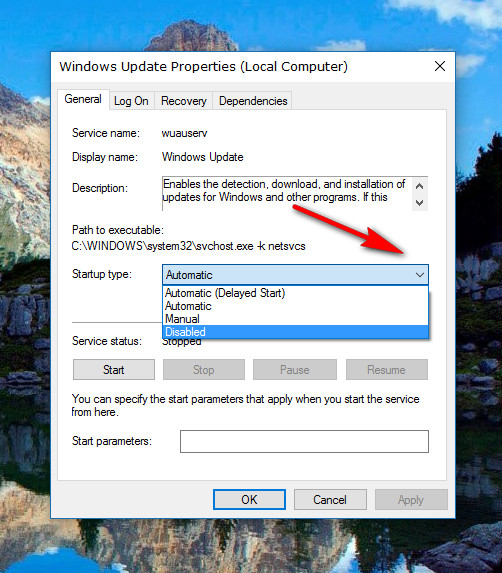
From the General tab, click on the drop-down menu where it says “Startup type” and then choose to enable or disable the service from the menu.
Group Policy
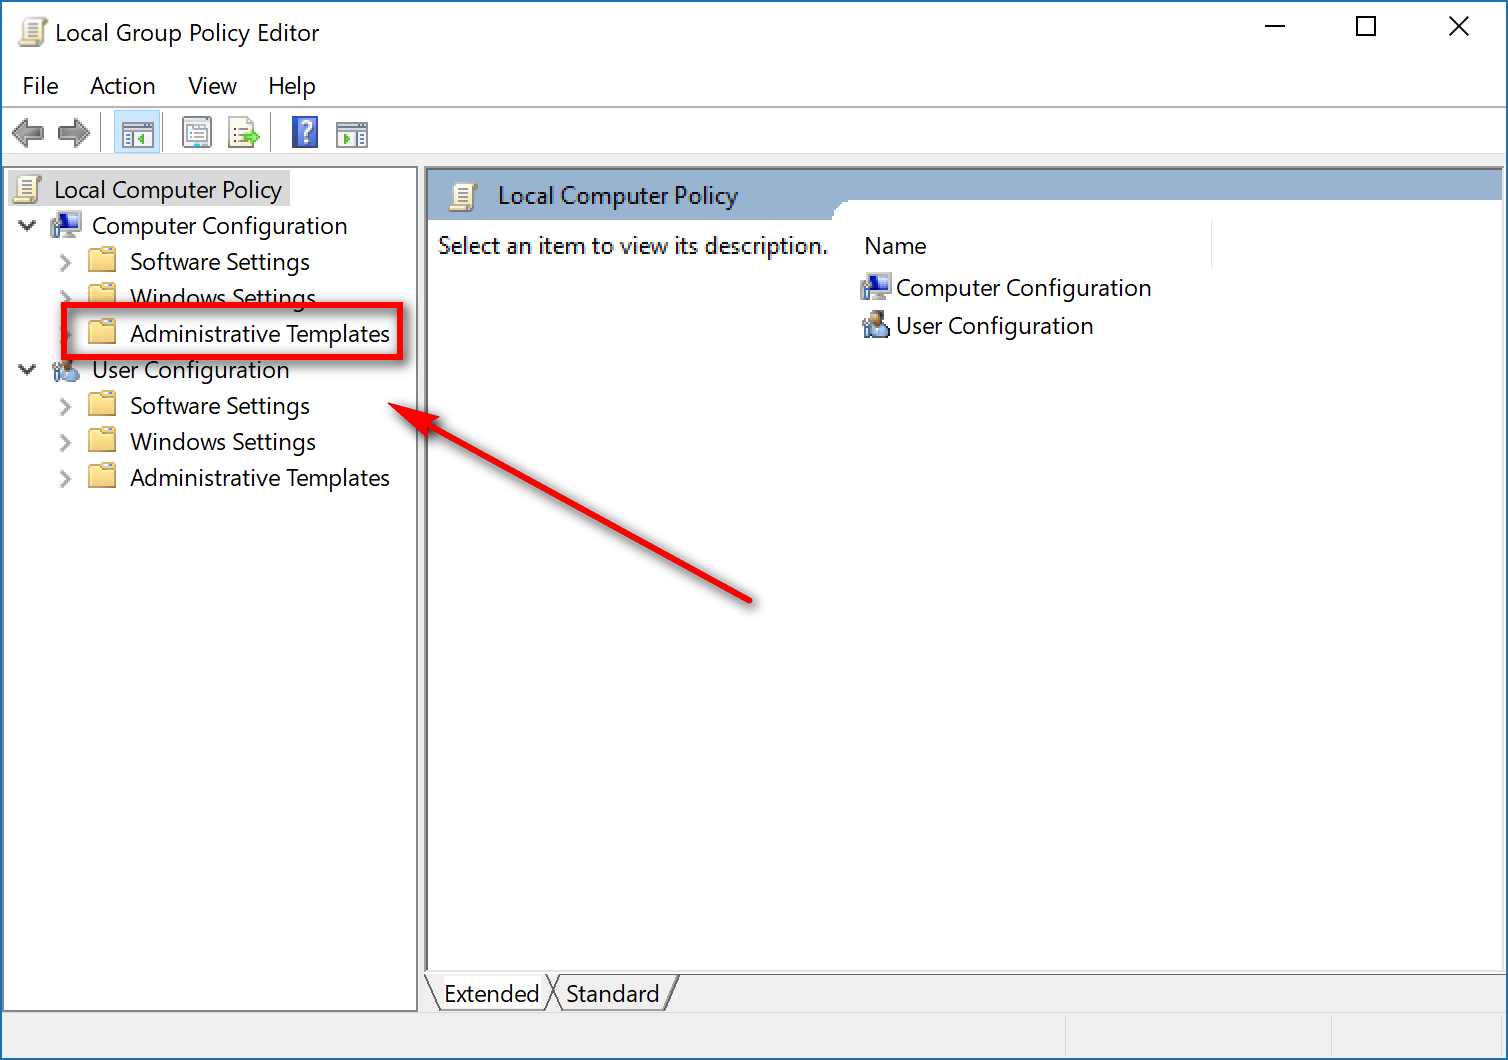
Start by logging into a version of Windows 10 Pro or Windows 10 Enterprise as an administrator and then open the Local Group Policy Editor on your computer. When done, click on the “Administrative Templates” folder in the left pane.
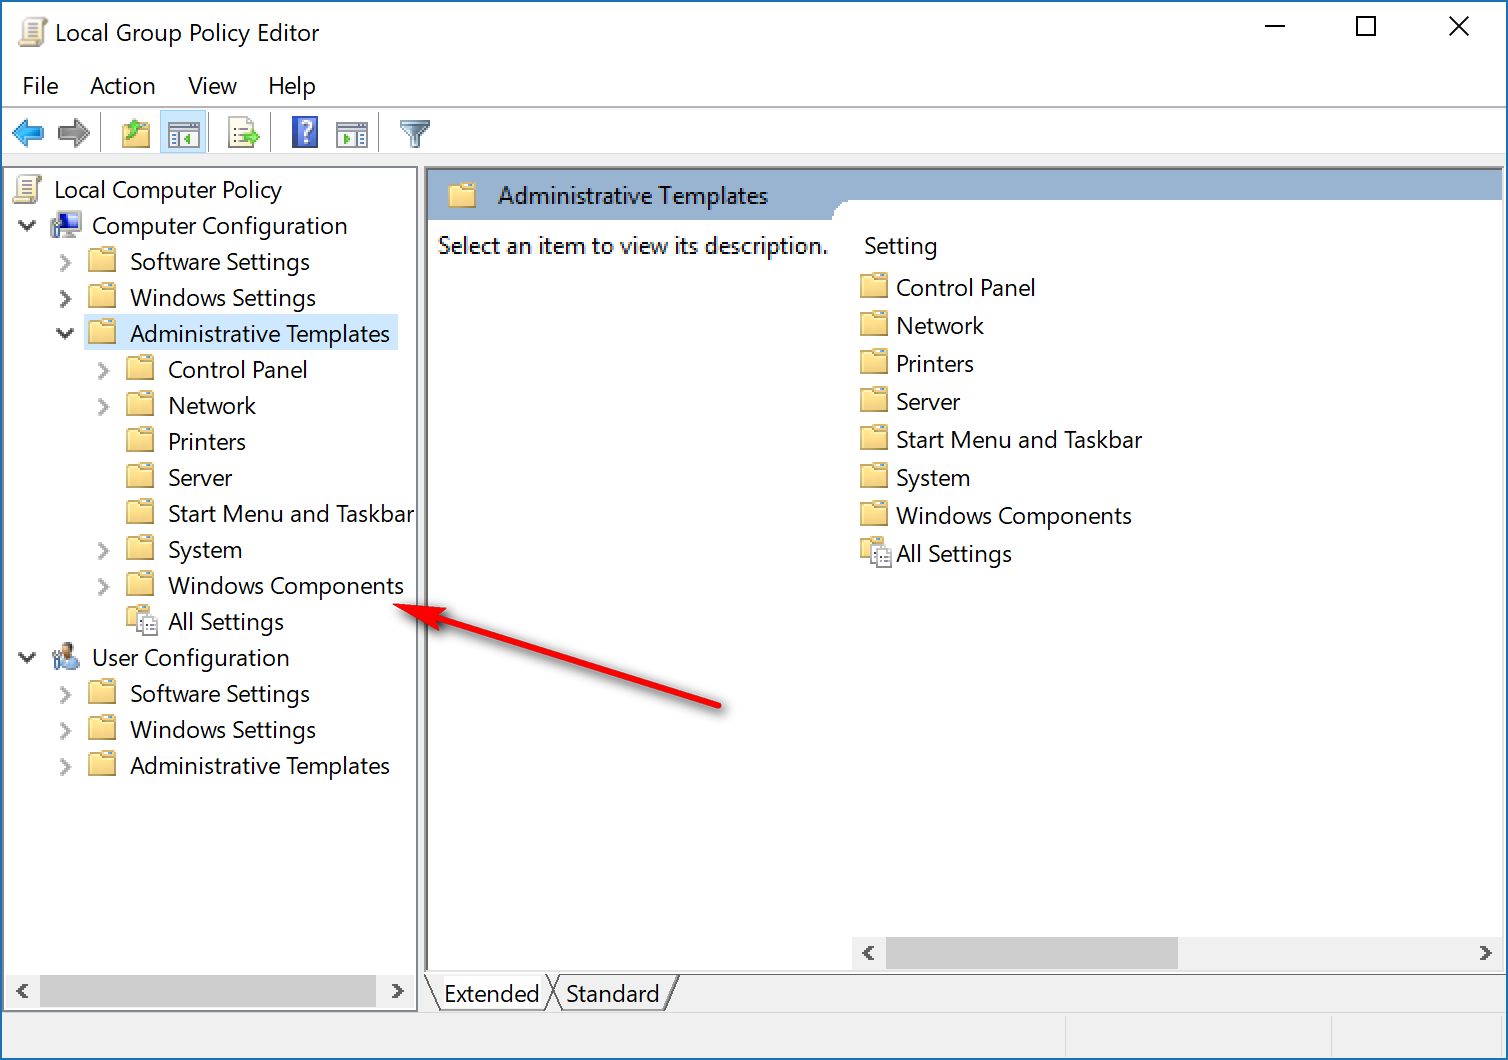
Click on the “Windows Components” folder.
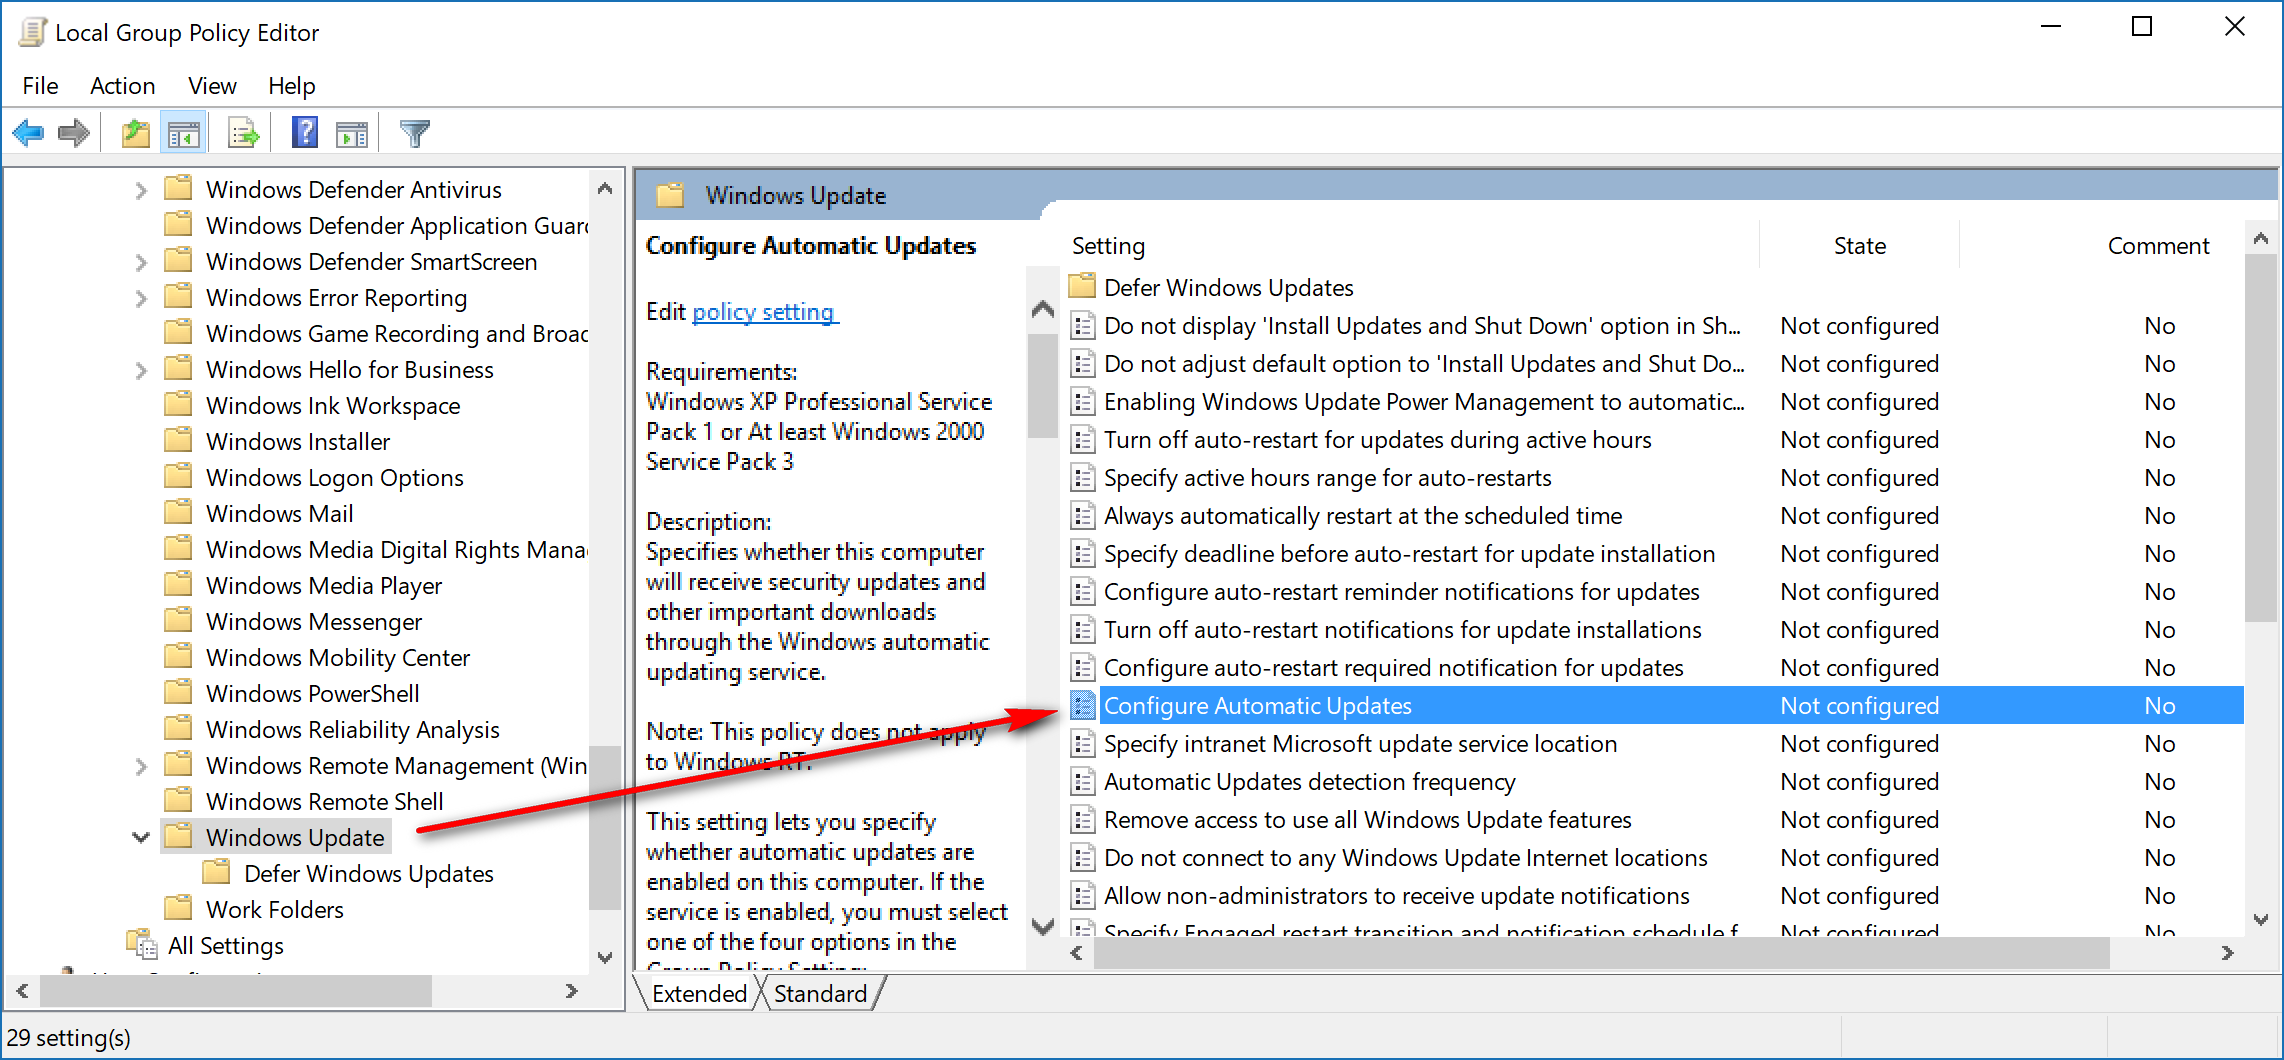
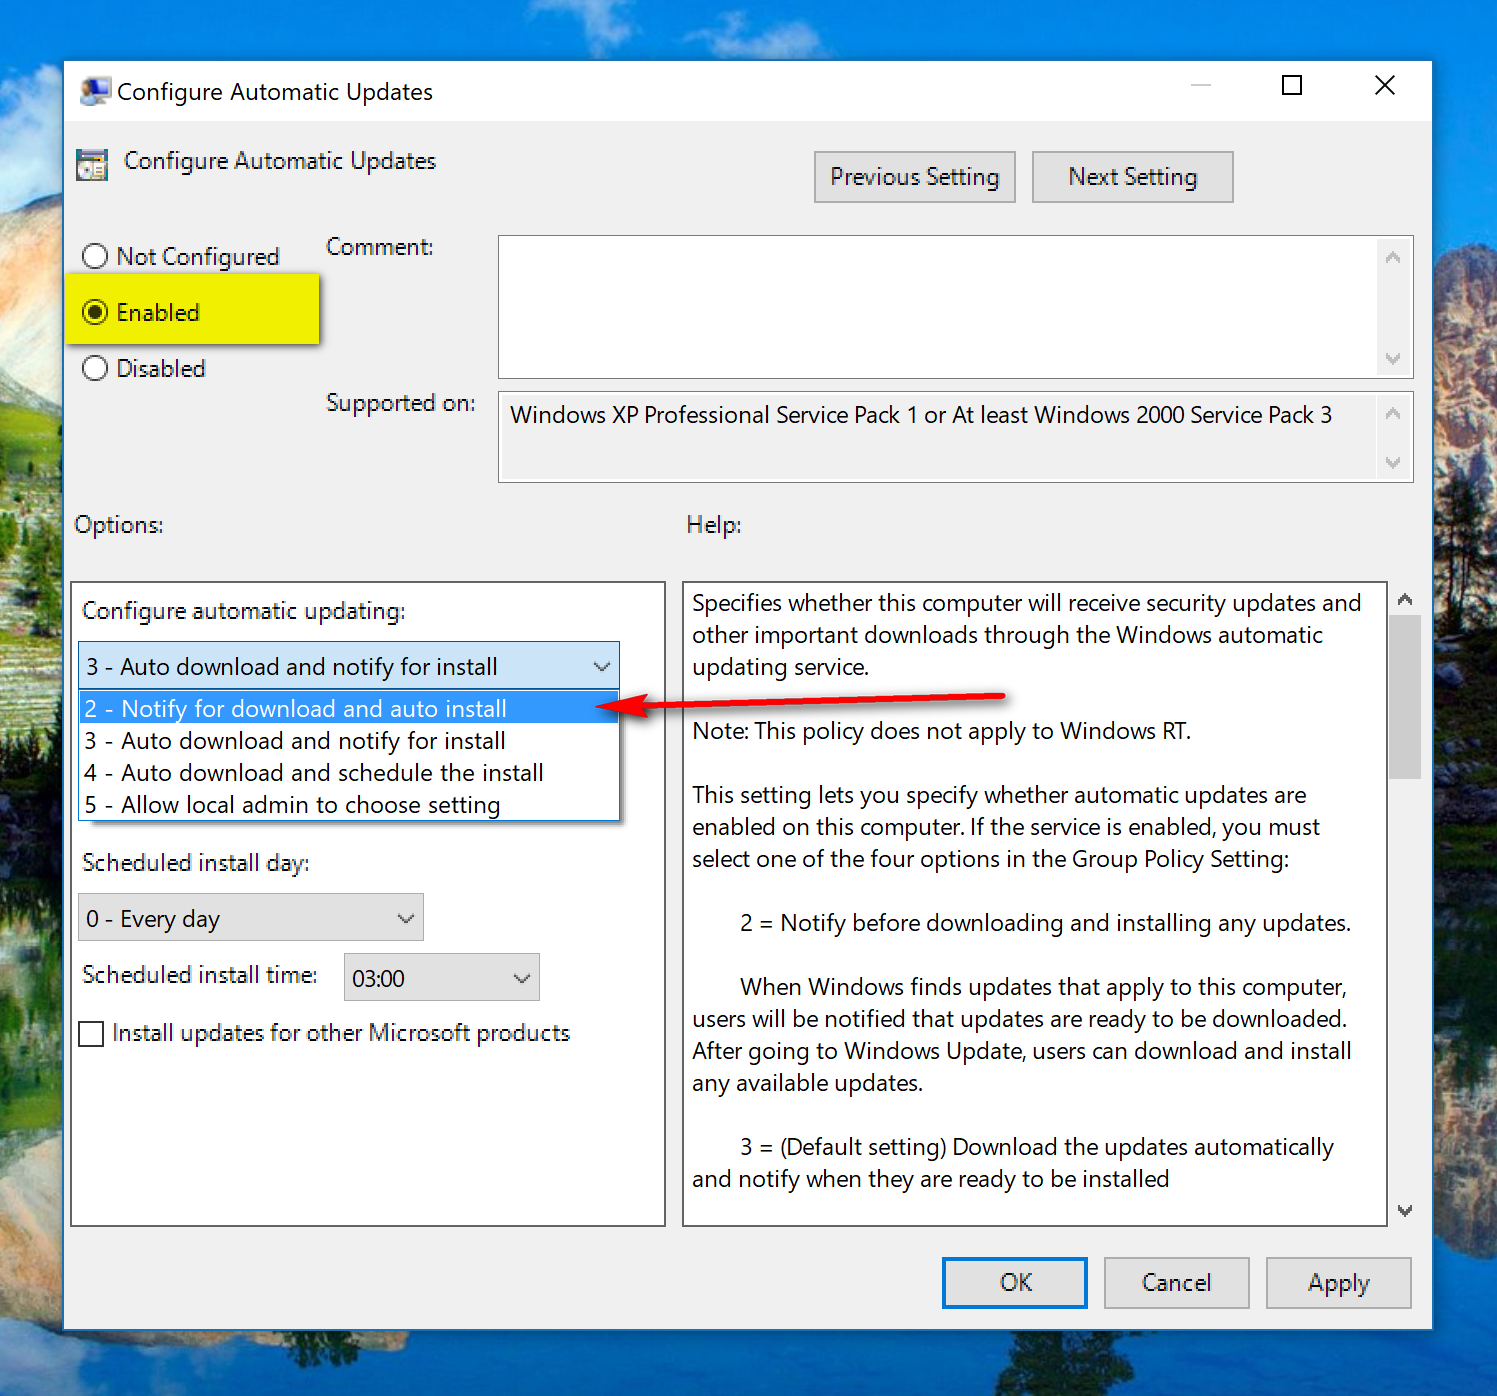
Click on the “Windows Updates” folder and then double-click on the “Configure Automatic Updates” link available from the right side pane.
Have it set on the “Not Configured” option if you want to have the automatic updates enabled on the computer.

Swap it over to the “Enabled” position and then click the drop-down menu and select the “Auto download and notify for install” if you want Windows to download the update onto the PC. Windows will then let you know about the updates, so you can choose if you want them installed or not instead of them being automatically installed without any notice.
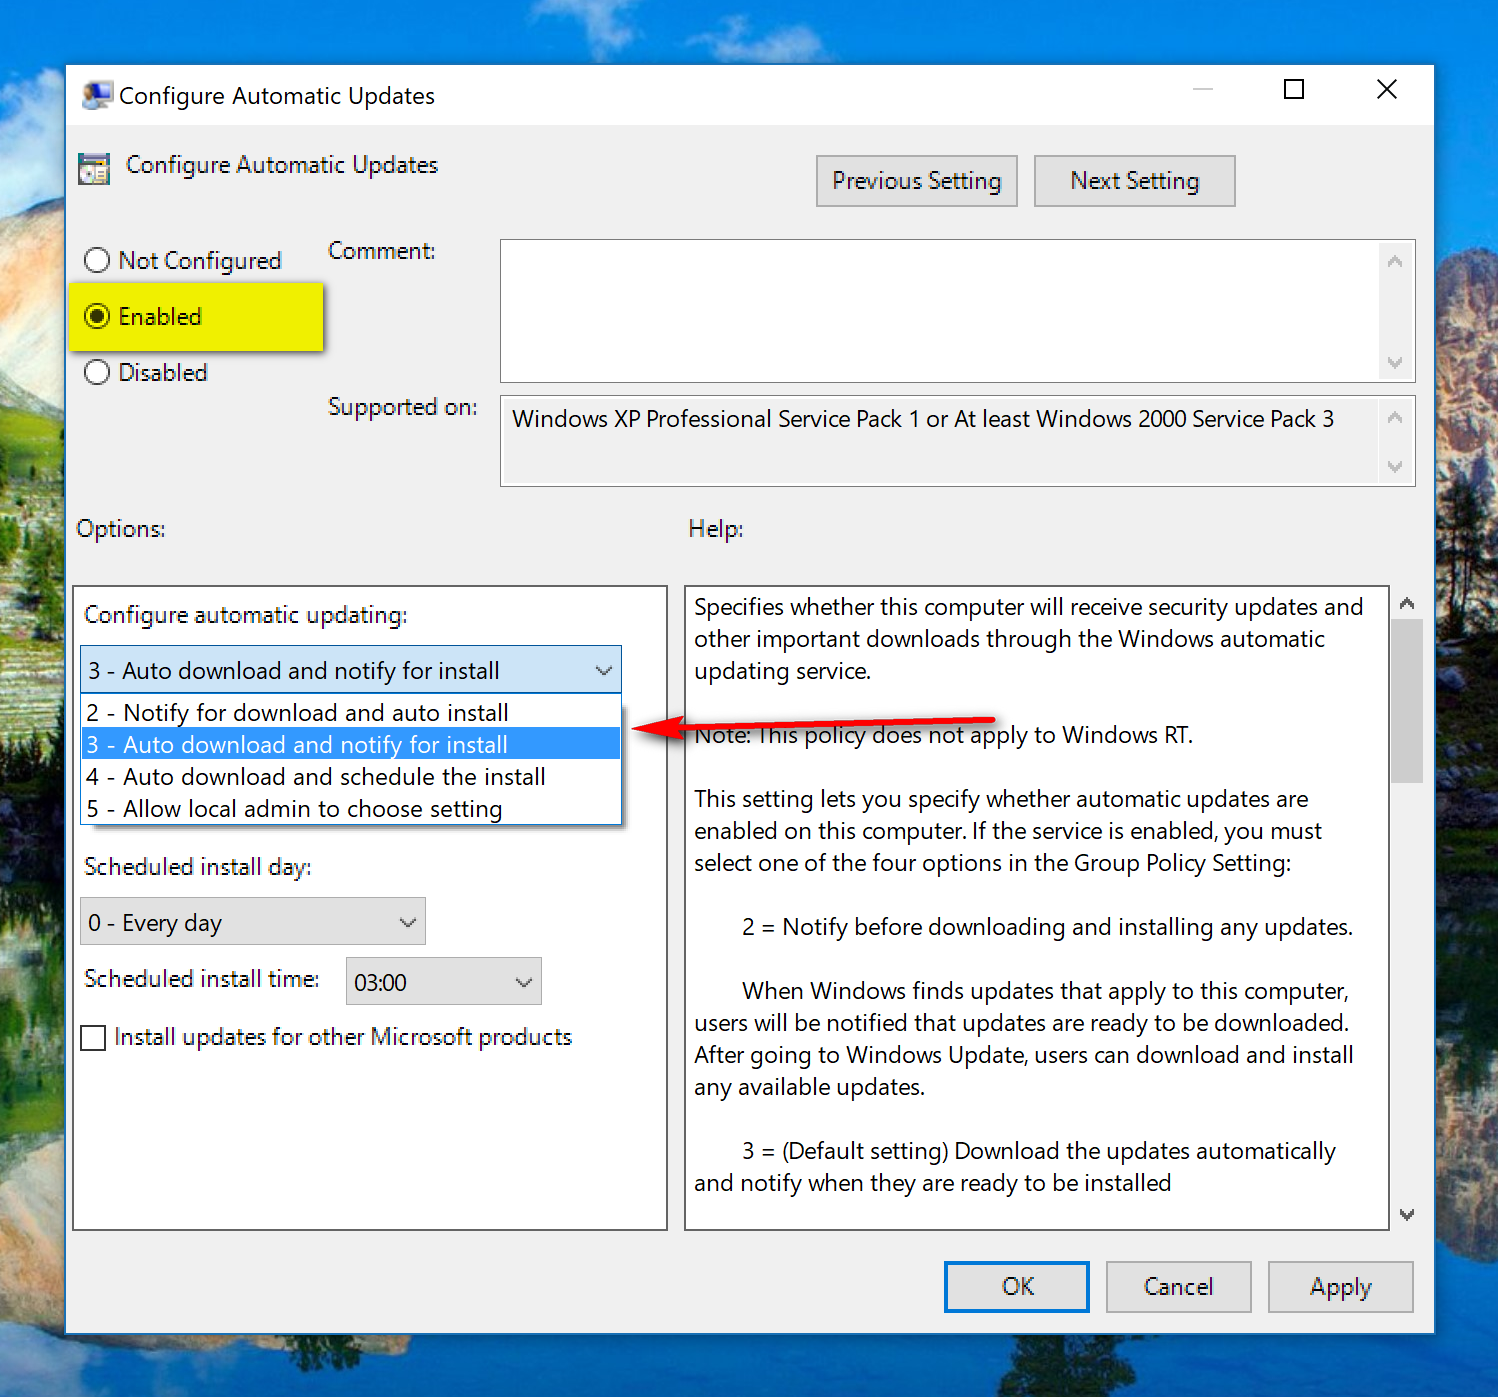
Select the “Enabled” option and then choose “Notify for download and install” if you want Windows to have to notify you before it gets downloaded and installed.
If you just leave your computer running Windows 10 “as is” then you will keep getting the automatic updates. But as you can see here, with a bit of work, it’s not that difficult to change that and disable them. A big part of the reason why Microsoft wants you to get updates and to disable them is that they can contain important security and bug fixes to go along with additional features, so keeping them enabled is a good idea unless you have a valid reason for wanting to disable them temporarily.


