 Email article
Windows 10 comes with the option to sync your settings. If you have the sync settings turned on, Windows saves your Internet Explorer web browser settings, applications, passwords, Ease Of Access, themes, and other Windows settings.
If you’ve been a Windows operating system user in the past, then you might already be aware of Windows’ sync settings that were first made available for users in Windows 8. Things are similar in Windows 10, but they have been revised and are overall much better in the latest version of Windows.
A lot more people are familiar with the fact that Windows does have a sync settings feature now in Windows 10 than they were when Windows 8 was relatively new. Many people didn’t have the chance to use the option for syncing settings when Windows 8 was Microsoft’s most current operating system because many users opted to continue running Windows 7 on their computers instead. Consequently, far from all devices could be synchronized because it just wasn’t an option that had been introduced to them yet. Now that oodles of people are warming to Windows 10, though, things are starting to change.
Most people who begin using Windows 10 are pretty happy with it, and syncing settings is now a lot more relevant—particularly since Microsoft accounts are being used more than ever before as well. So it’s a good idea to get familiar with the sync settings if you haven’t gotten familiar with them yet already.
Settings app
You can turn the sync settings on and off in Windows 10 by using the Settings application. To get started, open up the Settings app by heading to the Start menu > Settings gear icon and then click on “Accounts” from the Windows Settings menu. Once you are inside Accounts, click on the “Sync your settings” link in the left pane. You’ll now get the chance to turn on and off the “Sync settings,” plus have a play with all of the options for each unique setting.

To change the individual settings, you just need to pick the one you want and toggle the switch off or on. If you wanted not to sync the theme for instance, then you just turn off the option for “Theme.” With the theme turned off, you can then have a different background for different devices from the one Microsoft account.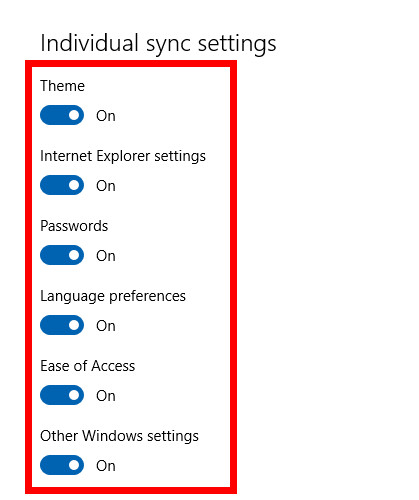
Registry Editor
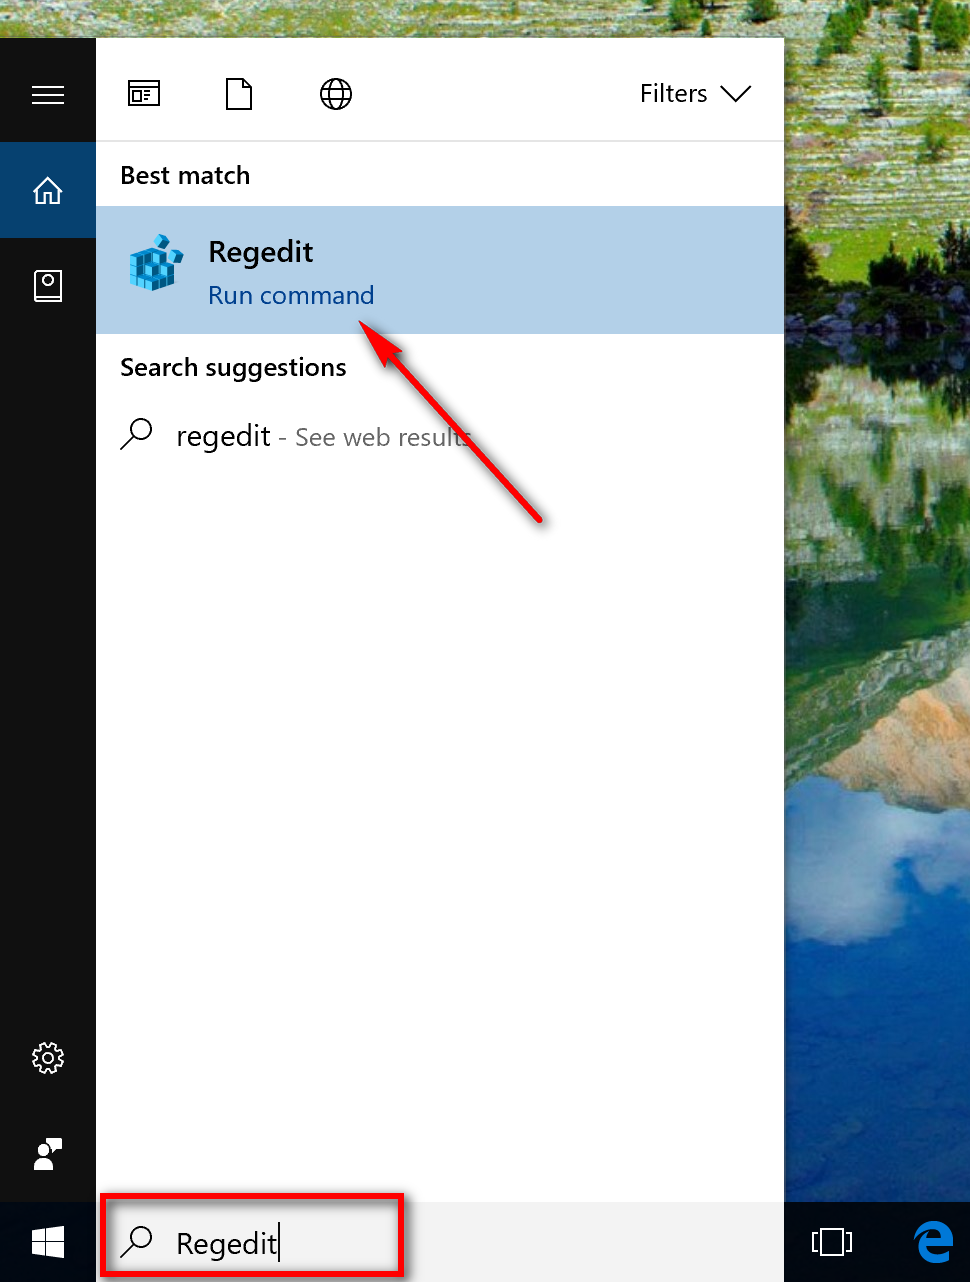
It’s also possible to turn the sync settings on and off by opening up the Registry Editor on all versions of Windows 10. Just type “Regedit” into the search bar in the taskbar and then click on the “Regedit Run command” from the Best match section.
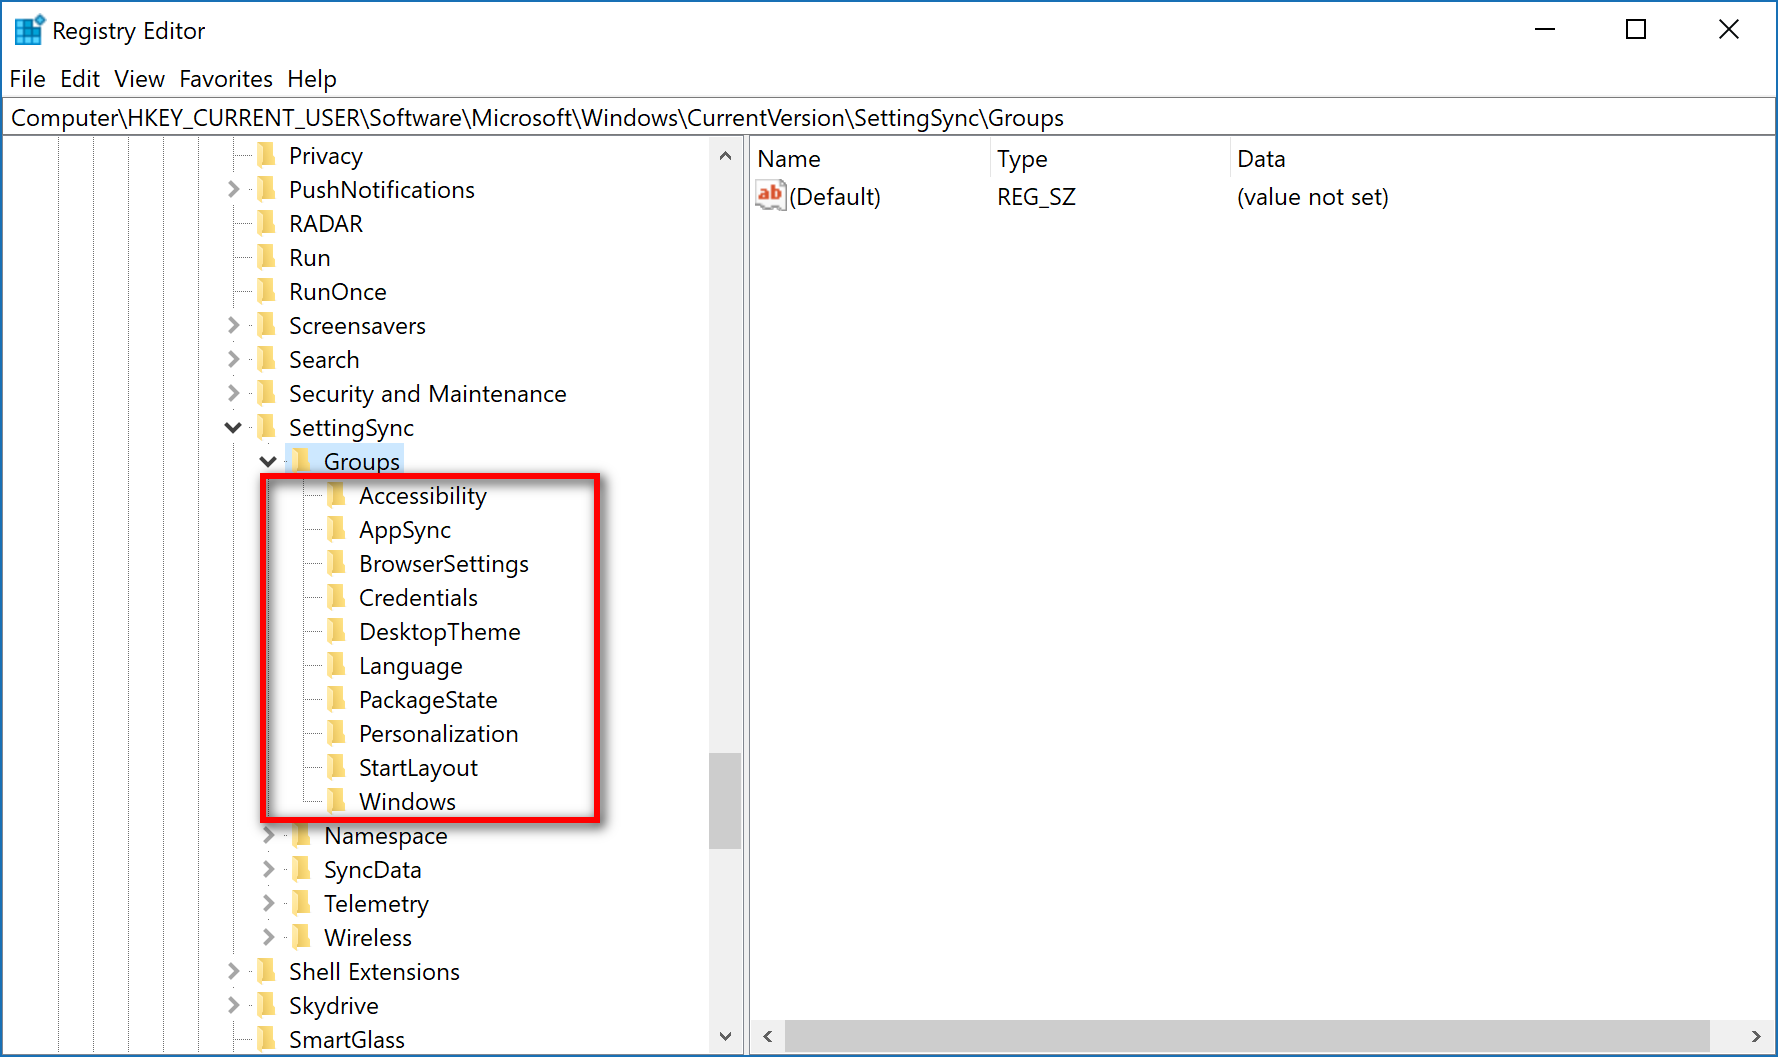
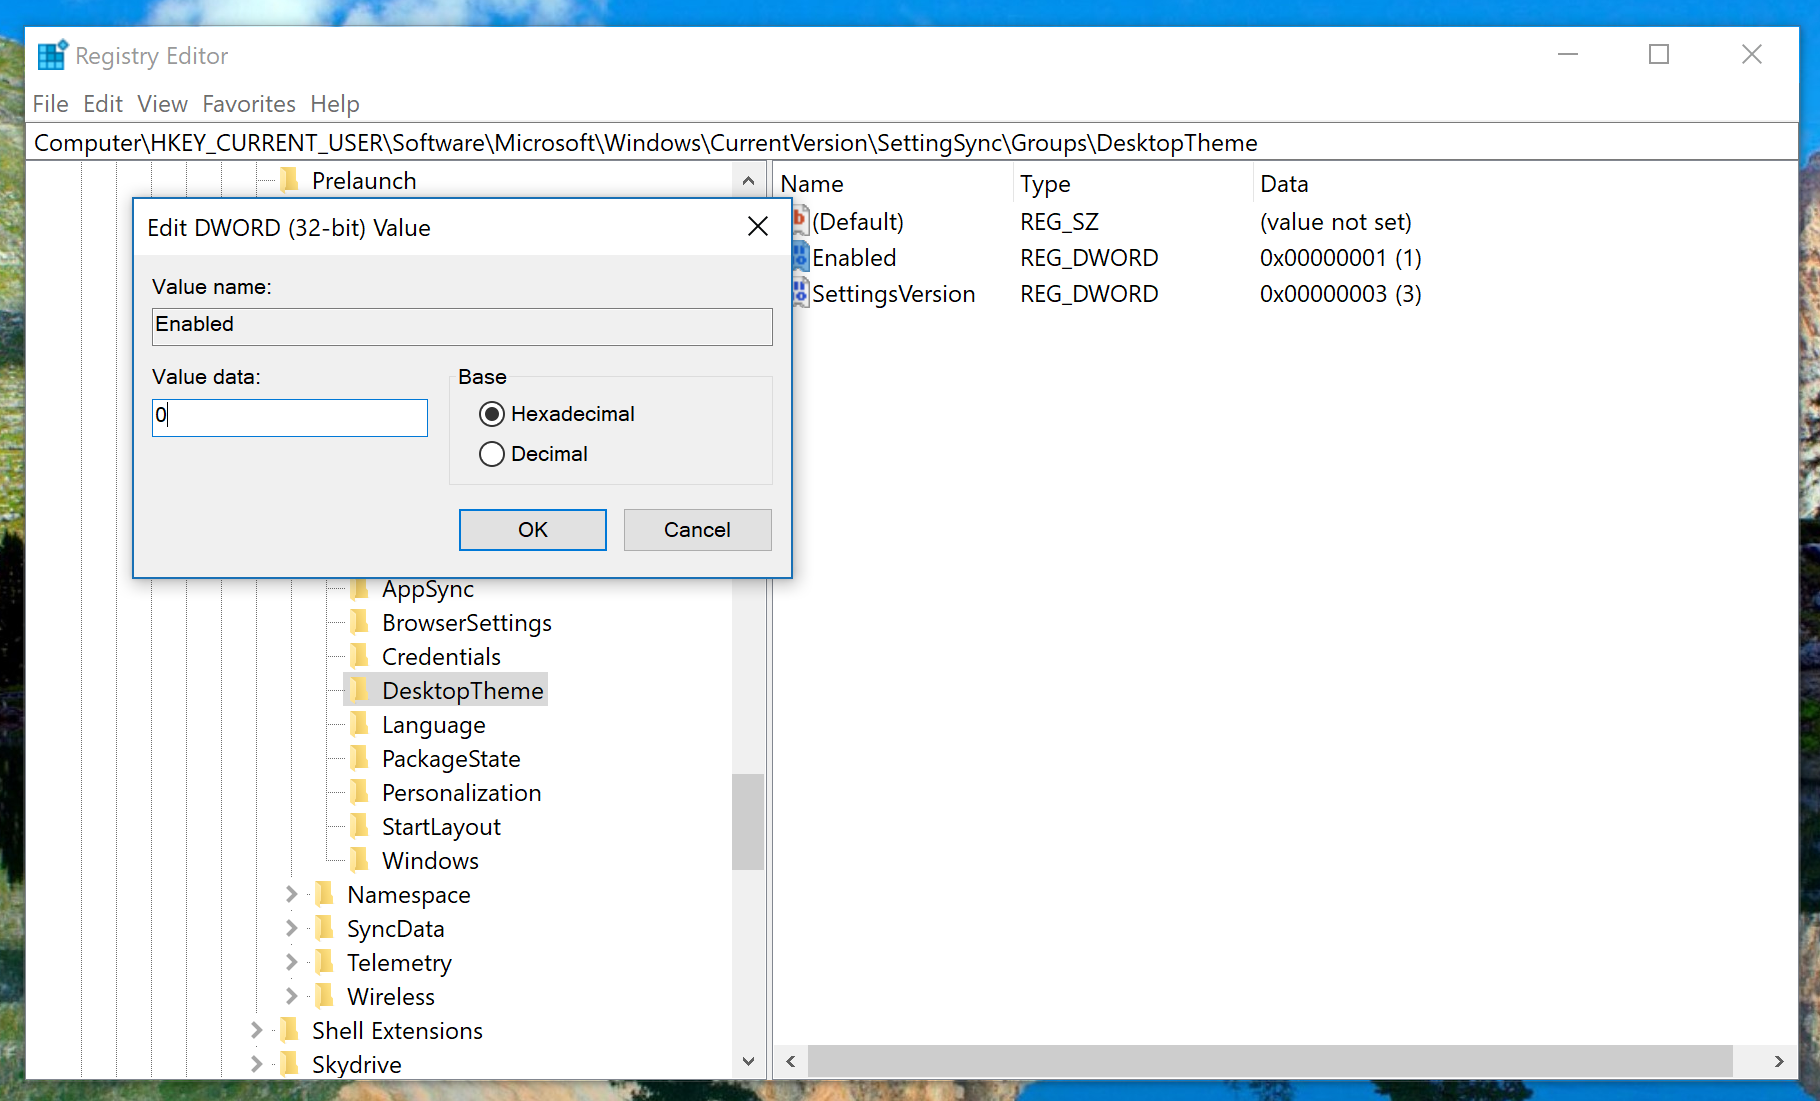
Next, navigate to this key: HKEY_CURRENT_USER\Software\Microsoft\Windows\CurrentVersion\SettingSync\Groups and then you’ll see a bunch of different keys listed under “Groups” available like shown in the image below. You can click on each of those keys—depending on what you want to turn on or off—and have it highlighted so you can see the options for it available in the right side pane.
Once you can see the option for it in the right pane, double-click the mouse on the “Enabled” link.
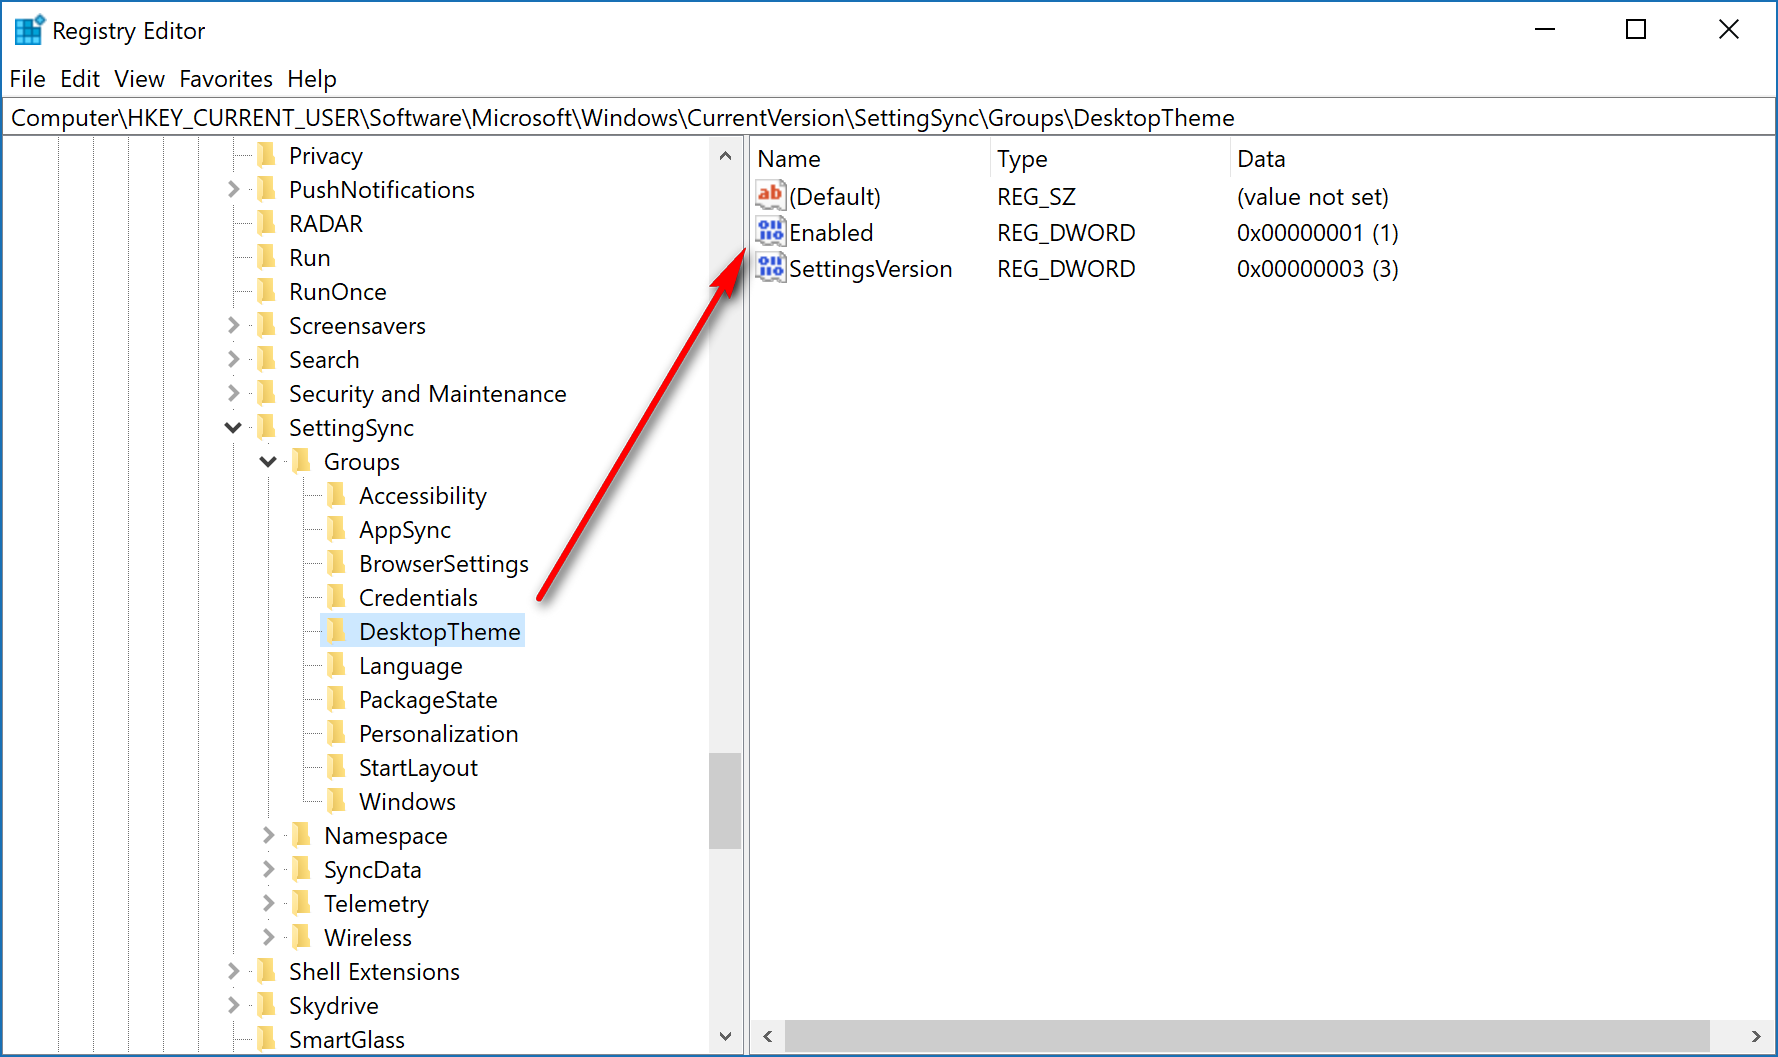
It opens up the “DWORD” box and allows you to make edits to the existing DWORD value. In the example, I’ve used the “Desktop Theme.” If you change the “Value data” to “0,” it disables the desktop theme from syncing. If you keep the value set on “1,” it keeps the syncing enabled. Apply that same strategy to each entry to enable or disable the one’s you want from the Group key’s sub-entries.
Given that many people never even tried Windows 8, it’s fair to say that anything sync related in Windows is going to be a new experience for many individuals who are just settling into the Windows 10 environment. Microsoft seemingly loves the idea of users having Microsoft accounts as we head into the future, and one of the upsides of that is its ability to have settings synced. The sooner you get to know how to sync your settings the better.


