 Email article
The world of data encrypting is a pretty complicated thing, and there is often more to it than meets the eye. That is one of the reasons why there is currently no built-in encryption from the Microsoft-owned BitLocker in the edition of Windows 10 Home whereas the other editions such as Windows 10 Professional and Enterprise do have it.
Windows 10 Professional and Windows 10 Enterprise come with BitLocker encryption for drives because a lot of the people using the Pro edition are professionals in real life and a lot of the people using the Enterprise edition are people who either own or work for companies. Notwithstanding, it would be inaccurate to assume that working professionals were the only ones’ using something like the Pro edition of Windows 10. In reality, the Pro edition of Windows 10 comes with many of the top of the line laptops that run Windows, and lots of people buy expensive laptops who aren’t necessarily professionals—they might just have a lot of money and be interested in buying what they consider to be a worthy laptop. You won’t find a Surface Book that doesn’t come with Windows 10 Pro, for example, but you will find plenty of Surface Book owners who only use their laptops outside of work hours. We see the same thing happen with the iPhone all the time. How many people actually play graphically demanding games or need the processing power of a top-end smartphone like the iPhone? I would argue probably nobody that I’m personally familiar with, but they’ll buy that iPhone instead because they don’t want to be seen walking down the streets of Manhattan with a Moto G4 Play—or whatever might be a lot more practical for their needs.
Nonprofessionals having full drive encryption can be a bit of a problem. There are a lot of I.T. Professionals out there who won’t recommend you encrypt your data because it can create more trouble than it’s worth. For instance, if something goes wrong with your operating system, you might lose the chance to decrypt the data, and then you have lost everything. So you need to ask yourself: does this data that for some reason I’m wanting to encrypt really need to be encrypted or am I being a little bit paranoid? If you have some essential stuff that you don’t want other people seeing (like perhaps your Social Security and tax information), then it’s fine to go ahead and encrypt it. But you might want to think twice before going to the trouble of encrypting a full drive unless it’s with encryption software that you 100% trust or that drive does contain a lot of essential business related stuff on it and you know for sure where to get access to the recovery key.
There are a couple of obvious reasons why encrypting data like your Social Security number makes sense. For starters, it’s information that you can find out again later, even if you do lose it. And secondly, you don’t need to encrypt the entire drive just to encrypt that small amount of data. You can just choose to encrypt the individual file or folder instead.
Unlike the BitLocker encryption that comes with Windows 10 Pro and Windows 10 Enterprise editions only, there is a way for all of you Windows 10 Home users to encrypt single files and folders as well directly from the existing operating system without you needing to install anything extra.
How to encrypt a single file or folder in Windows 10
You can encrypt a single file or folder anywhere that your Windows 10 operating system lets you put it. You can have the file or folder on your desktop, or you can keep it anywhere within the File Explorer. To get started, locate the file or folder and then right-click on it and click on the “Properties” link from the menu.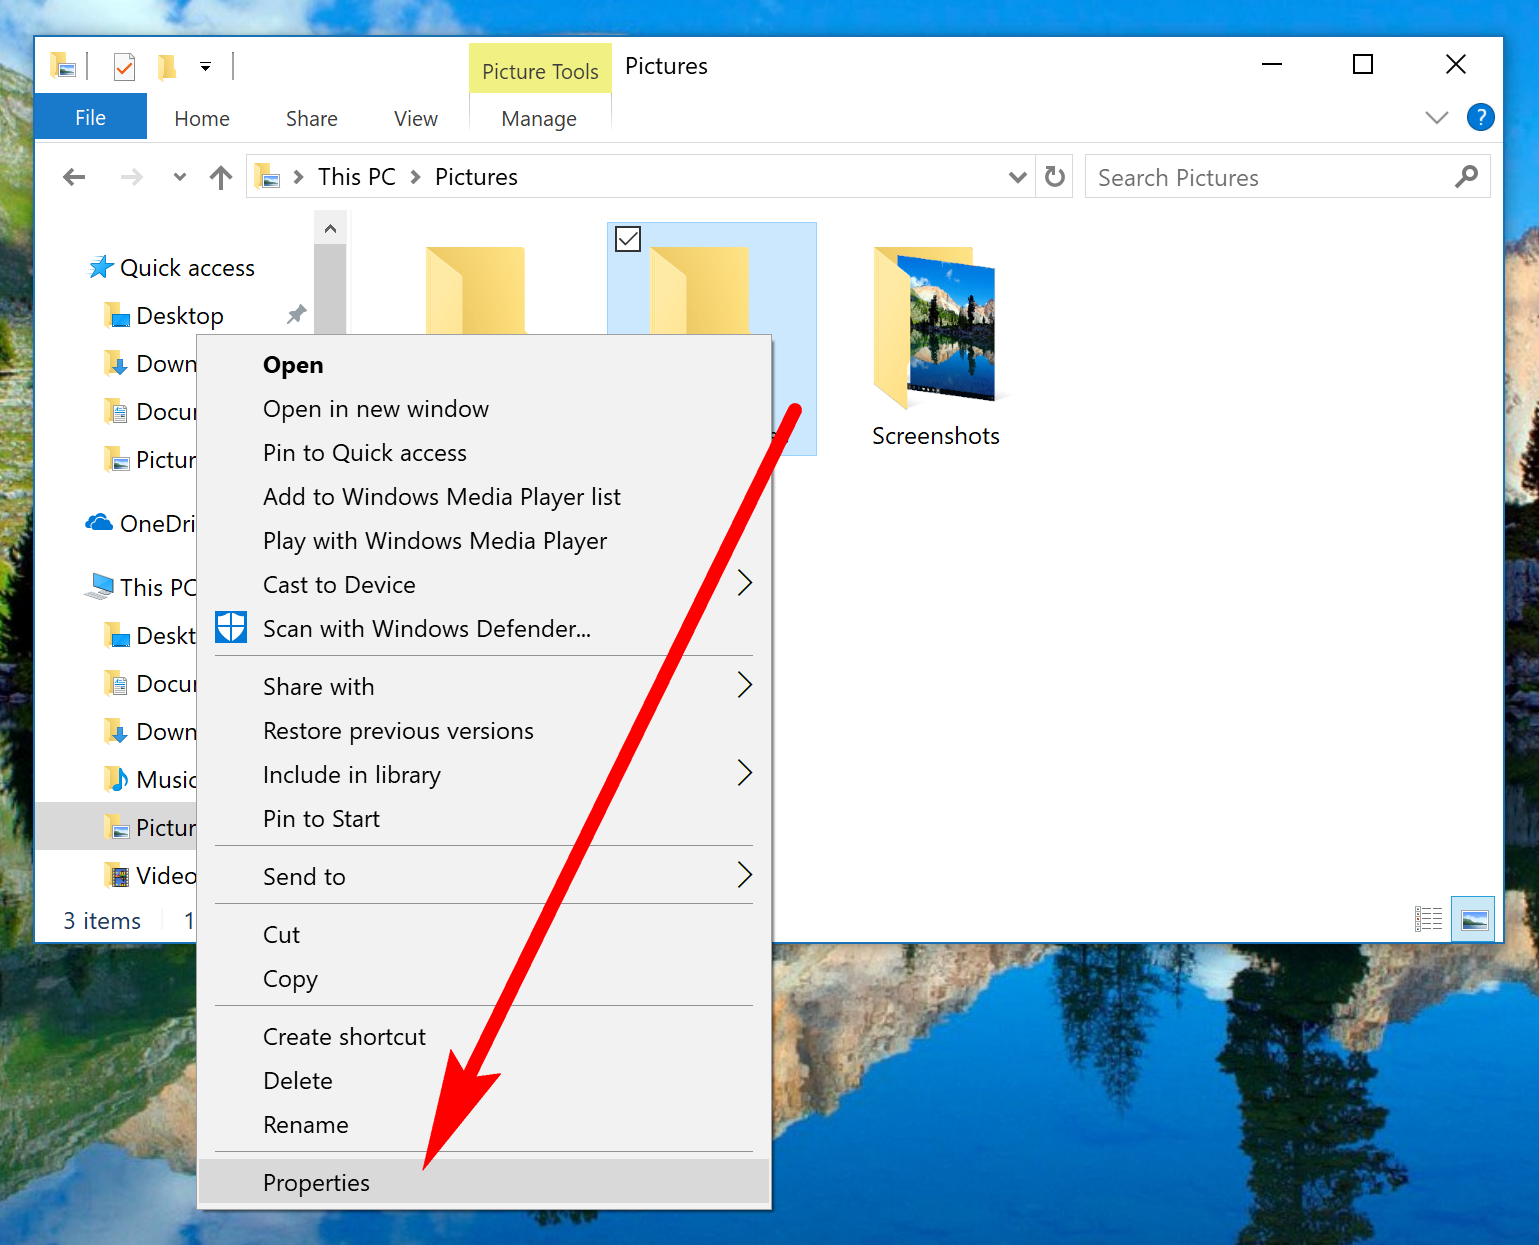
Keep it within the General tab and then click on the “Advanced” button where it gives the Attributes.
Under the Compress or Encrypt attributes heading, put a checkmark in the checkbox next to the “Encrypt contents to secure data” entry.
Click on the “OK” button when that’s done.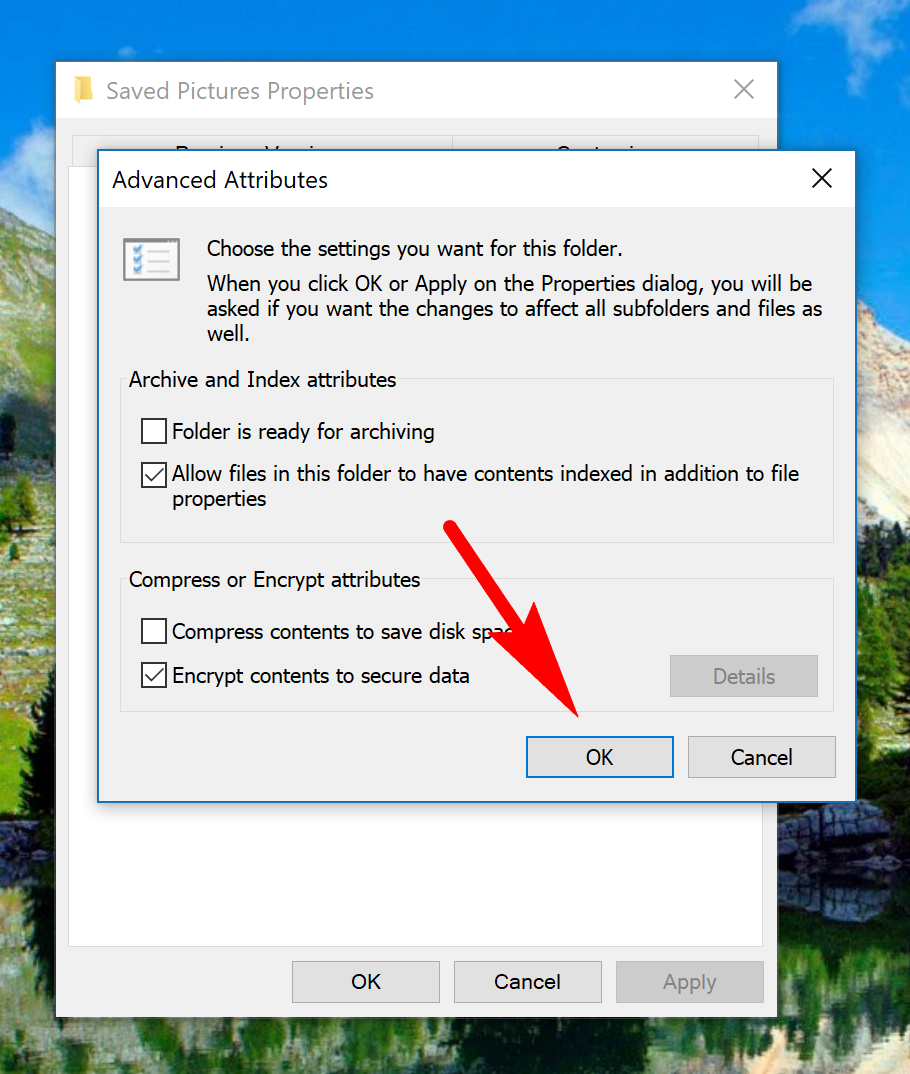
Click on the “Apply” button from the Saved Pictures Properties dialog box that is still open on the computer.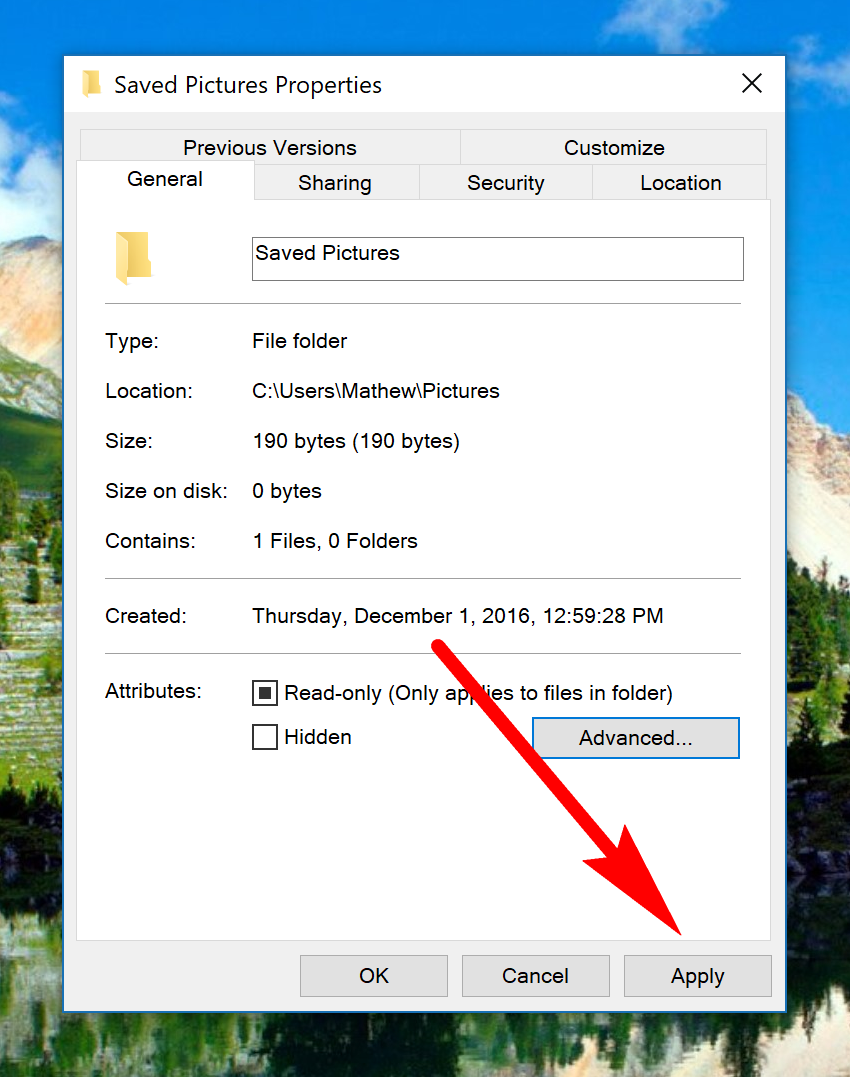
Windows 10 then gives you a message letting you know that you are choosing to make the following attribute changes and lists the attribute that you have decided to change. In this case that’s the “encrypt” attribute. You can see it in the picture below highlighted in the yellow area. Beneath that is an option for you to choose whether you would like to apply the change to the folder only, or to the folder as well as any subfolders and files that might be attached to that folder. In my case, it doesn’t matter because I only have the pictures within the one folder, but if you have any subfolders coming from that folder, then you might want to also apply the changes to it.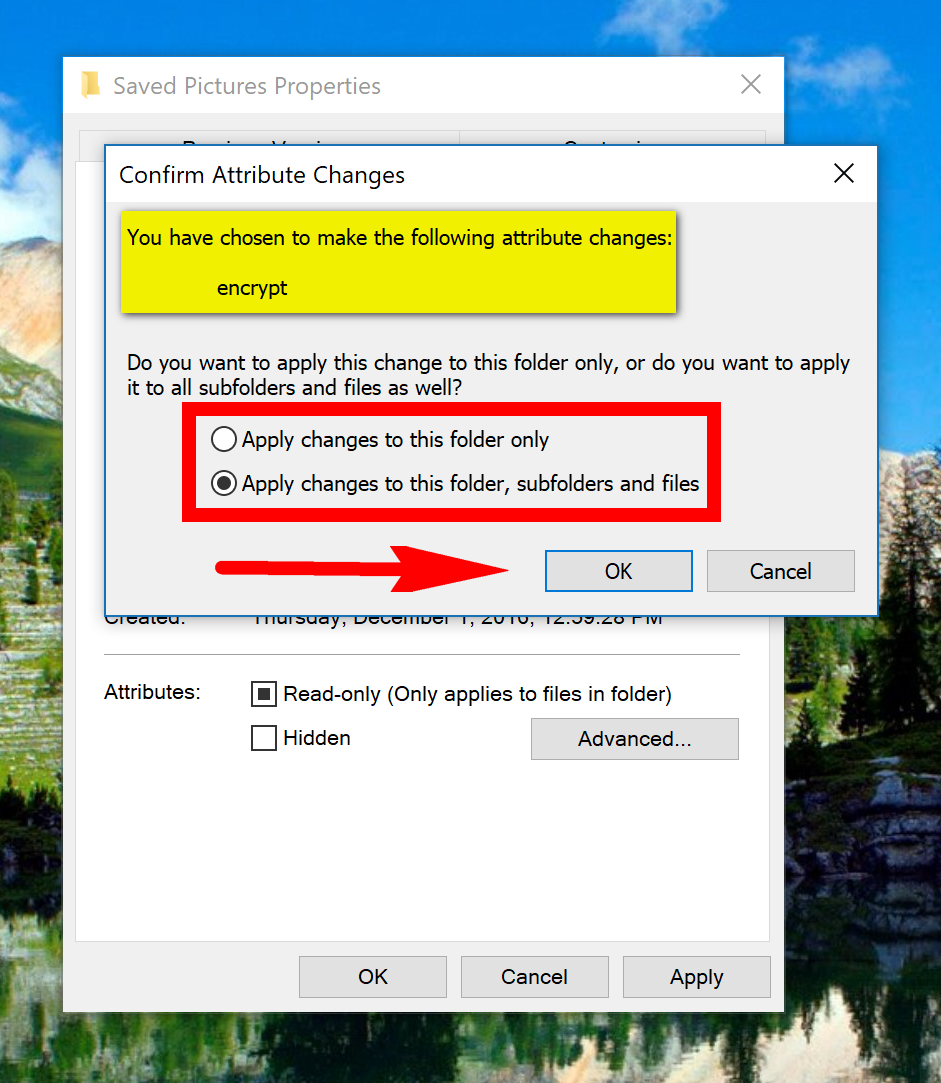
Once you’ve clicked on the “OK” button in the step above, Windows 10 then offers a little message in the bottom right corner of the screen for backing up the file that you have just encrypted. It’s a good idea to back up the file just in case something happens to the existing file that you’ve encrypted, and you are unable to decrypt it. That’s how people wind up losing the data. Always back it up to at least one place, and try a couple of locations like an external SD card and Microsoft OneDrive or Google Drive if you have something of importance that you really don’t want to lose. You could password protect the backup copy, so it requires a password to open the file if you chose to put it in the cloud. That stops any prying eyes.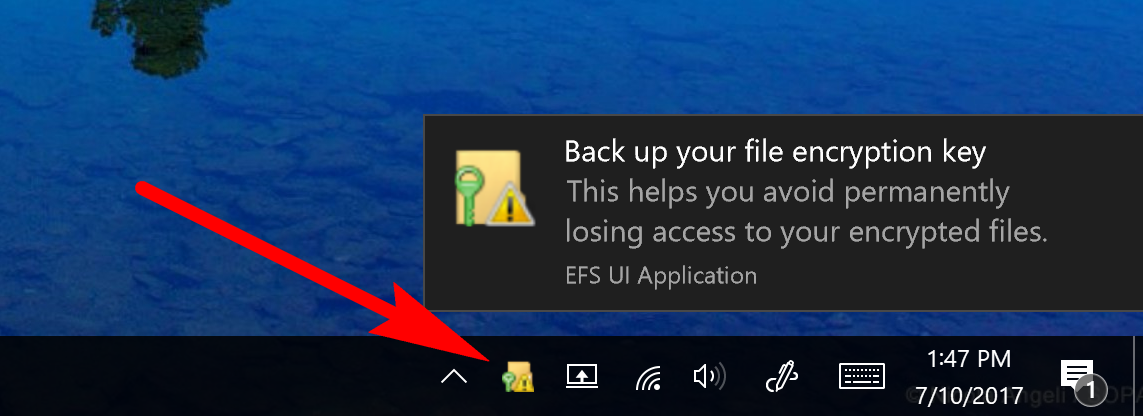
If you don’t manage to click on it, you can click the small arrow icon to the far left side of the system tray, and you’ll find it available amongst your other icons that didn’t quite fit into the system tray and had been tucked away in this area for you to use instead.![]()
The file or folder is now encrypted, but unlike when you use BitLocker, there is no padlock image on the file or folder once it is successfully done. You’re just going to have to remember what you encrypted and what you didn’t if that information is of any importance to you moving forward.
Also well worth mentioning is that Windows 10 offers a way for you to always backup what you have just chosen to encrypt by using the Certificate Manager tool (known as Crtmgr.msc for short.) To open up the tool, you just type “Crtmgr.msc” into the search box in the taskbar and then click on the “Certmgr.msc Microsoft Common Console Document” that becomes available under the Best match section.

When inside the Certificate Manager, click on the “Personal” folder from the Cert Manager’s left side pane.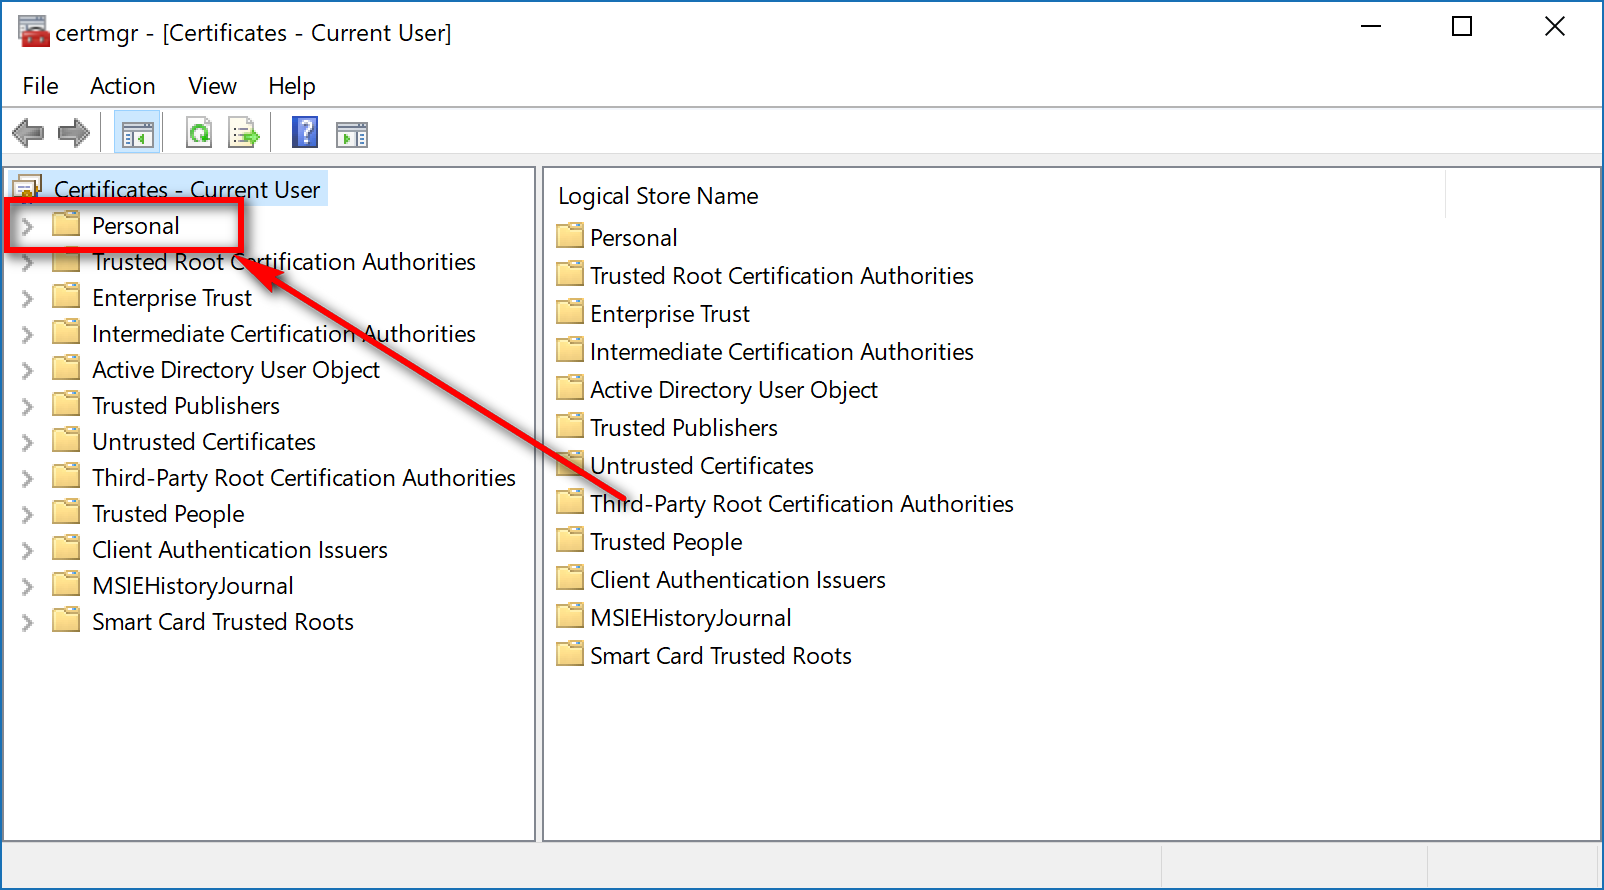
Click on the “Certificates” folder in the right side pane.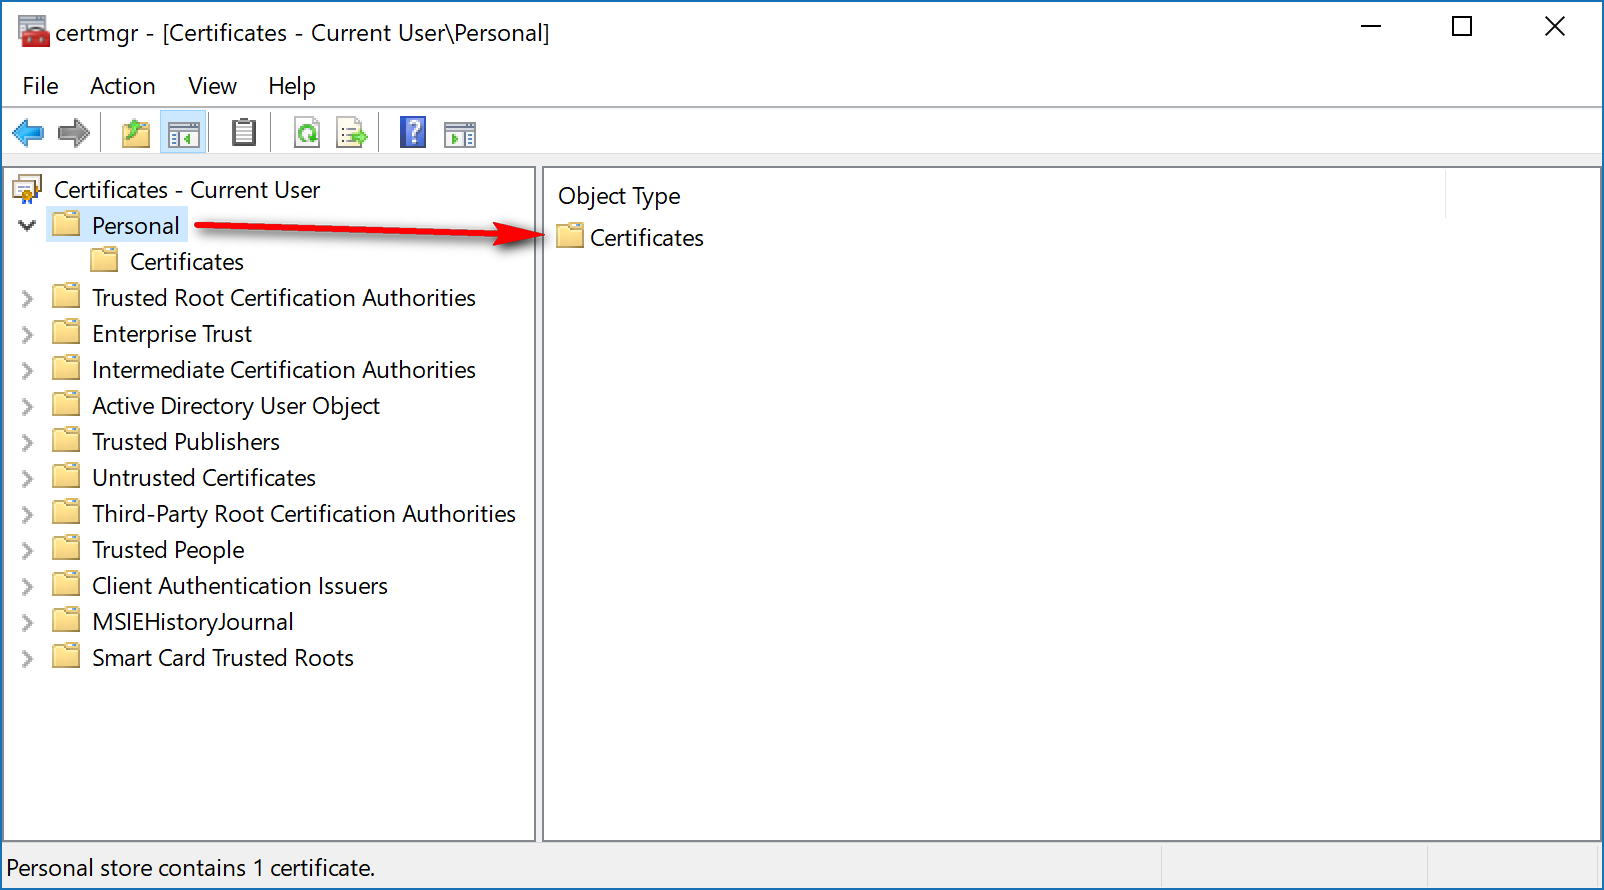
Highlight the certificate that you want to backup. You highlight it by clicking on it once, and you know it is highlighted when it turns a blue color.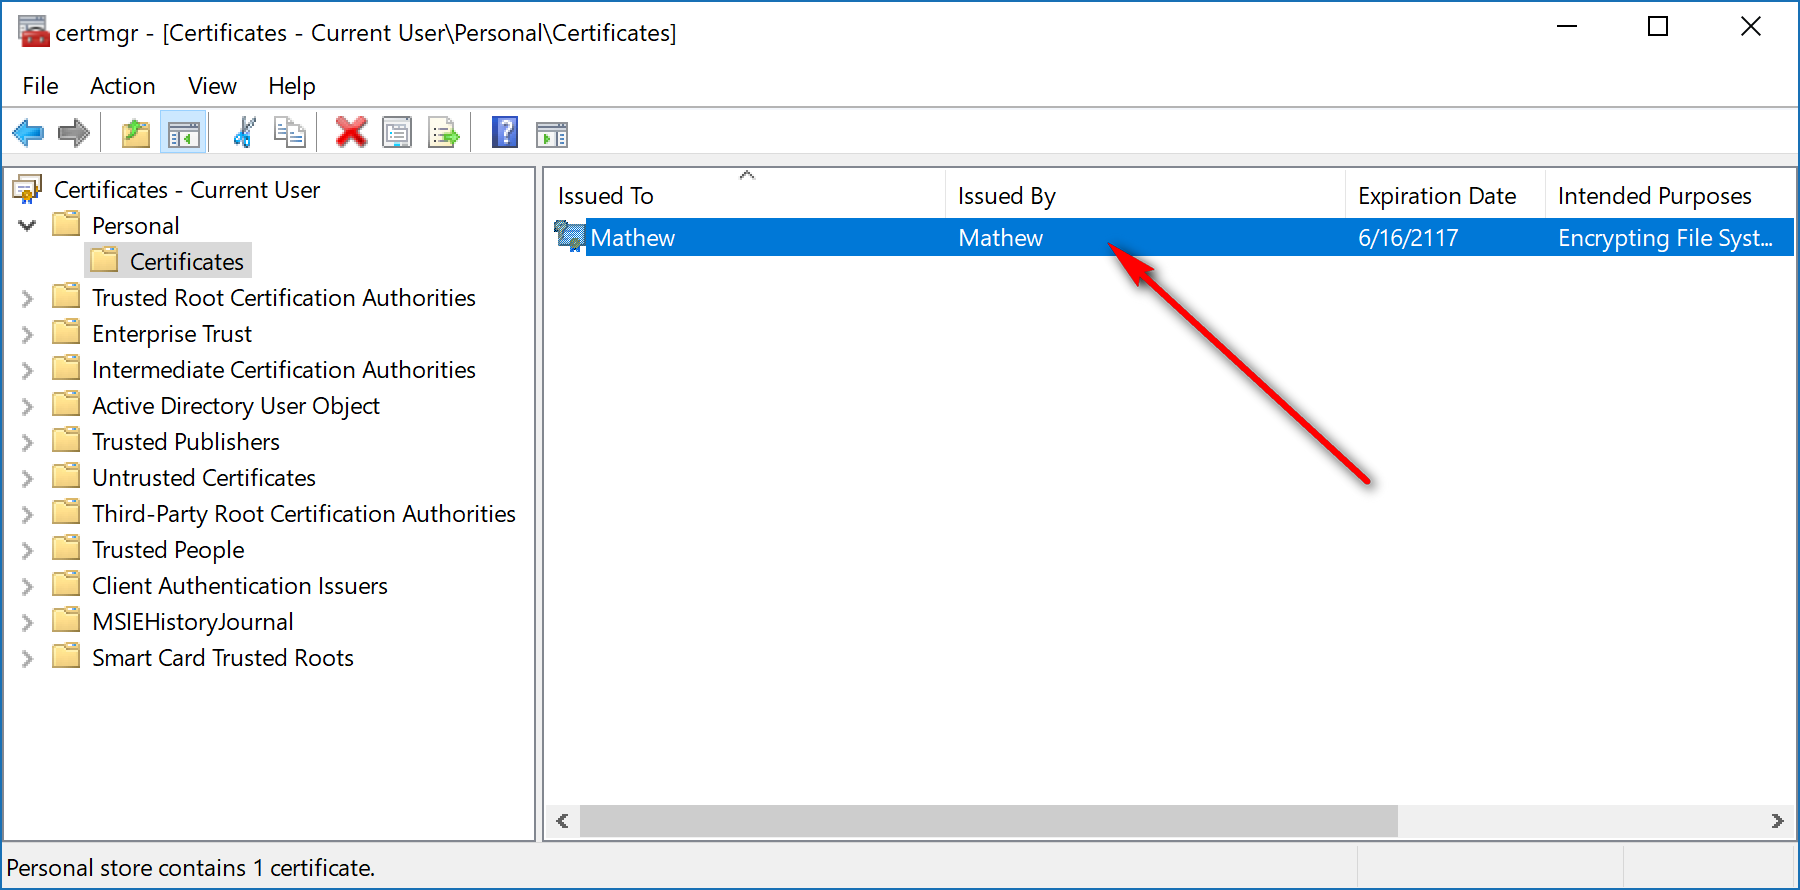
Next, click on the Action > All Tasks > Export from the menu and then it opens up the export wizard for you to export the file or folder that you are backing up.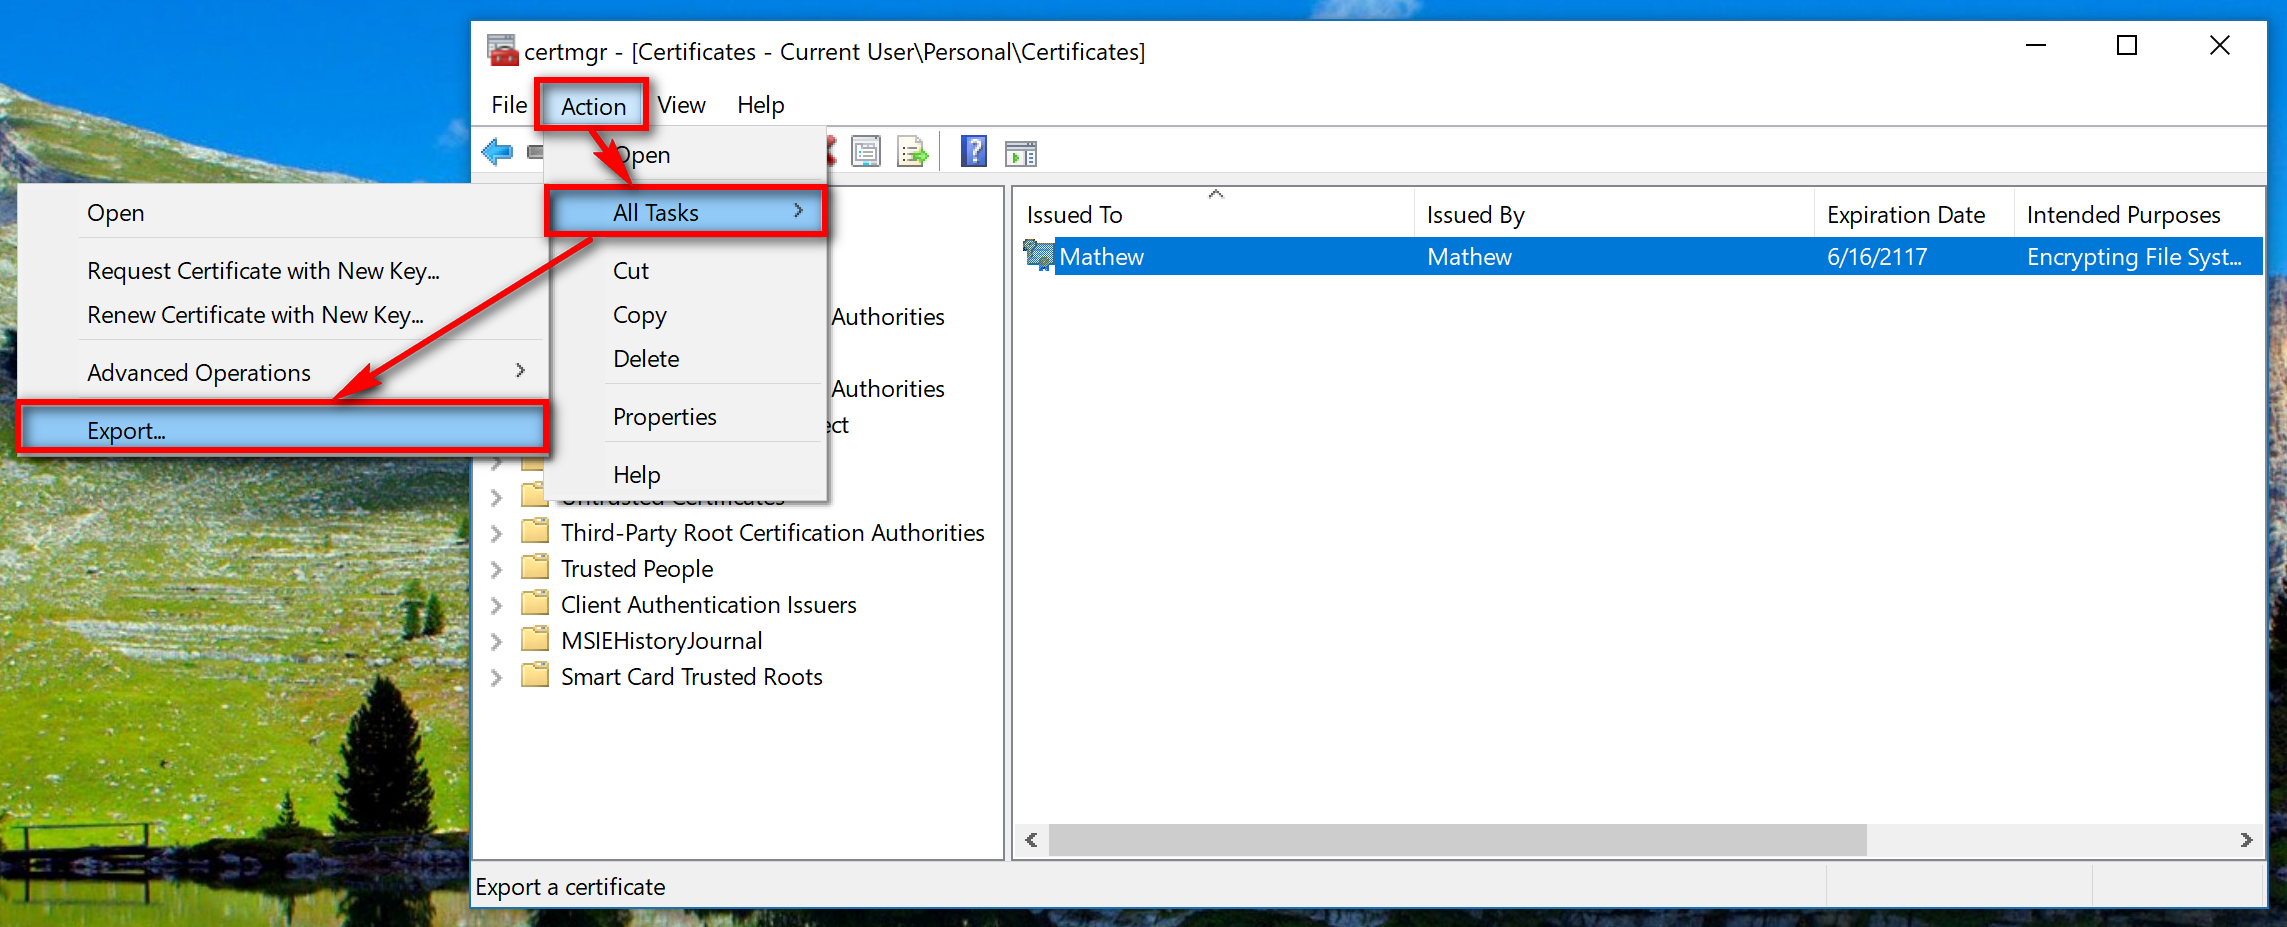
Click on the “Next” button at the bottom of the welcome screen.
The Certificate Export Wizard then gives you the option of either exporting the private key or not exporting the private key along with the file or folder. It’s highly recommended that you choose the “Yes, export the private key” so that your file or folder is then password protected.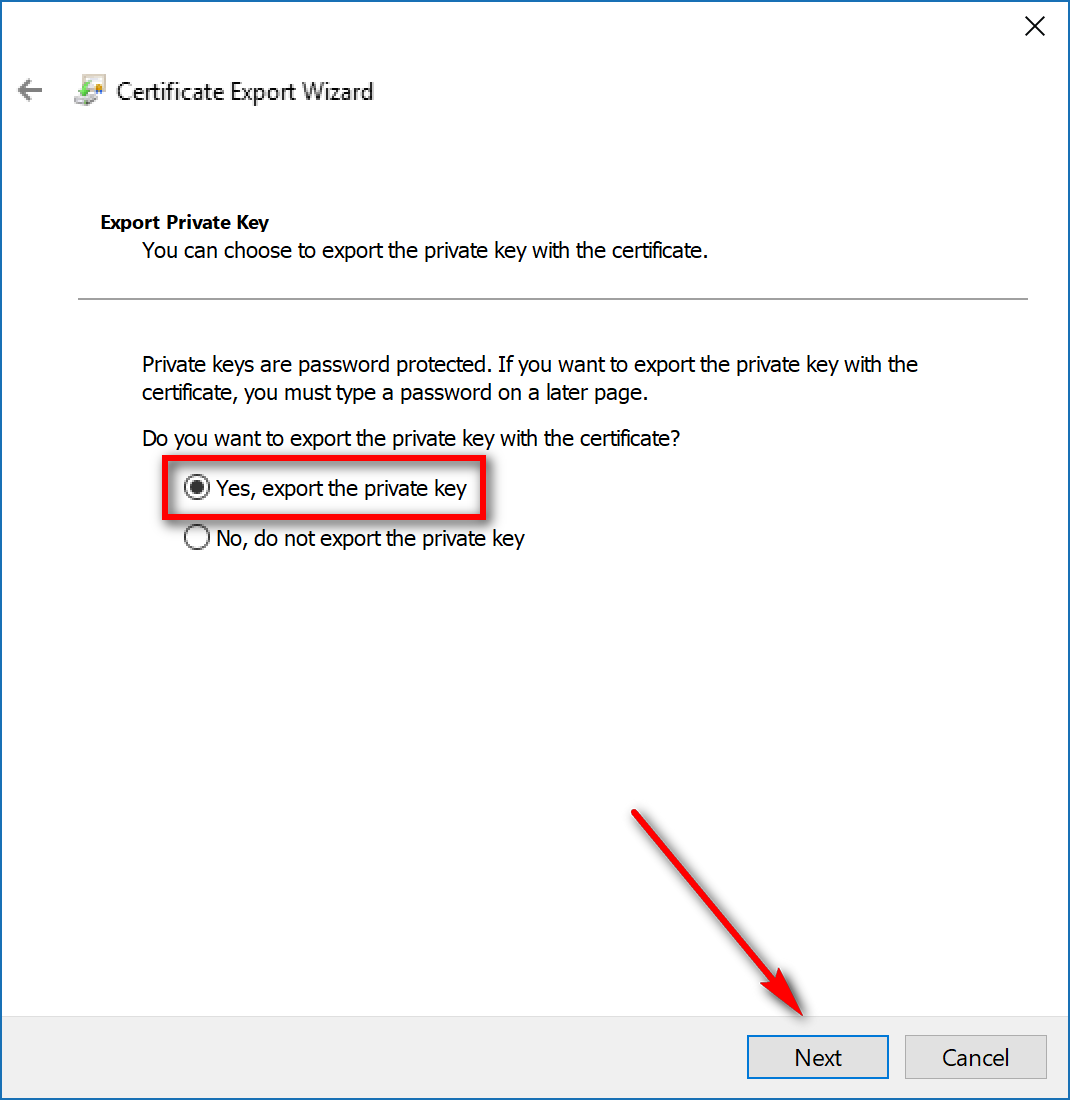
Leave everything as is on this page and then click on the “Next” button once again.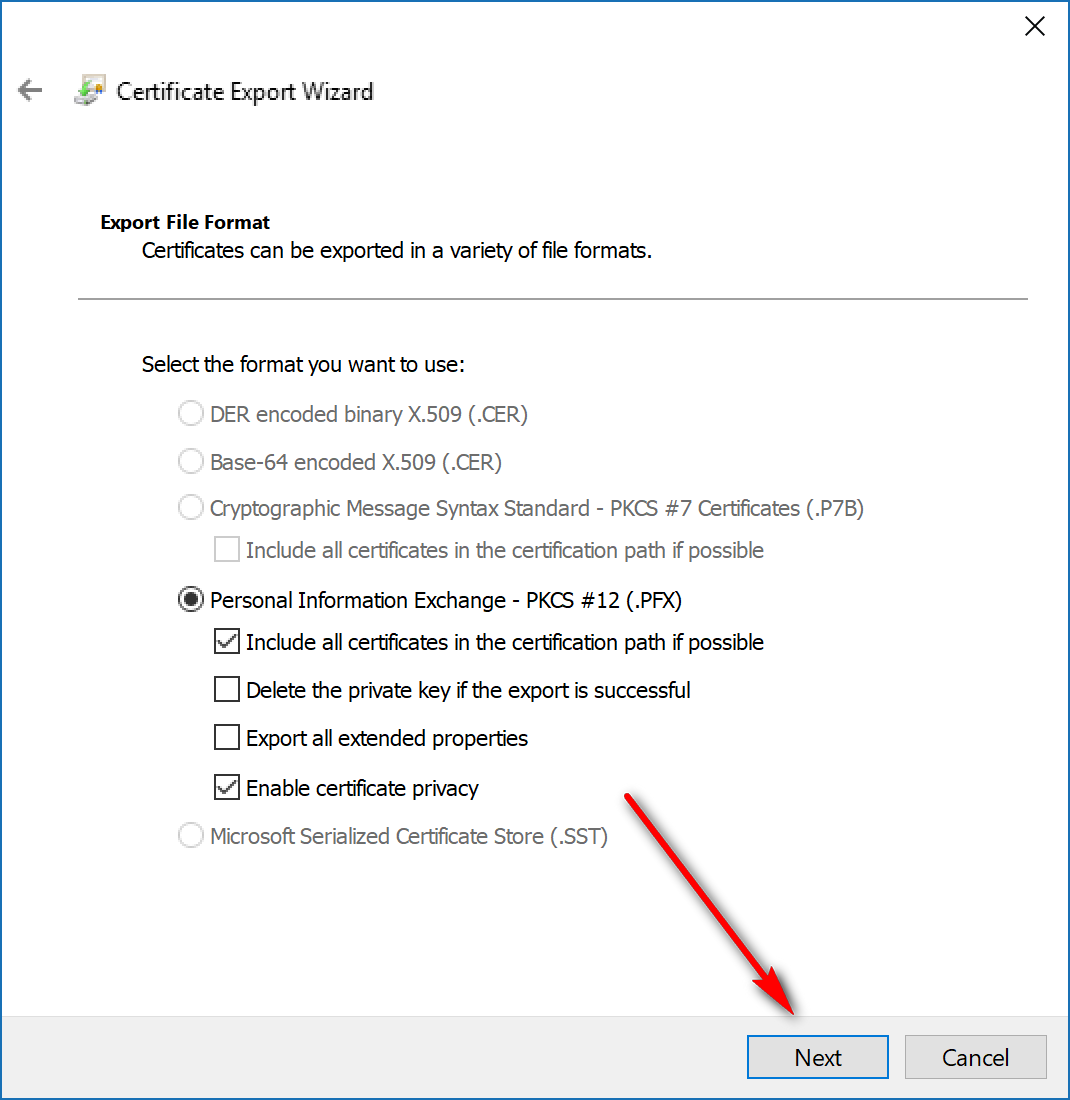
If you did choose to password protect the file or folder a couple of steps ago, it is here where it now gives you the chance of adding the password to it that you want to help keep it secure. Most passwords are recommended to be at least eight digits if you want to keep it properly safe and secure.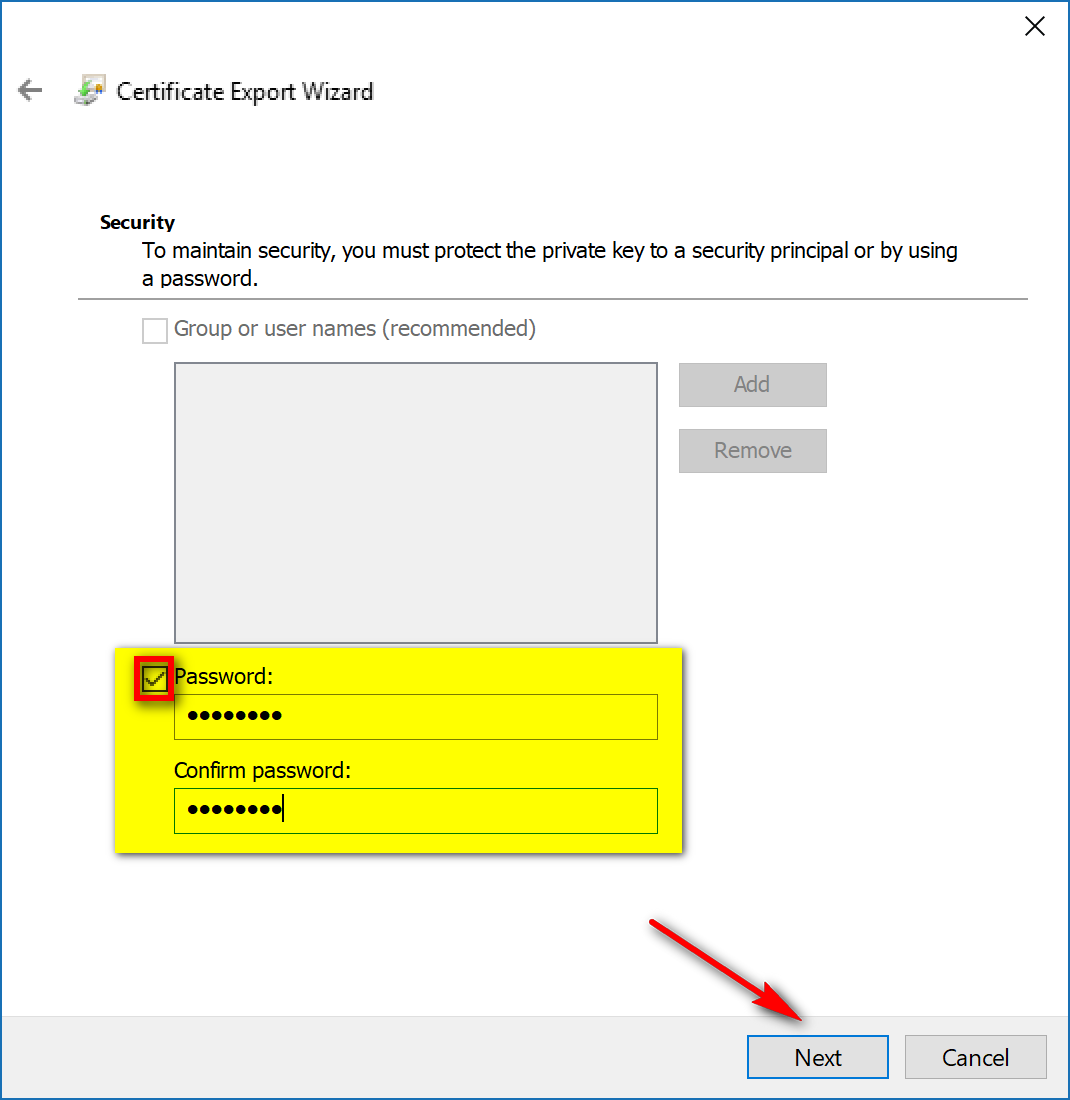
Next, type the name of the file or folder or click on the “Browse” button and browse the computer’s drives or desktop for it. Once the right name is added, click on the “Next” button. You’ll need to make sure that you use the same file or folder name that you originally encrypted.
Click on the “Finish” button to close the Certificate Export Wizard.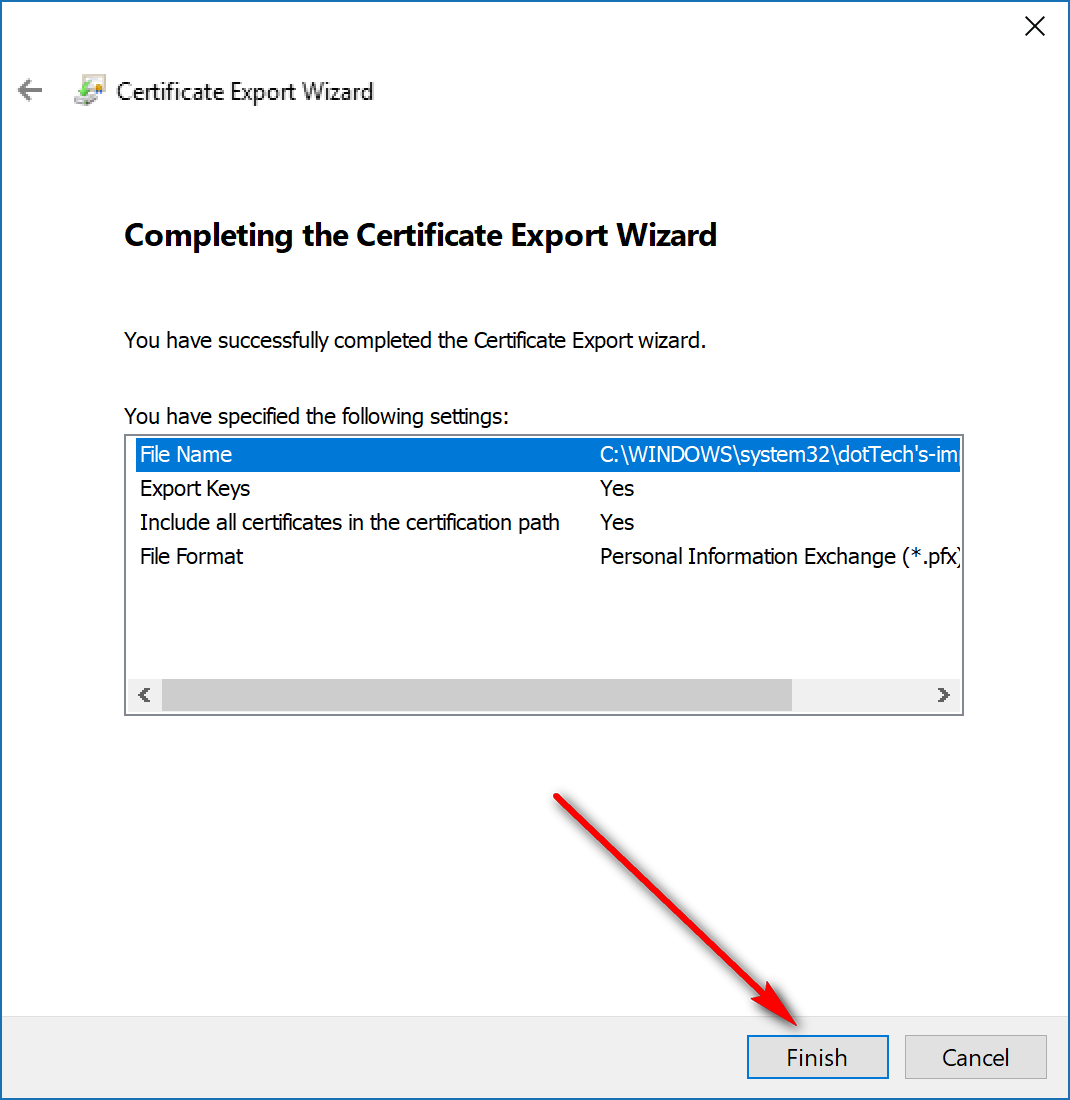
You’ll get a message letting you know that the “export was successful, ” and the file should now be on your desktop. You can upload that to your cloud storage or transfer it to an external SD card storage when you connect it to the computer.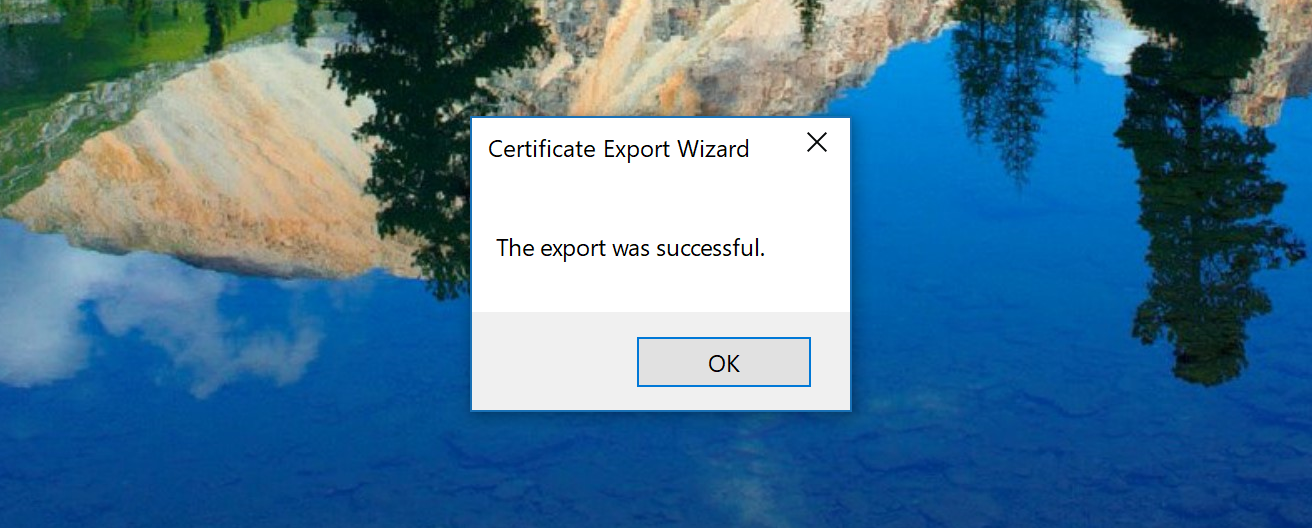
Encrypting files isn’t just about keeping out customs when you travel, or the government and NSA; you’ll want to consider encrypting your files just in case you lose your laptop, and it falls into someone else’s hands. You won’t get the laptop you lost back that way, but at least it stops anyone from being able to view your files that might contain sensitive information you don’t want anyone else seeing. If you are going to devote some time to learn how to encrypt something (as of today), I would recommend that you learn the guide above for encrypting files and folders.


