 Email article
Windows 10 is a lot different to older versions of Windows since Bill Gates is no longer in charge; however, you’ll still find many of the same features available that you have known for a long time—one of those is System Restore. The Windows System Restore has been a feature around since Windows ME. It allows users to snapshot system files and then restore them later if they were having a problem with Windows—just like rolling back the clock before the problem started and then using the computer again before the problem arises. There have been some changes lately though that include new features in Windows. The presence of the new system recovery features make the System Restore more expandable than it used to be.
System Protection is a feature in Windows 10 that you can get access to after choosing to configure the System Restore from the Control Panel. Users should use the System Protection so that the computer is always saving system files and settings. The option is already turned on by default in Windows 10 for many people, so not everyone has to do anything for it to be working. With System Protection working, the files are saved in restore points. These restore points get created when something of significance happens in Windows 10, such as the installation of a new tool, program, application, and so on. If nothing of any significance has happened on the computer for a while, the restore point will get automatically created every seven days as well, so you don’t have to worry about doing anything that Windows considers worthwhile just to get the restore point working.

The System Restore and the System Protection features compliment each other. If the System Protection has updated your version of Windows to something you don’t want to have or your current version of Windows that has been saved by the System Protection has an issue, you then use the System Restore to roll back to an earlier time and use that version of Windows instead. Although, you can only do that with the System Restore if you have the System Protection turned on first.
That said, Windows 10 makes it possible to disable the System Protection and thus make system restoring unavailable if a user should wish to do that. It’s not recommended by us to do that unless you have a particular case where it makes sense because you may want to take a System Restore one day and will find it impossible to do so. You shouldn’t solely rely on the chance of making system restore as your backups or system images. There are some times when it can leave you without data—for example if you need to restore the computer back to a time that is before you had installed something that you required on the computer, and it’s the only restore point available for getting the computer working again. That’s why you should still be familiar with backing up and system images (Macrium Reflect is a great tool for the latter.) But the option for taking system restore is still a feature that many people have known from Windows for a long time, and they enjoy it still being around.
There are a few more things that you should know about System Protection’s features. You can only use it if you have booted the operating system like you normally would use the operating system; it doesn’t work in Safe Mode. Also, any files that are stored in your user account on the C: drive are not affected by System Protection as Windows sees these as associated with your personal user account files only. What’s more, the System Protection only works if your drive is formatted with the NTFS file system.
One thing to note before following the guide: Microsoft has rolled out two different settings for the System Protection on computers. Some people are finding that it is turned on by default and other people are concluding that it is turned off by default. If your computer is like my desktop, then it will be turned on already. If your computer is like my laptop, then it will be turned off, and you might prefer skipping to the bottom of this article after opening the System Properties box to avoid confusion.
How to Enable/Disable System Protection for Drives in Windows 10
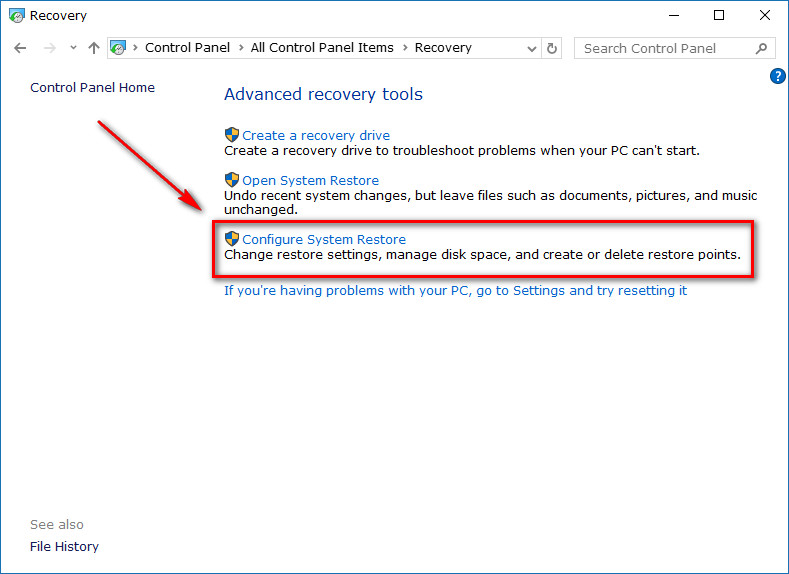
Start by opening the Control Panel and then click on the “Recovery” link from the menu. It opens you up to the Advanced recovery tools menu where you get three more links. Click on the one that says “Configure System Restore” to find the System Protection area.
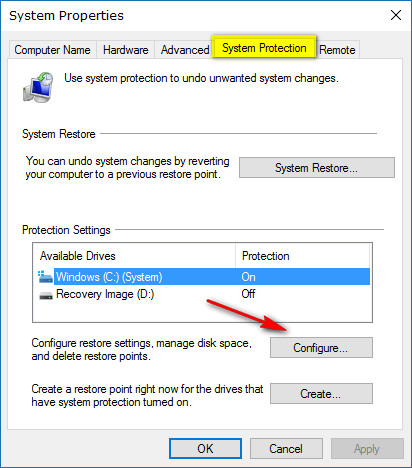
Make sure the “System Protection” tab is selected at the top from the System Properties dialog box, choose the C: drive from the Protection Settings and then click on the “Configure” button available beneath it.
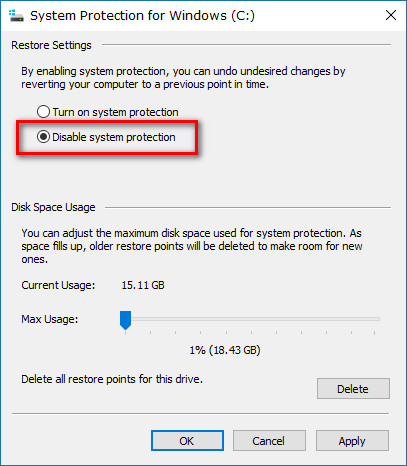
Select the “Disable system protection” under the Restore Settings and then click on the “Apply” and “OK” buttons to disable the System Protection for the drive.
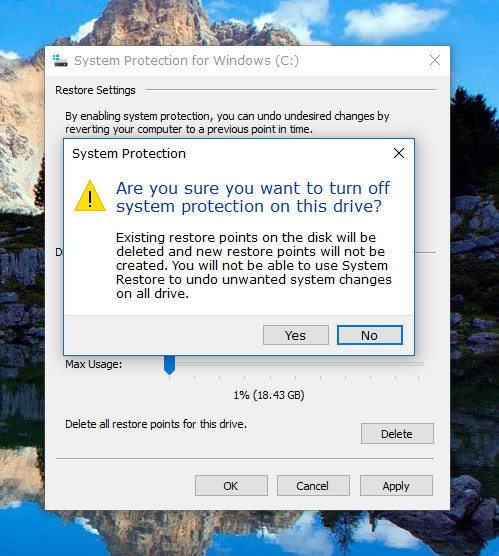
You’ll get another notice about System Protection that you need to click “Yes” to proceed with disabling it.
Turning off the System Protection means you will lose all of the existing restore points that have been taken up until this time. No new restore points are created until you turn this feature back on again in the future, so the option of rolling back is gone for now.
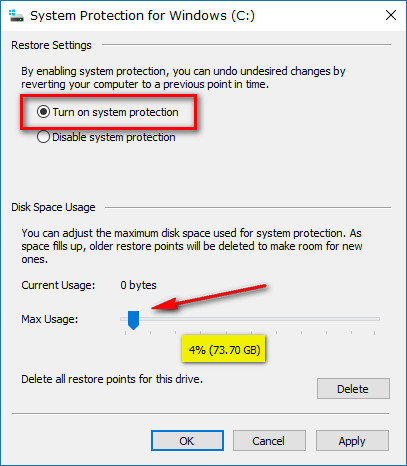
If you ever want to turn the System Protection back on again in the future, then you just need to go back to the Restore Settings and change it to “Turn on system protection.” When you do, it gives you the chance to set the “Max Usage” meter as well. You’ll need to change that to 4% of you want it to be using the same setting that it was on before you started.
If you do have a computer that has the System protect turned off by default instead of on like mine was in the example above, you’ll be seeing the same System Properties dialog box as below instead. There isn’t really any difference in what you need to do apart from a click on the C: drive so that it is highlighted and then click on the “Configure” button beneath it. You’ll now configure it the same way as the steps above demonstrated.

Without the restore points being created by System Protection in Windows 10, there is no option for System Restoring available. Knowing how to enable and disable the System Restore feature becomes a lot easier once you understand that. Microsoft hasn’t spoken or written publicly why they seem to have stopped the System Restore feature from being enabled on many computers (a hint that they might be looking at different ideas in future versions), and the rumors that Windows is stopping File History for backups doesn’t help in making people feel like their computers are going to be safe heading forward. But for now, at least, you still have the option of turning on the System Protection for taking the restore points to help your PC stay out of trouble.


