 Email article
Although its rare, every once in a while some Windows system files will become corrupted and report errors. You will be receiving messages of missing DLL files or some other errors indicating that a system file has been corrupted. A restart often fixes the problem but if it doesn’t, you can use the System File Checker which attempts to repair your Windows files while the system is running. Read our guide below to learn how to run System File Checker on Windows XP, Vista, 7, 8, and 8.1 to fix corrupt system files.
How To Fix Corrupt System Files with System File Checker on Windows XP, Vista, 7, 8, and 8.1
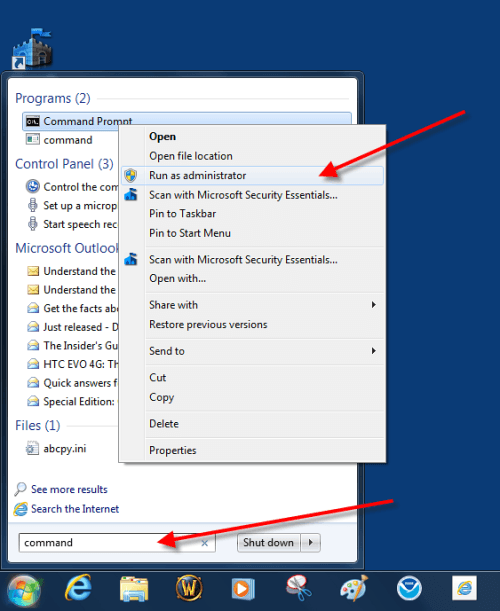
Step 1: To get started, search for command prompt from the start menu and open it. Windows Vista and 7 users will have to right click on it and choose “Run as Administrator“. Windows 8 and 8.1 users will have to search for command prompt via Start screen and right-click or long-tip and “Run as Administrator“.
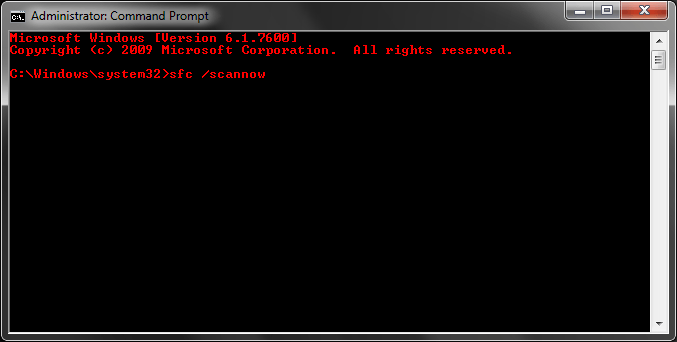
Step 2: Once the command prompt window opens, type: sfc /scannow and hit Enter. Make sure that there’s a space between sfc and /scannow .
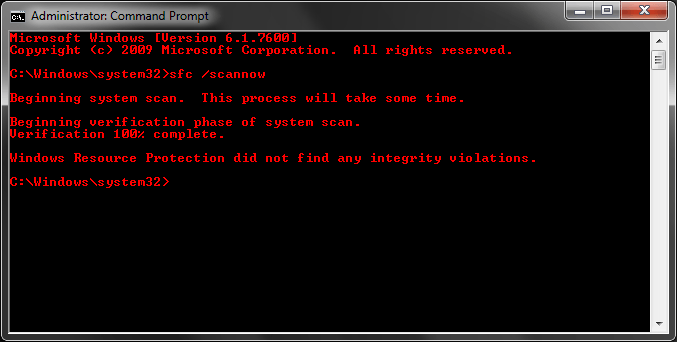
Step 3: Now the system scan will begin scanning for corrupted files and repair it if necessary.

Step 4: Once the system scan is done, a message will appear whether any system file was corrupted. To exit the command prompt, simply close the window.
Conclusion
The System File Checker scans for any system files or dll errors and attempts to fix it without forcing a system reboot. If you’ve done all virus checks, troubleshooting and defragging and if Windows still reports errors, you can use the System File Checker.


