 It’s not a nice feeling when you are trying to help somebody you don’t share the same physical space with, because you are unable to actually interact with their computer and most of the time people can’t explain their problem properly. Asking them to take some screenshots or record their screen can help, but asking them to install some software as a fix to an assumption you’re making could carry more problems than it solves.
Fortunately, Microsoft decided to have mercy on their users and created a program called Steps Recorder (also known as Problem Steps Recorder) for Windows 7 and 8, and this guide shows you how to use it.
BEFORE WE BEGIN
Steps Recorder is, essentially, a screen recording program that allows you to automatically take screenshots (it doesn’t record video) at particular steps:
Steps Recorder is able to automatically capture any steps you take on a PC, including a text description of what you did and a picture of the screen during each step (a screenshot). Once you capture these steps, you can save them to a file that can be sent to other people. This can be helpful if you’re trying to show someone how to do a certain task or troubleshoot a problem with a support professional.
You can use Steps Recorder to create guides you would give to someone help to follow or to create a call-for-help demonstration you can give to the person helping you troubleshoot whatever problem you are having.
Take note Steps Recorder is only available on Windows 7 and higher, meaning Windows 7 and 8. You cannot use it on Windows XP, Vista, etc. — Microsoft explains why not. In short, apparently the executable doesn’t work on older versions of Windows, though there are some downloads around the web featuring a working solution, it didn’t work for me on Windows Vista SP2. You can try it yourself, just be safe with what you download.
Other things to note:
- If you are running Windows 7 you can launch the program from the Start menu button, type psr in the search box and hit Enter. For Windows 8 go to the Charms bar, click on Search, and type psr to bring it up.
- A simpler way for both systems is just running it through Windows Key + R, type psr and click OK.
That said, let’s being…
HOW TO RECORD SCREEN ON WINDOWS 7 AND 8
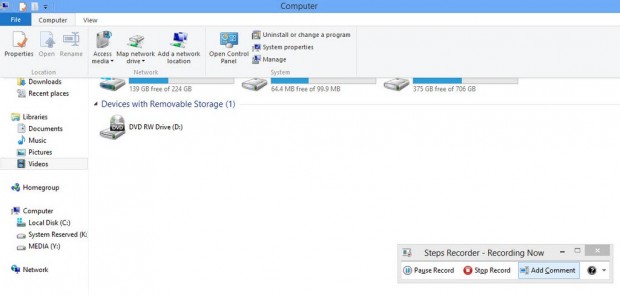
When you launch Steps Recover, you will see a tiny window like the above. It’s what we get with Steps Recover, simple but proven effective.
The program has three main features:
– Start Record. From the moment you click this option, every time you go to another menu, window or program, Steps Recorder will take a screenshot and record key information. E.g. If you do a left or right click, the name of the program or directory you were at, etc.
– Stop Record. Simple as that.
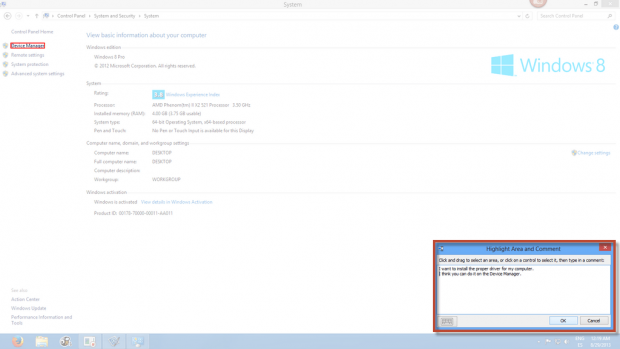
– Add Comment. If you notice something that could be helpful in order for others to help you with your problem, be sure to click this option and add relevant information about the directory you’re at. However, your comment won’t show in the screenshots, it will be part of the text recording.
To begin record, hit the Start Record button. You can go to any window or program you think would be relevant for the guide or call-for-help you are creating and Steps Recorder will automatically take care of the screenshots and writing down your activity.
Along the way, you can manually add comments about anything you’d like.
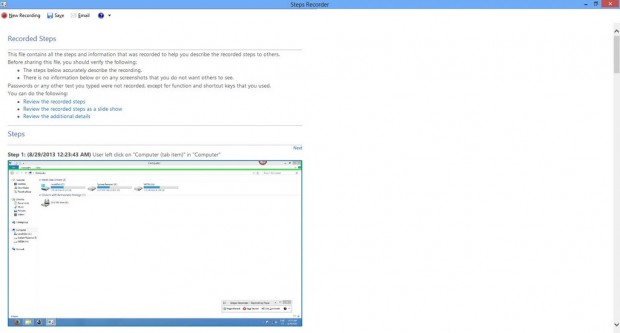
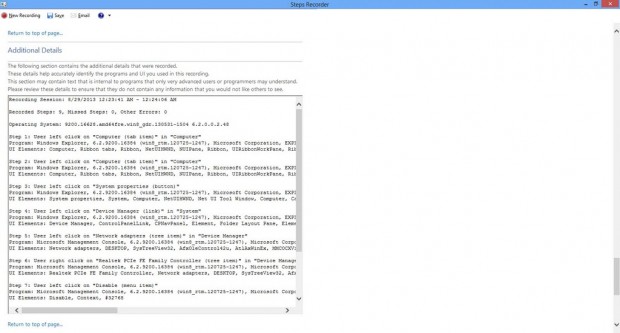
When you’re done, click Stop Record and the program will stop recording and open the log of your recording. You’ll see screenshots, time signatures, directories and programs you accessed to as well as any click you did.
At the top of this window you can see the Save option; select a directory and a name for your file and it will be saved as a ZIP file.
Inside the ZIP you find a MHTML (.mht) document you (or whomever you send the ZIP file to) can open natively with Internet Explorer. If you want to open it in Firefox or Chrome, you will need to install an add-on (Firefox) or extension (Chrome). You can also load the file into Microsoft Word.
The size of the file will depend on how long your screen recording session was, but it should generally be a lightweight file (around 1-2 MB if the recording wasn’t too long), so you won’t run into troubles when trying to send it or receiving it on email. If you do, you can always use cl0ud storage to help transfer the file to whomever you want to send it to.
CONCLUSION
Steps Recorder not only it makes it easy for the regular user to describe a troublesome situation in a graphical manner (by using screenshots) but is also convienent to the person that’s willing to help. It can also be used to create step-by-step guides to try to help others, as opposed to get help.
While I would’ve liked it to have more functionality, such as the ability to insert text on screen, using a more friendly output format, and the ability to record video, Steps Recorder does just fine for what it is.
Have you ever needed to give/receive remote tech help? If so, what is the app you used? Let us know in the comments below!

 Email article


