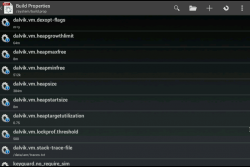
 Tired of seeing ‘This app is incompatible with your device’ in the Play Store? Say no more! With this guide, you’ll learn how to change your device’s build.prop file. By doing this, you’ll trick your device into thinking it’s another device. Let’s get started!
Disclaimer: This guide is intended as a helpful “how to”. dotTech and its writers are not responsible for any gain or loss (including but not limited to bricked devices) incurred as a result of following this guide. Editing your Android build.prop file is an unofficial process and, while it works if done correctly, contains certain risks, such as loss of data or bricked devices. Proceed at your own risk.
BEFORE WE BEGIN
This guide requires root. If you do not have root, go root your Android device and then revisit this guide.
To make this guide as easy to understand as possible, we’ll be using Build Prop Editor. Download it and install it to your Android device. You can install the app by visiting this link or searching for Build Prop Editor in the Google Play Store.
Use Clockworkmod or TWRP to make a complete backup of your Android device as this may not work for you.
Back up your original build.prop file. Do this by installing Root Browser, navigating to /system/ and copying/pasting your build.prop file to /sdcard/. You can install Root Browser by visiting this link or searching for Root Browser in the Google Play Store.
HOW TO EDIT ANDROID’S BUILD.PROP FILE
- After making a recovery backup, backing up your build.prop file, open up Build Properties Editor and locate ‘ro.product.model‘.
- If your Android device runs Android 2.3.6 Gingerbread do the following .Whatever ro.product.model currently says, change it so that after the = sign, change the field from what it currently says to ‘Nexus S‘.
ro.product.model=Nexus S
- After setting ro.product.model to Nexus S, find ‘ro.product.manufacturer‘ and change whatever ro.product.manufacturer currently says after the = sign to ‘samsung‘.
ro.product.manufacturer=samsung
- If your Android device runs Android 4.1 or 4.2 Jelly Bean do the following . Whatever ro.product.model= currently says, change it so that after the = sign, change the field from what it currently says to ‘Nexus 4‘.
ro.product.model=Nexus 4
- After setting ro.product.model to Nexus 4, find ‘ro.product.manufacturer‘ and change whatever ro.product.manufacturer currently says after the = sign to ‘LGE’.
ro.product.manufacturer=LGE
- After changing ro.product.model and ro.product.manufacturer, navigate to system settings, apps,then Google Play Store and wipe it’s cache and data.
- Once you’ve wiped the cache, reboot your device.
- After rebooting, open the Play Store. The Google Play Store should now think your device is either a Nexus S or a Nexus 4 (depending on which part of the guide you’ve followed).
Done!
CONCLUSION
Android is a great mobile os, but is sometimes very limiting to people who own lesser-known devices. Luckily, with this guide, you’ve learned how to trick Android/Google Play into thinking you have a more supported device. This should open the door to you being able to install a lot more apps. Enjoy!

 Email article


