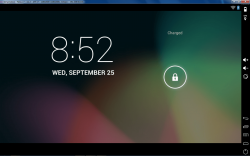
 The term emulator is well known, namely for software that allows you to play retro console games on a modern system. More importantly, emulators are software apps that allow you to simulate a particular device while taking full advantage of the system you’re running them on. They have many different uses, one of the most common is that they are used by devs as a testing tool. Genymotion is a cross-platform Android emulator that is founded on an existing open-source project (AndroVM). It runs on Windows, Linux and Mac and allows you to experience the Android OS on any of the aforementioned platforms.
What is it and what does it do
Main Functionality
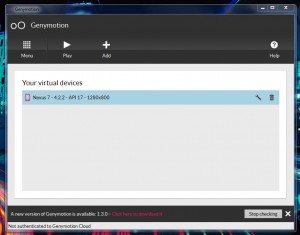 Unlike the Android emulator that comes with the official SDK, Genymotion is very easy to use. Of course, an Android emulator is most beneficial to mobile app developers, but even so anyone could use one. For example, you could check out new apps in a safe environment before installing them on your device(s). You could even try out one of the new versions of the Android OS if you’re more accustomed to an older version. Genymotion uses virtual snapshots of existing devices through VirtualBox. Long story short, this enables you to emulate the experience you would have on a real device such as the Nexus 7, Nexus S, Nexus One Jelly Bean or generic tablets.
Take note Genymotion works on Windows, Mac OS X, and Linux. We specifically reviewed the Windows version.
Pros
- A fully working Android emulator thats much easier to setup and uses than a lot of other offerings
- Several different virtual devices to choose from including the Nexus 7, Nexus One Jelly Bean and more
- All Android devices are pre-rooted
- You don’t need the Android SDK package to get this emulator up and running, but you will need it to install apps and perform advanced functions
- All components work properly, including the internet connection (shows up as Wi-Fi)
- The install package comes with all the necessary components (including VirtualBox) unless you choose an alternate package
Cons
- If you have a low end system the emulator is probably not going to run very well (low end includes anything with less than 2GB of RAM)
- It doesn’t come with support for Google Play apps and services, that includes the Google Play store
- It can be a bit difficult to sideload apps through the emulator if you don’t know what you’re doing
Setup
 Because there is a specific set of steps required to get Genymotion up and running, I decided to include this segment in my review. My hope is that it will aid some of you in getting a working copy of the emulator together.
To download the necessary files, you will need to register on the official Genymotion website. After you’ve registered you can download the software package. Unfortunately, registration is required to use the emulator since you sign-in when you actually launch Genymotion. You can’t avoid it, at least not if you want to use the emulator.
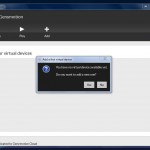 During your first run, you will need to select a virtual device image to download. You can choose any one you want from the list, it doesn’t really matter unless you’re a developer and you need to test a specific device or resolution. After you download the device image, you will need to deploy it by creating a new virtual device.
When you start the virtual device, you will then be asked to connect to the ADB console through the Android SDK. The latter step is optional, but I would definitely recommend following through with it.

That should be it. If everything was installed and setup correctly, you should be able to load your virtual device and start playing!
Discussion
Once you have deployed and created a virtual device, you can start using it at any time. It works just like any other Android device, as you’re essentially getting the same experience. I’m not going to go over all the particulars of the Android OS here and now.
I did notice that most of the virtual devices do not come with Google Play support. In fact, there doesn’t appear to be support for any Google services. That means if you want to take advantage of native Google apps you will need to install them yourself. Personally, I got my hands on a copy of the latest Google Play apk and installed it. You will need the Android SDK (ADB) to install apps (this is why I recommended connecting to the SDK during setup).
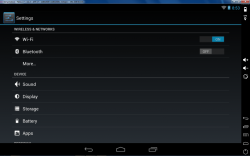
The device comes pre-rooted, and you can use all available features and functions. Even the Wi-Fi connection is registered and working, although it just connects through your primary network.
Also, Genymotion uses a combination of system RAM and virtualization techniques to run the emulator smoothly. If you don’t have virtualization enabled (where applicable) in your system BIOS settings you may experience slowdown. The same holds true if you have a limited amount of system RAM available. I would say this emulator is best suited for machines with more than 2GB of system RAM available.
Conclusion and download link
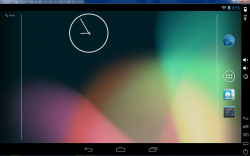 Genymotion is a very easy to use Android emulator that integrates with the system and allows you to experience using one of the virtual devices. It’s not difficult to setup at all, and you can pretty much get a virtual Android device up and running in about 20 minutes max. You will need to have the Android SDK (ADB) package installed on your machine in order to handle apk packages and perform specific functions on the virtual device. For the most part, it comes in working order though it’s devoid of Google Play and various Google services. If you’re looking for a full featured Android emulator, Genymotion is the way to go.
Price: Free
Version reviewed: 1.2.1
Supported OS: Windows 8/7/Vista/XP
Download size: 110MB
VirusTotal malware scan results: N/A (file too large)
Is it portable? No

 Email article


