A tag is a keyword that you can add to a group of saved photographs. They are a part of Window’s filtering system, and work on Windows Vista, 7, and 8. With tags added, you can organize and locate your photos and images more effectively. This guide shows you how to easily add tags to images and photos for free, without having to download a thing. Read on to learn more.
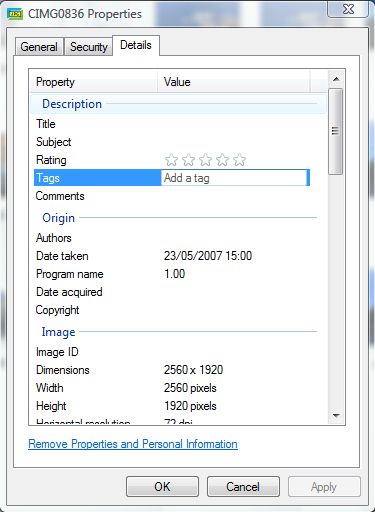
To add a tag to a single image, open Windows Explorer. Then right-click an image, and select Properties. That should open the window in the shot below.
From there move the cursor over Tags to open a box where you can input a tag title. Input a suitable tag for the photograph which should not match the file title. For example, if it’s a vacation photograph you could input something like holiday photo. Then click Apply and OK to add the tag.
However, it’s better to tag multiple photographs that are somehow linked. If you have a variety of holiday photographs saved, the holiday photos tag could be added to all the shots you took whilst on the same vacation. For that, you need to batch add tags.
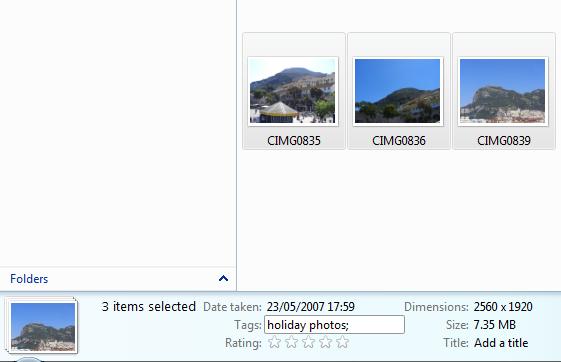
To add tags to multiple photos at a time (i.e. in batch), hold the Ctrl key and then select the photos from Windows Explorer. When multiple photos are selected, note the details pane at bottom of Windows Explorer. It includes a Tag property where you can add new tags to all the selected photos. Add a new tag for the photos there, and select the Save option.
When you add tags to multiple photos, you can then find the pictures with the associated tag. Go to the Start menu search box, and input the tag you added such holiday photos. For that you should input tag: holiday photos. Then Windows Explorer displays all the images with the holiday photos’ tag.
Or you can search within a Windows Explorer folder. Input tag: holiday photos into the search box at the top right of the Explorer window. That should then find matching tags within the folder.
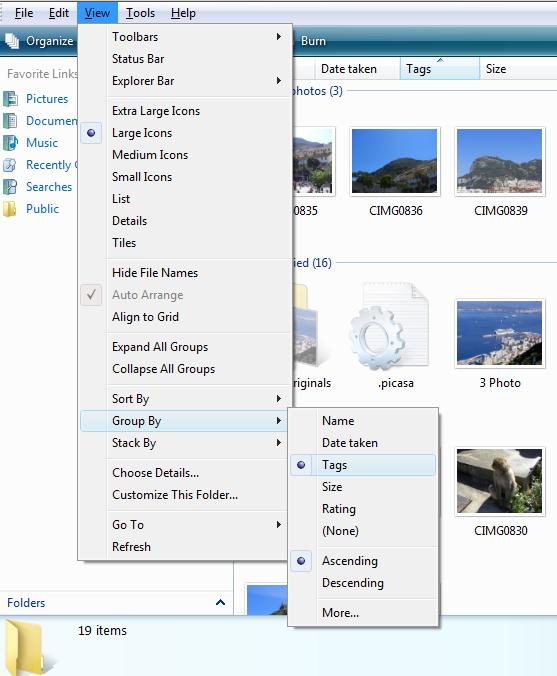
You can group the Windows Explorer photo thumbnails by tags. Press the Alt key to display the File menu bar at the top of Windows Explorer. Then select View > Group By > Tags. That groups the photos in ascending order by their tags.
Windows Explorer also includes filter options for tagged photographs. Select the Views’ option, and switch to Details. From the Tag column heading click the arrow on the right side of the heading to open, and select a check-box next to tag to filter.
Thus, photo tags provide more search and filter options for those files. With them you can sort your photos more effectively without adding additional folders.

 Email article


