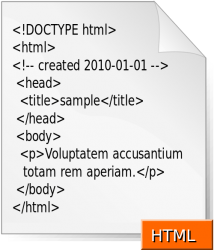
 There are plenty of website design software packages with which you can add site images without any HTML (Hyper-Text-Markup-Language). However, you can still edit the code with the software. Web designers enter HTML tags into HTML editor software. You can also add HTML image tags to blog posts. As such, image HTML tags offer plenty of design flexibility. These are the HTML tags for adding and formatting website images.
The basic HTML tag for adding images to websites is: <image src= “file.jpg”>. You should substitute file in that tag with the title of your image file. You should also include the image file format, such as JPEG or GIF, after the title. Note that if the image is not included within your HTML source folder, you should add the full subfolder path before the file title as well. For example:
<image src= “subfolder title/file.jpg”>
You can adjust the size of the images by adding height and width values to the HTML tag. You add the values within the inverted commas, and input higher or lower numbers to expand or reduce the size of the image. As such, the HTML tag is as follows:
<image src= “file.jpg” width = “300” height “300”>
You align the images much the same as text. Add <p align> tag before the image HTML. The p align tag equals left, right or center. The full HTML code would be:
<p align = “left”><image src= “file.jpg” width = “300” height “300”></p>
To further format an image, you can add a border to it. For that you add the border = “” tag within the image tag. Adding a larger number increases the border’s width. With that included, the full HTML tag is as follows:
<p align = “left”><image src= “file.jpg” width = “300” height “300” border = “3” ></p>
Also note that images can link to other parts of the website. To add an image link, you should insert <a href = “URL”> before the image HTML. You should substitute URL with the page address the link will open. The HTML should also include an alt = tag which makes image text visible when you place the cursor over them. Add a closing </a> tag at the end of the image HTML. The full HTML code would be:
<p align = “left”><a href = “URL”><image src= “file.jpg” width = “300” height “300” border = “3” alt = “Add image text here”></a></p>
Those are the basic HTML tags for inserting images, resizing, aligning and adding links and borders to them. You can copy (Ctrl + C) and paste (Ctrl + V) the code from here to your website design software, and then change their values.

 Email article


