 Email article
 Usually rooting guides aren’t too difficult now-a-days because of the abundance of third-party developers we have offering support combined with an Android open source operating system that’s always been easy to hack. Even though the new Android 5.0 Lollipop comes with heightened security, developers are still coming up with solutions for unlocking the system internals.
Anyway, now and then a toolkit comes out and when they do they offer hackers a great deal of joy because everything available all from the one package; thus making opening your device with root access even easier than earlier.
The Google nexus 10 comes with it’s own all-in-one- kit that is made by popular XDA Developer member Mskip, You might know the name from other kits for the Galaxy Nexus and the Nexus 7.
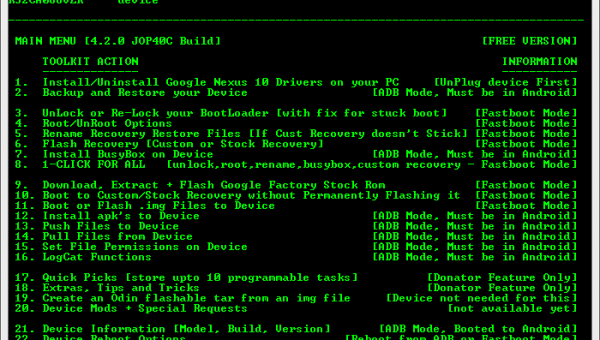
So, what do we mean when we say it offers everything in the one place? Inside you have the nexus 10 ADB and fastboot drivers, a dedicated option for locking and unlocking the bootloader, a button for flashing the custom recovery, a button for gaining root access, a Nandroid backup option, APK’s, other backup and restore options apart from the Nandroid, BusyBox, change extensions to tar files, reboots in fastboot and normal mode and a whole lot more. other standout features include Google stock images available from a folder, partition dumps, compressed zip files, renaming of recovery files for stock ROMs, boot in ClockworkMod Touch recovery without any other CWM files required and the ability to boot in download mode for flashing files.
Now that you know every that’s coming inside the toolkit it’s time to learn the steps for downloading the same to your computer. that way you can enjoy everything we mentioned and more for your giant tablet whenever you want to use something.
How to root the Nexus 10 with the all-in-one toolkit
- Download the SkipSoft toolkit from here.
- Download the file to the desktop of a Windows computer.
- Double click the icon to open the program.
- Click the ‘next’ button on the display for finalizing the installation.
- Click the icon from the desktop that’s readily available after the installation completes.
- Type ‘No” in the option box
- Select the “Enter’ option on the display to access the main menu
- From there you can see the different buttons available which allow you to perform different functions.
- Each option comes with a number. Type the number in the vacant area and then follow the set of on-screen instructions to finish the task you are choosing to complete.
Those wanting more can visit the same link above where you’ll see the original poster with additional information on the topic. There you will find the full list of features that come inside and a bunch of comments for problems and solution which you might find useful.


