Word users have already learned how to adjust the transparency of the images that they’ve included in their documents. This time, it’s for Google Docs users. Just like in Word, Google Docs also offers the option to adjust the image transparency but it is way easier to do than in Word.
If you still don’t know how it’s done, just read and follow the steps listed below.
How to adjust image transparency in Google Documents
- First, you must log in to your Google account and then you can either go to Google Drive or Google Docs.
- Create a new document on Google Docs.
- On the new document, go to the “Insert” tab and then select “Image”. This will allow you to insert a photo to your document via direct upload or via direct URL, albums, Google search or snapshot.
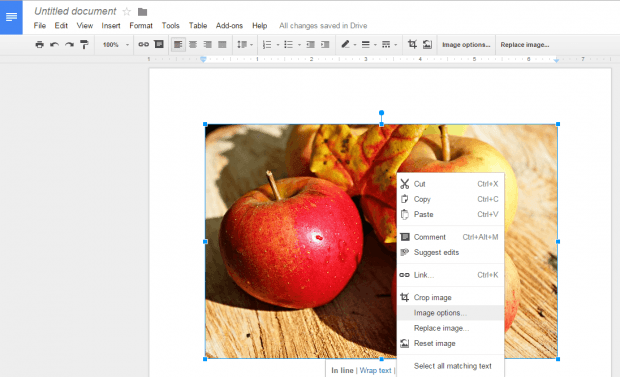
- After which, just set the alignment and position of the image and then on the toolbar, select “Image options”. Alternatively, you may just right-click on the image and on the context menu, select “Image options”.
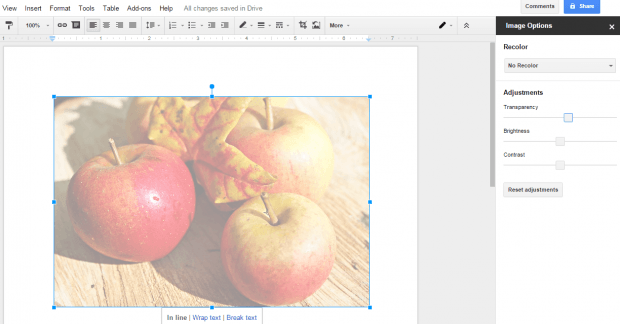
- Now, wait for the Image options panel to appear on the right portion of your Google Docs interface.
- Under the said panel, look for the “Adjustments” section and then go to “Transparency”.
- Just drag the transparency bar back and forth. Set the transparency percentage to one hundred percent and your image will no longer be visible. So just keep it between fifty to eighty percent for better results.
So that’s it. You’re done.

 Email article


