 Email article
 In YouTube, there are extensions or add-ons that you can use to set the default video quality. So if you want to automatically load the videos in HD, then you’re free to do so. The thing is what if you also want to do the same thing for Facebook videos? Can you also set the video quality to SD or HD by default? Well, thankfully, it’s possible and you don’t even need to use an app or add-on.
Speaking of which, this post will teach you the steps on how to get it done.
How to set the default video quality in Facebook
- First of all, you need to log in to the web version of Facebook on your browser (ex. Chrome, Firefox).
- After you’ve successfully logged in, click here to go directly to your Facebook settings page. Alternatively, you may click the small arrow on the right side of your Facebook’s top navigation bar and then go to “Settings”.
- Once you’re on Facebook Settings, go to the menu on the left and then click “Videos”.
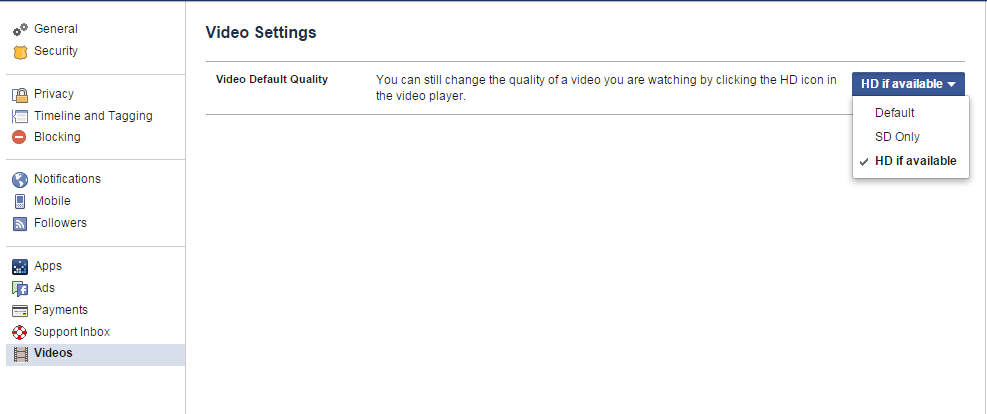
- Under “Video Settings”, go to “Video Default Quality” and then set the quality to SD or HD. SD means standard video quality while HD means high quality or high definition video quality.
- So that’s basically it. Whenever you click and play a Facebook video, it will be automatically loaded in your preferred video quality. Do note that this setting will only be applicable to videos that were directly uploaded to Facebook and not those videos that were shared from other video sites like YouTube and Vimeo.


