 Email article
Aiming to satisfy both desktop and mobile customers, Windows 10 follows its predecessor to provide many features that usually belongs to mobile devices. Battery Saver, Airplane Mode, Action Center (notification center), and many mobile-related functions have made their way to Windows 10.
Anytime I set up a machine with Windows 10, one little setting I always visit first is the password timeout. As good as it sounds, the setting allows you to set the period of time that you don’t have to enter your password or PIN to unlock the device presuming your last login was successful. Since more and more laptops and 2-in-1s act like mobile devices, requiring to type in password or PIN anytime to unlock the screen is somehow annoying for many users.
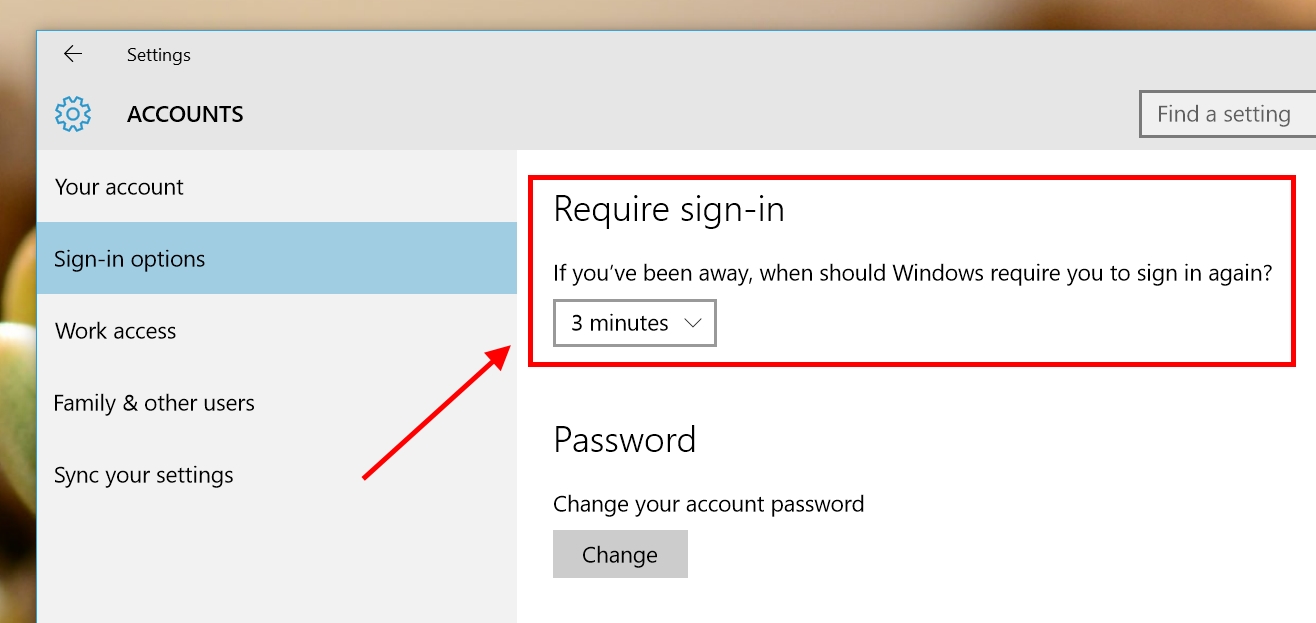
To customize this setting, the easiest way is first type “sign-in options” into the search box on the Taskbar then open the first result. In the Settings window, you’ll see the very first section called “Require sign-in.” It’s where you select your password timeout time. The drop-down menu lets you select never to require sign-in, require everytime, or 3 minutes, 5 minutes and so on.
If you select the “Never option,” keep in mind that it just won’t ask for password or PIN only when the screen is automatically turn off or you close the laptop lid. If you lock the device on purpose by selecting “Lock” from the Start Menu or pressing Windows + L or the computer starts from a shutdown, Windows 10 will still ask for password one time.
And that’s all!


