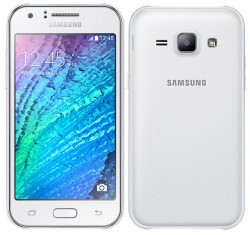
 Installing TWRP recovery on Samsung Galaxy J1 is your gateway to installing unofficial software updates. Once you have the TWRP recovery, you may install any custom ROM that you find available to flash on your device. Some of those ROMs main objective will be to give you a newer software version than the one currently issued by your phone carrier network and manufacturer. Others will give you some features you have been longing for and cannot live without.
REQUIREMENTS
- You are to follow this guide on the Samsung Galaxy J1 only. Attempting to install the files in this guide on a different device can easily brick that device.
BEFORE WE BEGIN
- Download the Samsung USB Drivers for mobile phones from the official Samsung websites page by scrolling down the page we have here.
- Double-check that the Developer Options menu is already enabled. Do that by pointing to the Settings > Developer Options. Those who do not see the Developer Options available from the Settings menu must unlock the hidden menu by tapping over the build number from the About Device menu 7 or so times.
- Those that already do see the Developer Options menu can tap and enter that menu and enable the USB Debugging Mode from inside. Now that the USB Debugging Mode is enabled, you can connect to the computer and start your guide.
- By following the TWRP recovery on Samsung Galaxy J1 guide, you are voiding the warranty terms and conditions. Since the agreements are now void, you cannot expect to send it away for free repairs under warranty. Conversely, you can flash a stock recovery and delete the custom recovery and the warranty should work again.
HOW TO INSTALL TWRP RECOVERY ON SAMSUNG GALAXY J1
- Download the TWRP recovery image from this page here.
- Download the Odin 3.10 to flash that TWRP custom recovery on your device from here.
- Download both the files and move them over to the desktop of the computer.
- Right-click over the Odin flashing tool and select the ‘extract here’ option.
- Double-click and run that Odin tool.
- Right-click over the TWRP recovery file and select the ‘extract here’ from the menu.
- Reboot the Samsung Galaxy J1 in download mode.
- Connect the Samsung Galaxy J1 to the computer using the USB cable.
- Wait for the ID: COM port to change color. That’s the port you’ll see on Odin’s front screen.
- Click the PDA/AP button.
- Browse the desktop for the TWRP recovery file.
- Leave the Auto Reboot and F Reset Time options on.
- Check the re-partition box is empty.
- Click the Start button and that custom recovery image will now get flashed on your Samsung Galaxy J1.
You know it’s complete when your device reboots and the Odin flashing tool says that it passed on the display.
Most failed attempts or no color in the ID: COM port are usually a result of the USB drivers not working. Download those from the course above that we put in the guide. If you did download them already, try rebooting the Windows PC. Sometimes a driver requires a reboot to get working properly.

 Email article


