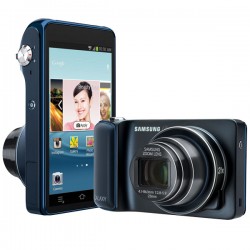
 Did you have big plans with your Samsung Galaxy Camera? Few come larger than flashing a new ROM on your device and that’s exactly what you can get done with a custom recovery.
REQUIREMENTS
- These are the guidelines to install CWM recovery on Samsung galaxy camera devices with the model number EK-GC100 only. You can check your model number by heading to the Settings > About Device > Model Number.
BEFORE WE BEGIN
- Download the Samsung USB Drivers before you open the Odin flashing tool so Odin can recognize your device.
- We highly recommend everyone backs up the device before starting the steps. Once you have root access on the Samsung Galaxy Camera, your annoying backing up days are officially over. However, we are not there yet and you will need to back up your data using multiple apps, a PC or the built-in backup functionality that comes with your Galaxy Camera.
- You will need to unlock the Developer Options menu if it is not unlocked already. You can check if it’s locked on your device by heading to the Menu > Settings > Scroll down the list. You should see it toward the bottom of the Settings if it’s unlocked. For everyone else, follow the next step.
- To unlock the Developer Options menu, head to the Menu > Settings > About Device > Tap the build number 7 times and it will tell you that you are now a developer.
- Now all of you can follow this path: Menu > Settings > Developer Options > Enable the USB Debugging Mode. The mode is best kept off unless it is in use, which is why you might find it off to begin with. However, you must enable it to root your device. You may disable it again as soon as the guide is finished.
HOW TO INSTALL CWM RECOVERY ON SAMSUNG GALAXY CAMERA EK-GC100
- Download the ClockworkMod recovery image from this link found on the first page here.
- Download the latest Odin flashing tool version from here.
- Extract both the files on your desktop by moving them to the desktop and then right-clicking and selecting the “extract here” option from the menu.
- Double-click the Odin executable file and run that same Odin flashing tool so it’s open on the desktop.
- Turn off your Galaxy camera and reboot it in download mode (Volume Down + Home + Power during the rebooting phase).
- Keep watching the Galaxy Camera display for when it tells you to press the Volume Up button and get that done.
- Connect the Galaxy camera to the computer using the USB cable.
- Click the PDA/AP button from your Odin user-interface and upload the custom recovery executable that is on your desktop.
- Click the Start button and Odin will flash it on your device.
You know it’s complete when you get the green pass message from the Odin user-interface and your device reboots. If you do not see the Galaxy Camera reboot, you’ll need to do that manually. Once the reboot is complete, you can boot the device into the new recovery mode any time and start flashing your new ROMs.

 Email article


