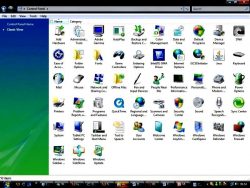
 When you are working in Windows, the Windows right-click context menu is a very useful tool, offering you context sensitive relevant options to facilitate the task you are working on.
During the regular course of your work, if you find yourself accessing the Windows Control Panel more often than usual, why not include this feature in your Windows right-click context menu, where you can get to it very quickly?
No doubt the settings window or interface has taken over most of the tasks that the control panel does, but the control panel is a still a tool that most Windows users would like to continue using.
The Windows Right-Click Context Menu
If you check the default Windows right-click context menu it has the options of view, sort by, refresh, and so on until new, display settings and personalize. Some of these options have sub-menu’s to further expand on the option you select. From this Windows right-click context menu, how do you go about adding the all-important Control Panel?
Manually Adding the Control Panel
You can edit the registry manually to add the control panel to the context menu, by making a couple of quick edits in the Windows registry.
Before you start this process, it is strongly suggested to backup your computer and your registry, before you make any changes to the registry. You probably want to read relevant information on how to use the registry editor as it a very powerful tool that if used incorrectly, can render your computer inoperable or unstable.
Click on Start and type “regedit” to open the registry editor. Press the enter key and click on yes to permit the editor to make changes to your PC.
Use the sidebar in the registry editor to navigate to the key “HKEY_CLASSES_ROOT\Directory\Background\shell”.
Now, to create a new key inside the shell key, right-click the shell key and choose New followed by Key, and type in the new name as Control Panel, for the context menu.
Next, right-click the control panel key and select New followed by Key and type in the name of the new command key.
Double click on the default value on the right side of the screen with the new command key selected on the left side of the screen and its properties window will now open.
Type “rundll32.exe shell32.dll, Control_RunDLL” into the input box for value data and then click OK.
You will now be able to test your Windows right-click context menu as changes are saved immediately. Just right click anywhere on your computer’s desktop screen or in your file explorer and confirm that you can now see the “Control Panel” option added.
Conclusion
This way, you will find it easy to include the control panel option to your Windows right-click context menu. The interesting thing is that you can test your new option immediately on adding it!
You are very strongly advised to backup your computer, including your registry before you attempt in manually editing it to add any additional option to your Windows right-click context menu.

 Email article


