{rw_text}Software reviewed in this article:
Version reviewed:
v3.0
Supported OS:
Windows 2000 and higher
Price:
$39.99 (USD) for a personal license, and $99.99 (USD) for a business license
Software description as per the developer:
Do you have a photo that would look just right if you could only remove one or more objects or persons from your composition? For example, look at the following two pictures. The original on the left features a large building in the foreground that dominates the scene while also blocking an uninterrupted view of the horizon. If we could somehow remove this, it would open up the entire view. You can see what we mean in the picture on the right. With the building gone, we can really appreciate the full beauty of this landscape. Well, now you can remove just about any unwanted object or person using Inpaint.
Ashraf’s note:
This review was last written on InPaint v2.4. It has now been updated for InPaint v3.0. The following are the changes in InPaint v3.0 as per the developer:
- Absolutely new interface
- Inpaint algorithm improvements
- Whole program optimization
- Localization to German, Russian, French, Norwegian, Portuguese, Spanish
- Mac OS X support (only Intel CPU)
{/rw_text} –>
{rw_good}
- Straightforward and easy to use.
- Has an undo/redo feature.
- Supports all four major image formats: .JPG/JPEG, .PNG, .BMP, and .GIF.
- Processes images quickly fairly quickly.
- Supports drag + drop.
{/rw_good} –>
{rw_bad}
- Users can no longer easily multi-process the same area selection. (Easy multi-processing of the same area was available in previous versions.)
- Undo/redo functions are not properly programmed for undoing/redoing area selection – they only work with undoing/redoing image processing.
{/rw_bad} –>
{rw_score}
{for=”Ease of Use” value=”7″}The new area selection method (coloring in the area you want to remove) is more annoying to use, in my opinion, than the previous method of drawing a “border” around areas in InPaint v2.x. Another issue I found with InPaint v3.0 is that the undo/redo features don’t work with area selection – they are only for undoing/redoing image processing. Being unable to undo/redo area selection is very annoying. Plus users can no longer easily multi-process the same area as a whole. However, overall, Inpaint v3.0 is still easy to use.
{/for}
{for=”Performance” value=”9″}Works very well; InPaint v3.0 has made a lot of improvement in terms of quality. However, InPaint still isn’t perfect; don’t expect to do one process and instantly fix images. Furthermore, results still vary depending on the image you are trying to edit.
{/for}
{for=”Usefulness” value=”9″}I can see many people finding this program useful.
{/for}
{for=”Price” value=”5″}If InPaint was a perfect program, it would be worth its digital weight in gold. However, based on its performance and user-friendly, I feel $30 for user license and $60 for business license is a much better price rather than the $40/$100 that InPaint is currently at.
{/for}
{for=”Final Score” value=”8″}
{/for}
{/rw_score} –>
{rw_verdict}[tupr]
{/rw_verdict} –>
We have all used the “clone stamp” (or something similar) tool when using an image editor, right? When it comes down to its core, InPaint is basically a clone stamp which has been tweaked for quick and easy usage. In other words InPaint is a program that allows users to easily remove “blemish” (whatever you may consider a blemish to be) from images.
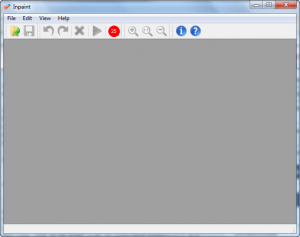
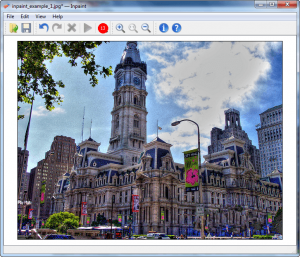
This is what InPaint’s main program window looks like:
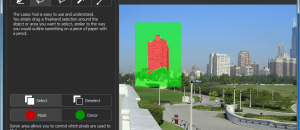
The attraction of InPaint is how easy it is to use to remove “blemishes” vs. using a clone stamp. All you need to do is load the image you want to edit (.JPG/JPEG, .PNG, .BMP, and .GIF supported) [drag + drop is supported], “color in” the area you want to remove, and process the image. If you don’t like the end result, you can either undo the processing and modify your selection, or go in and make new selections to improve image quality. Unfortunately while previous versions of InPaint allowed for easy re-processing of the same area as a whole, InPaint v3.0 does not. However, in defense of InPaint v3.0, the performance is a lot better and multi-processing of the same area as a whole is not needed as much as it was needed before.
The following is a demonstration video created by the developer showing InPaint in action:
Of course in the demo video the developer shows an image that InPaint has processed very well. While InPaint indeed does work very well, don’t expect such easy and accurate processing for all images. How well InPaint is able to edit your image depends on the image and its content. To show what I mean, I have conducted five examples of my own:
NOTE: Because the trial version of InPaint does not allow you to save images, I am unable to show the images by themselves (I could not save them); rather I can show the images within InPaint, so please click on the screenshots to view the images properly in detail.
Example 1
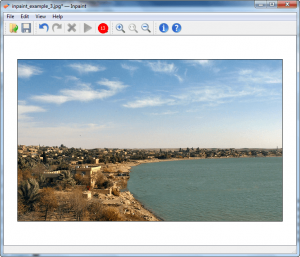
Original Image
Image Credit: SnapsterMax
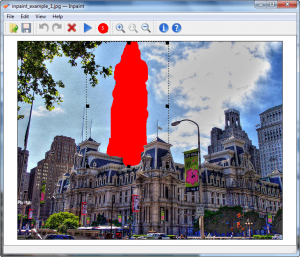
Objective: Remove the tall building in the middle of the image
Selection
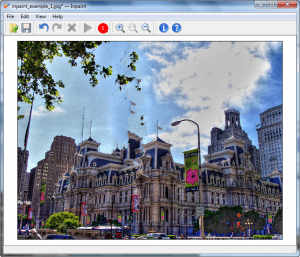
Result
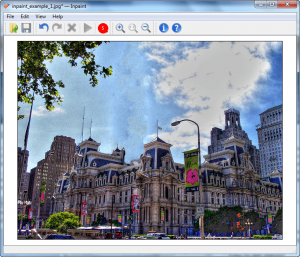
As you can see, with doing just one selection and processing, InPaint performed OK. It removed most of the building but it left some blemishes. I went back and individually selected those blemishes and processed the image a few more times to get an end result of this:
Yes, if you look very closely and analyze the image, there is still some evidence that the image has been edited; and yes, there can still be improvements made (I could still go in and use InPaint to improve the areas that are yet not perfect.) However, the end result is very good… especially if you consider I spent less 3-4 minutes on the image.
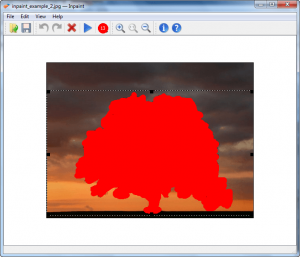
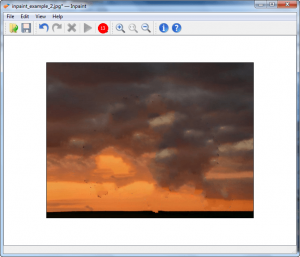
Example 2
Original Image
Image Credit: joiseyshowaa
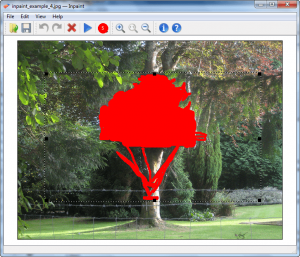
Objective: Remove the tree from image.
Selection
Result
Unlike example 1 which needed multiple processing, InPaint was able to properly remove the tree extremely well with just one selection and processing. Yes there is still some touch up required (I didn’t go in and individually process the left-over blemishes like I did in example 1) but the end result with just one selection and processing is terrific. (I spent about 1-2 minutes on the image.)
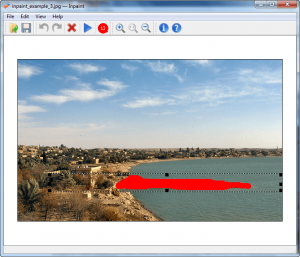
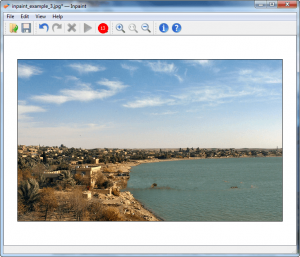
Example 3
Original Image
Image Credit: Jayel Aheram
Objective: Remove the strip of land from the river.
Selection
Result
InPaint performs well in removing the land with just one selection and processing. However, like example 1, there are some noticeable blemishes. I did a couple of more selections and processing and ended up with the following final image:
Beautiful. Yes, like with all the other images, anyone looking for modifications will spot where InPaint removed parts of the image. However, anyone not specifically looking for changes will notice no difference. (Again I spent about 1-2 minutes on the image.)
Example 4
Original Image
Image Credit: AndyRob
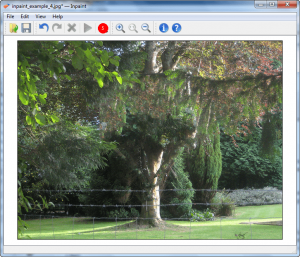
Objective: Remove the treehouse from image.
Selection
Result
After looking at that result image, I ask you: “What treehouse?” Like example 2, InPaint was able to satisfactorily remove the “blemish” in example 4 with just one selection and process. Just like all the other images yes there is still room for touch-up (I didn’t go back and process the left-over blemishes individually) but anyone that didn’t know there is supposed to be a treehouse in the image. will never know there is supposed to be a treehouse in the image. (Again I spent about 1-2 minutes on the image.)
Example 5
Note: For example 5 I reused the image from example 1 but for example 5 I am trying to remove a different part of the image.
Original Image
Image Credit: SnapsterMax
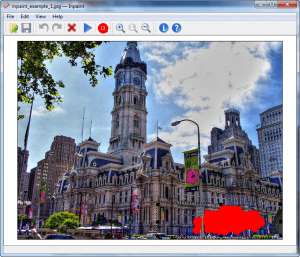
Objective: Remove the tree from the bottom-right corner.
Selection
Result
All the previous examples showed off InPaint’s skills. Example 5, however, reveals the fact that InPaint does not always perform very well. As you can see in the above screenshot, while the tree did get removed, the building in the background is distorted; it is clearly noticeable the image has been altered, even to someone not specifically looking for the alteration.
To try to improve the quality of the image, I went in and processed the blemishes individually. The best result I was able to come up with is this:
Although better than just one selection and process, the end image still clearly needs quite a bit of touch up. The reason why InPaint does not perform as well in example 5 is because the background is a more complex than the backgrounds in examples 1/2/3. Example 4 also has a fairly complex background like example 5, but the nature of the image (the trees, leaves, etc.) helps cover-up for any potential blemishes InPaint has left behind in example 4. The image in example 5 doesn’t have such things to cover left-over blemishes and thus InPaint’s failure is fairly noticeable.
That said, here is one tip may help you get better results with InPaint:
- In InPaint after making your selection, a rectangle box appears around it. The area inside that rectangle box is the area that InPaint uses to fill in the area you selected. You are allowed to modify that outer rectangle box; drag its corners to make it bigger or smaller, and click + drag the box to other areas. Moving this rectangle box allows you to tell InPaint exactly what type of image you want to be filled in the area that you selected. If you are confused and don’t understand what I mean, see these two demo videos created by the developer showing how you can move around that rectangle box and what happens when you move it:
Note: The following videos are of InPaint v2.4. However, the idea of moving the rectangle is still applicable in InPaint v3.0. In other words, you can still do what is being shown in these videos in InPaint v3.0.
Last but not the least, there is one area I feel InPaint can be improved. InPaint has both undo and redo functions. However, the undo/redo are designed to undo/redo image processing; they are not designed to undo/redo area selections (the coloring in). For example, let’s say you color in an area in one continuous mouse-click, and then color in another area with a different mouse-click. If you use undo InPaint will remove the whole selection (instead of just undoing your latest mouse-click selection) and undo the last image processing you did; and you can’t even redo area selections. Clearly the developer did not build undo/redo to work with area selection and this needs to change. Not being able to undo/redo area selections is very annoying.
This review was conducted on a laptop running Windows 7 Professional 32-bit. The specs of the laptop are as follows: 3GB of RAM, a Radeon HD 2600 512MB graphics card, and an Intel T8300 2.4GHz Core 2 Duo processor.
{rw_freea}
Web InPaint – An online version of InPaint.
All of the following tools have a “clone stamp” (or something similar) tool which can be used to do similar things as InPaint:
{/rw_freea} –>
{rw_verdict2}InPaint is simple enough for novices and yet still handy for a quick touch up by a professional; it works quickly and performs well. I first reviewed InPaint when it was v2.x; InPaint v2.x was a good program. InPaint v3.0 is a great program. While InPaint v3.0 still isn’t “perfect” and the performance still varies depending on the image being processed and how you handle area selection, performance in InPaint v3.0 has been noticeably improved. I still feel InPaint v3.0 is overpriced just like InPaint v2.4 was, but InPaint v3.0 has improved enough to warrant an official recommendation: dotTech gives InPaint v3.0 two thumbs up and a solid recommendation.
{/rw_verdict2} –>

 Email article
