Sometimes people can get confused when using email clients and email websites because they both offer two unique ways of logging into the same place.
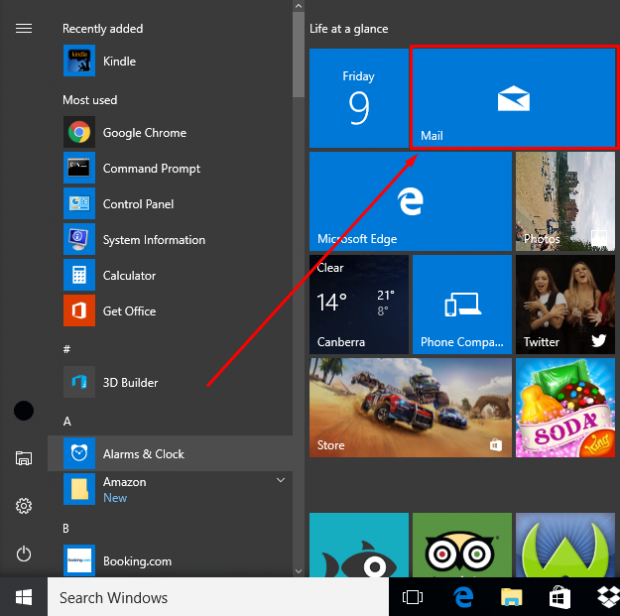
Windows 10 comes with a convenient email application available for people to use by default. Accessing it is easy: just open the Start menu and look for the large tile that says “Mail” on it. The idea behind the email app is to give you a quick way to read and reply to your emails without having to open a web browser. It does not mean you cannot use the web browser to access your emails; you can—and all the emails that you find there should be the same.
If you are logged into the account that you set up your Windows 10 email app with, it will always be accessible to the people who are logged into that same Windows account. The only other way anyone can get access to your Outlook emails is if they know your password and login from the web via outlook.com.
Here is what you need to prevent that from happening:
Changing the Windows 10 email app password in Windows 10
Click on the “Start” menu from the left-hand side of the taskbar where it shows the Windows icon.
Click on the Mail tile from the top section where it says “Life at a glance.”
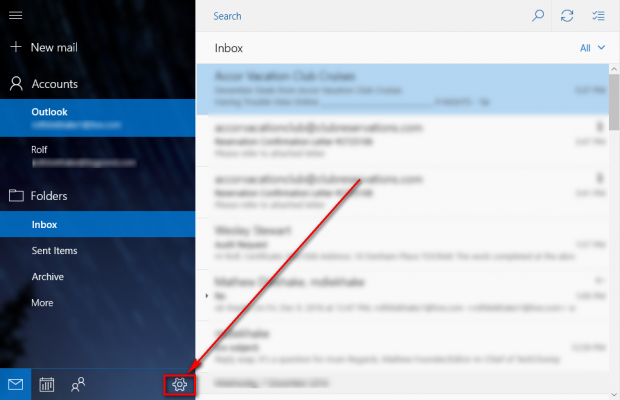
Click on the “Settings” gear icon from the bottom of the page to get access to your Microsoft Windows 10 email app settings.
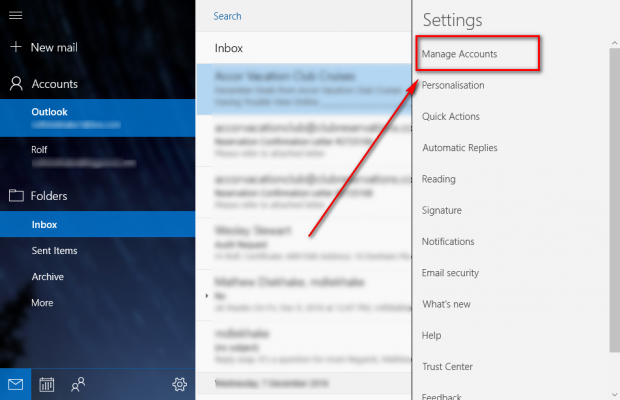
Under the “Settings” menu, click on where it says “Manage Accounts.”
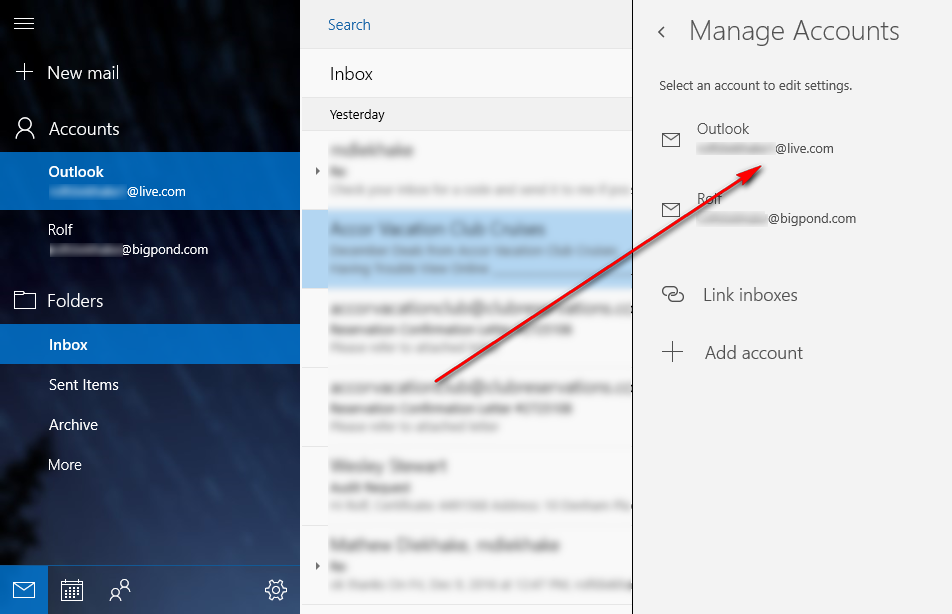
Click on the email account name that is associated with the password that you would like to change. (You can see that the one I want to change is a “Live” email address—which is associated with Windows. However, you don’t have to use a Windows email address for the native Windows 10 emailing application; it supports many email addresses, including Yahoo, Gmail, and many others.)
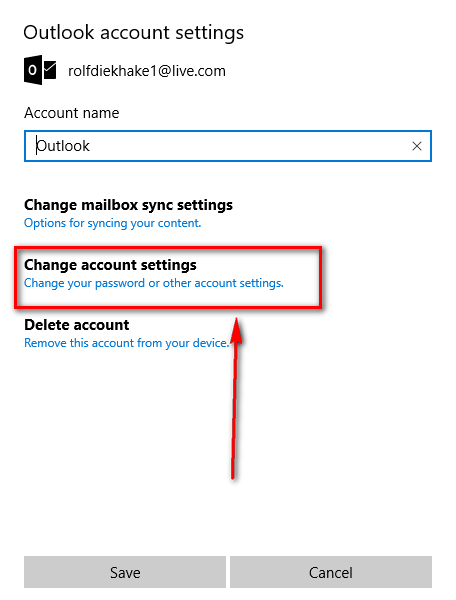
Click on the “Change your password or other account settings” underneath where it says “Change account settings.”
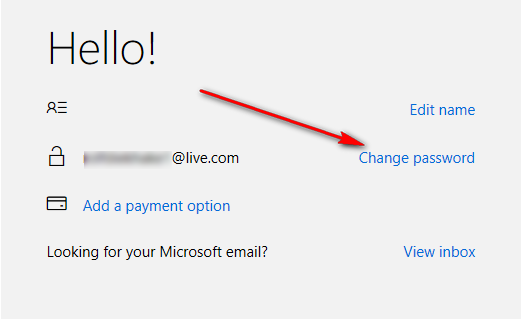
Click on the “Change password” link that is available from the following page where it shows you a range of options for you to choose.
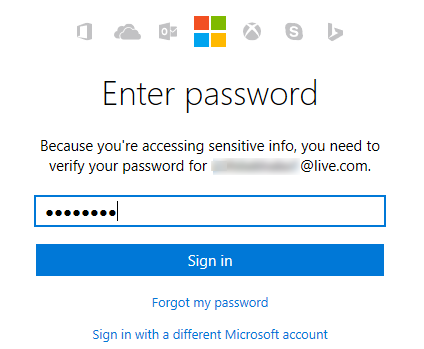
It now asks you to enter your password that is the existing password for the email account so that it can verify that it is you who is wanting to access the account.
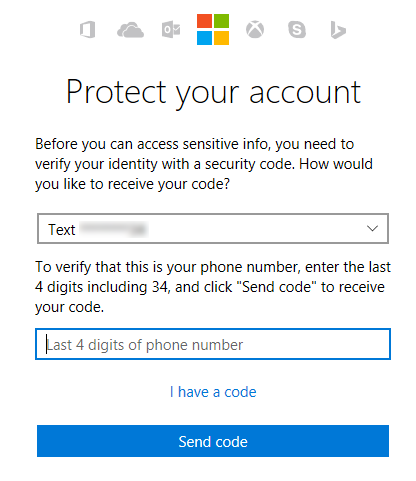
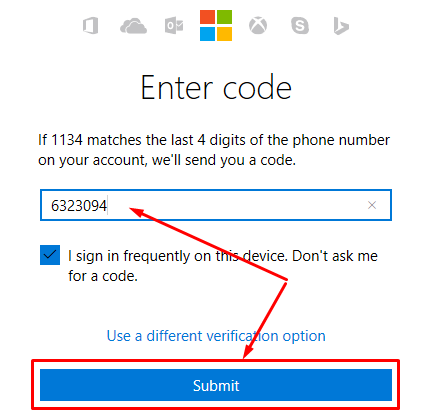
In typical Microsoft fashion, it then asks for you to enter the last four digits of the phone number that you have associated with the account. (These vexatious security measures are what drove me away from using a Microsoft email is my primary email address in the first place—but due to their extreme popularity (and by extreme I mean they must be used more than any other email that doesn’t deem it necessary to go to such drastic lengths to prevent hacking and spam), Microsoft seems hell-bent on making sure you need to verify things with your phone number and text messages because the act of logging in itself is not enough. The splendid news is that there is a way to stop that later in the guide if you—like me—sigh each time you see it or anything similar.)
Once you have received your text message from Microsoft, enter the code you were given into the allocated box and then click on the “Submit” button that is available toward the bottom of the screen.
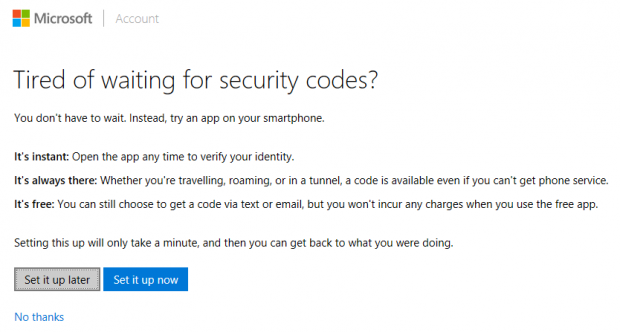
You then get the chance to get rid of the security codes via text messages by setting up the app that apparently makes life easier for you. I’ve skipped that for now by clicking on the “Set it up later” option, but you can do that now if you prefer.
Next, you finally get the chance to change your password. Enter the current password that is working on your account and then enter the new password that you want to change to. Lastly, reenter the new password to confirm that you have typed it in correctly and then click on the “Next” button that is available at the bottom of the screen.
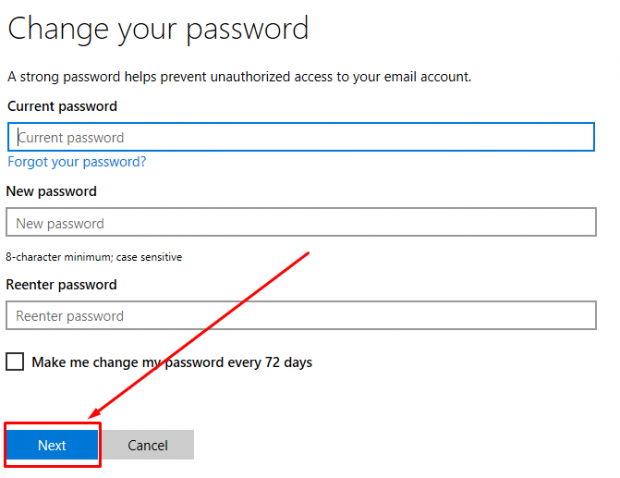 That is everything you need to change the Microsoft Windows 10 email app password that is associated with the account you are currently logged in and using with any version of the Windows 10 operating system.

 Email article

