 Email article
Sharing access to your web browser with someone, even if it to just access the internet for a few minutes, can be an uncomfortable affair. And rightly so, as the person borrowing it is able to check your browser history and get a fair idea of your browsing habits. Not to mention access to your bookmarks and saved passwords. Well, there is an interesting feature on Chrome for Windows which has been integrated for situations just like these. It is called the Guest Browsing Mode, and while it is still an experimental feature hidden in the browser, it works perfectly well. Here’s a quick guide on how you can enable Guest Browsing Mode in Chrome on Windows XP, Vista, 7, 8, 8.1, etc.
How to Enable Guest Browsing Mode in Chrome on Windows
- Launch Chrome on your PC
- Paste the following url in the address bar and hit Enter – chrome://flags/#enable-new-profile-management
- You should now see a page with several options listed out. The one we are looking for – Enable New Profile Management will be highlighted in yellow
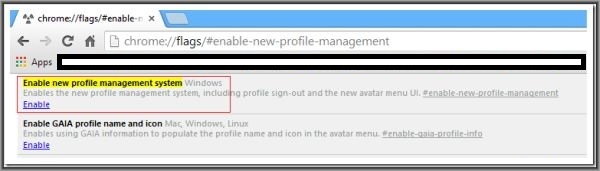
- Click the Enable link under this option
- You should now see a Relaunch Now button at the bottom of the page. Click it to apply the changes and relaunch Chrome

- Once Chrome relaunches you should see an Avatar icon in the top left of the Chrome window. Clicking on it will display additional options, including the one to Browse as Guest
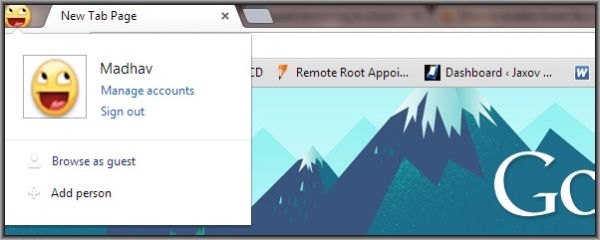
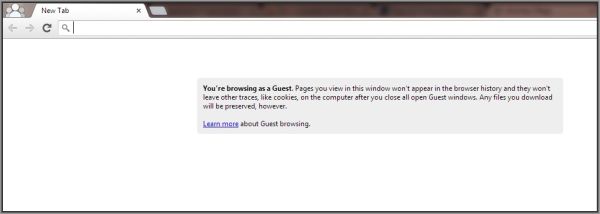
- Clicking the Browse As Guest Option will open up a new window, which you can let other users use on your computer to browse the web.
- To disable Guest Browsing Mode in Chrome, simply perform Step 2 above and click the Disable link under the Enable New Profile Management System Option
Conclusion
Guest Browsing Mode in Chrome for Windows is a safe and convenient way to let other people use your browser without having to worry about them getting a peek at your personal data. Go ahead and try it out and should you find it useful, let us know in the comments section below.


