 Email article
If you’re working on a spreadsheet with lots of rows and columns to fill, you could end up deleting some blank rows that you don’t really need. For example, if you’ve deleted data from specific rows, they’ll be left blank and can obstruct the flow of your list. Now, since you’re here, you’re probably looking for a way how to delete all blank rows on your Excel sheet at once and in just a few clicks. Well, that’s quite simple. You just need to follow the steps listed below.
How to delete all blank rows at once in Excel
- Open or launch the Microsoft Excel program on your computer. If you already have an existing file that you wish to edit, then open it.
- On your Microsoft Excel spreadsheet, highlight all of the cells with data and don’t forget to include the blank rows.
- Next, go to the “Home” tab and then go the section for “Editing”.
- In the said section, select and open the drop-down menu for “Find and Select” and then select “Go To Special”.
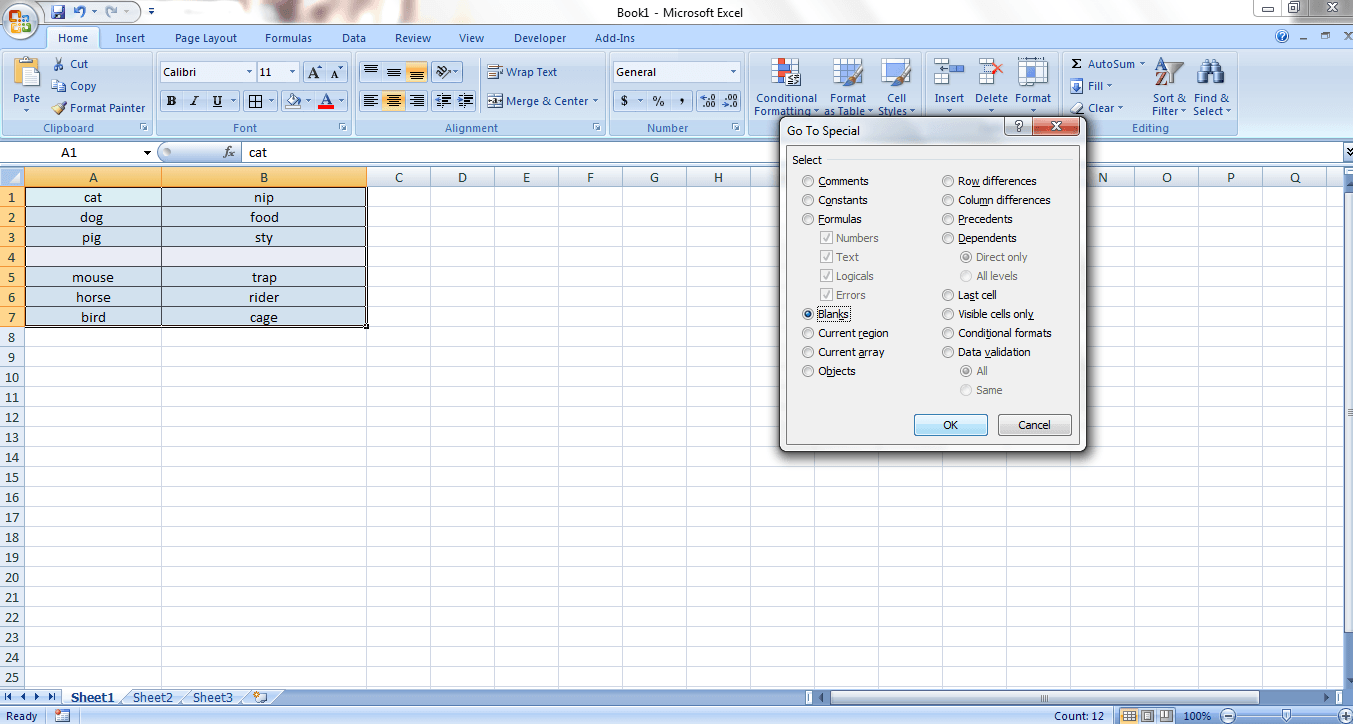
- On the “Go To Special” dialog, select “Blanks” and click “OK” to confirm.
- After which, Excel will automatically highlight all the blank cells and rows in your selection leaving the cells with data in their usual no highlight state.
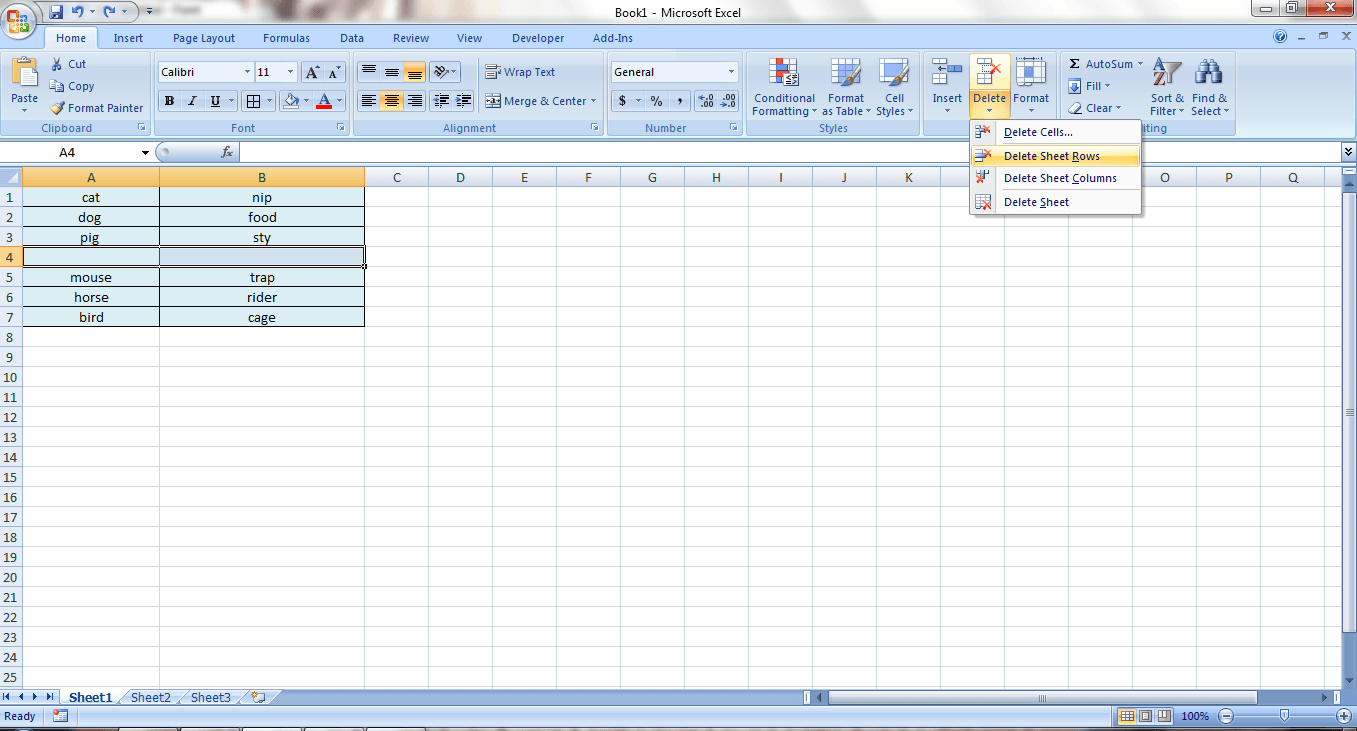
- Now, to delete all of the blank rows in your selection at once, you simply need to go to the “Cells” section from the Home tab and then select “Delete” > “Delete Sheet Rows”.
- So that’s it. All of the blank rows in your selection will be instantly deleted and the rest of the cells that comes after those rows will be automatically shifted up.
It’s as simple as that.
On the other hand, do note that this method works best when you’re using Excel 2007 or 2010.


