 Email article
Cortana is one of the most notable features of Windows 10. Its purpose is to become your personal assistant. You can quickly check for any information thanks to Cortana’s notebook as well as command it to do many cool things like send an email or check your calendar. As you already know, the screen when you launch Cortana is based on your interests and you can customize it intensely via the notebook. In this post, I’ll show you how to add multiple weather locations to Cortana screen – perhaps this is one of the most popular information you want to quickly see.
As I said above, Cortana stores its “memory” in a notebook just like a real-life assistant. By doing this, you as a user have complete control of what it knows about you. Everything you need to do is edit the information in Cortana’s notebook. Here’s how you add a new city to weather section of the notebook.
- Fire up Cortana via its search box on the Taskbar
- Click Notebook on the left
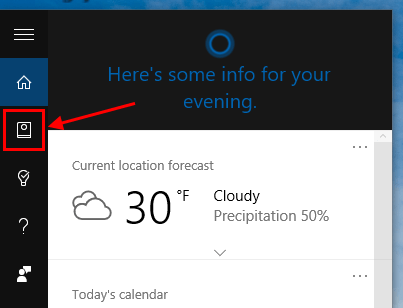
- You may have to scroll down and select “Weather”
- Make sure the toggle “Forecast for your cities” is on
- In the section “Cities you’re tracking,” select “+Add a city”

- Type in and select the city you want to add in the suggestion list
- In the next page, you can select to turn on weather incident notification. Once this is on, Cortana will notify you when there is an official weather alert/warning/advisory of that city
- Click Add at the bottom to add it
- And finally, don’t forget to click Save button before you exit the notebook or you’ll lose your change
That’s all!
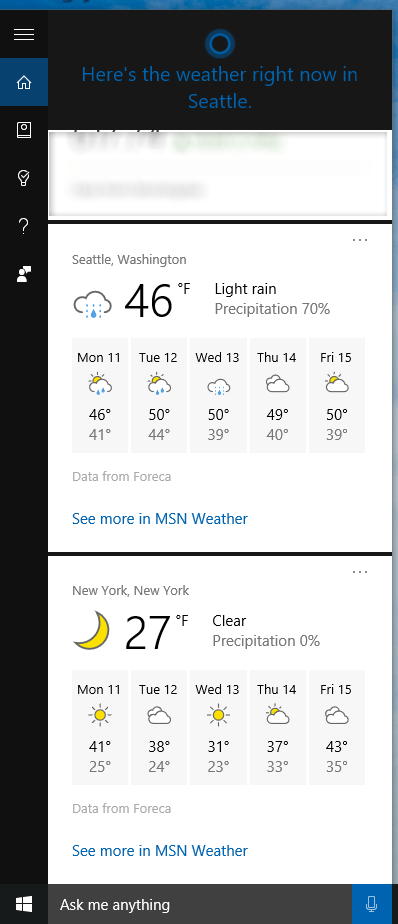
Multiple locations weather tracking on Cortana


