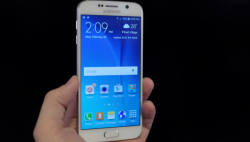
 Anyone who wants to root the Samsung Galaxy S6 smartphone will need to install a custom recovery first. The custom recovery available won’t give you many features, but you can expect the root access itself to open up doors to install any root apps and custom ROMs to replace your stock ROM.
One of the most popular arguments against rooting Android is why risk bricking an expensive device? That query is easily met by anyone firmly supplanted in the world of geekdom with a reply similar to “how can you not enhance your expensive device and run a more pure version of Android?”. Most people who root Android devices in the Samsung range choose to do so to remove the bloatware. Doing so will mean your operating system runs faster. Better yet, you should also find the battery life is significantly improved.
These are the guidelines to install a custom recovery on Samsung Galaxy S6 SM-G920I smartphones so you can start the guide to root the device:
REQUIREMENTS
- You must have the Samsung Galaxy S6 smartphone with the SM-G920I model number to use this guide. One of the other model numbers will probably get bricked if you use this guide.
BEFORE WE BEGIN
- Download the Samsung USB Drivers from our drivers page and install them on your computer before you start with the guide.
- Unlock the Developer Options menu if it’s hidden on your Galaxy S^ by tapping on the Settings > About Device > Build Number a minimum of 7 times before it lets you know that you are now using the smartphone as a developer.
- Enable the USB Debugging Mode on your Galaxy S6 by tapping on the Settings > Developer Options > USB Debugging Mode.
HOW TO INSTALL A CUSTOM RECOVERY ON SAMSUNG GALAXY S6 SM-G920I
- Make sure you log in to your Windows computer with an administrator account otherwise the Odin flashing tool will not work.
- Download the Arter recovery from here.
- Download the Odin flashing tool from here.
- Extract the files to the desktop of the computer.
- Double-click the Odin executable and wait for the flashing tool to open.
- Turn off the Auto Reboot option from the Odin user-interface.
- Boot the Samsung Galaxy S6 into download mode and then connect it to the computer with the USB cable.
- Click the AP button and upload your custom recovery from the desktop.
- Click the Start button.
- Wait until your Odin application on the computer gives you a pass message inside a green box.
- Turn the Samsung Galaxy S6 off and first time boot directly to the recover mode.
In conclusion, that’s how to install a custom recovery on Samsung Galaxy S6 SM-G920I smartphone. You can use your new custom recovery to do anything you would normally do from recovery mode or even root the device.
Here is everything you need to learn how to root the Samsung Galaxy S6 SM-G920I smartphone using a new version of the SuperSU application by Chainfire and the custom recovery you just installed.
You can donate to the original developer of this recovery if you want to give thanks to the man who made it all possible. It’s not often we get a new recovery before the big names like TWRP take over. Arter has also made it possible for Galaxy S6 SM-G920I smartphone owners to get root access with the help from the Arter recovery.
Credits: Arter97

 Email article


