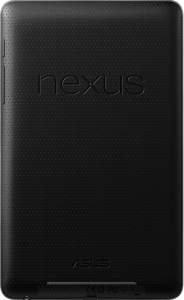
 This guide will help you to unlock the bootloader of your Google Nexus 7, the first device to run on Android 4.1 Jelly Bean, and to root your device and install ClockworkMod recovery, to gain access to advanced features such as blocking ads, or installing custom ROM’s such as Cyanogenmod.
Disclaimer: This guide is intended as a helpful “how to”. dotTech and its writers are not responsible for any gain or loss (including but not limited to bricked devices) incurred as a result of following this guide. Root your device at your own risk. Rooting may void your warranty. Unlock bootloader of your device at your own risk. Unlocking the bootloader may void your warranty.
Requirements
This guide will reportedly work good for all Google Nexus 7 devices running Android 4.1 Jelly Bean, the latest iteration of Android.
Before We Begin
Before starting with the procedures to unlocking the bootloader of your Google Nexus 7 and rooting it, make sure that you are ready with the following packages:
- Install ADB and Fastboot on your computer.
- Samsung USB drivers for Windows, if you are running Windows, or the drivers for Mac or Linux if you are running those. Install the drivers if you haven’t installed them already.
- Download either recovery-clockwork-6.0.1.0-grouper.img (ClockworkMod Recovery) or recovery-clockwork-touch-6.0.1.0-grouper.img (ClockworkMod Recovery Touch) to your computer depending on whether you would like to have touch support for your recovery. Do not extract this file.
- Download JB-SuperSU.zip. Copy this file to the root directory of your tablet’s internal storage (/sdcard).
Before beginning, make sure that your device has USB debugging enabled under Settings -> Developer options.
How To Unlock the Bootloader and Root Google Nexus 7 and Install ClockworkMod Recovery
WARNING! All user data on your device will be cleared!
Take note we must unlock bootloader before we can install ClockworkMod recovery, and we must install ClockworkMod recovery before we can root. This guide shows you how to do three, in the proper order.
To unlock the bootloader of your Google Nexus 7, install ClockworkMod recovery, and root the device, follow the steps below:
- Connect your Nexus 7 to your computer via a USB cable.
- Open a command prompt (First, press Win + R to launch the Run dialog, then enter “cmd” in the dialog box).
- First, change the working directory of the command window to the directory where you had placed the CWM recovery file (recovery-clockwork-6.0.1.0-grouper.img or recovery-clockwork-touch-6.0.1.0-grouper.img) using the command “cd directorylocation” without quotes (for example, “cd c:\android“).
- Then, in the command prompt, enter the following commands one after another:
- adb reboot bootloader
- fastboot oem unlock
You will then be asked to accept and all user data on the device will be wiped. - EndFragment–>fastboot flash recovery recovery-clockwork-6.0.1.0-grouper.img or fastboot flash recovery recovery-clockwork-touch-6.0.1.0-grouper.img
For most users, the ClockworkMod recovery would have been permanently flashed to your device after this step. If not, ONLY IF NOT, follow the steps below:
- Turn off your device.
- Boot into ClockworkMod recovery mode by keeping the ‘Volume Up’, ‘Volume Down’, and ‘Power’ buttons pressed.
- Select ‘Mount /System’ from ‘Mounts and Storage’.
- Then type the following commands one after another in the command window:
- adb shell
- cd /system
- mv recovery-from-boot.p recovery-from-boot.bak
- You have now successfully unlocked your device and permanently flashed ClockworkMod recovery to your device.
Follow the steps below to root your Google Nexus 7:
- To start rooting your tablet, go back to the main menu by pressing the ‘Power’ button (or boot into ClockworkMod recovery if you are not already there).
- Go to ‘install zip from sdcard’ –> ‘choose zip from sdcard’.
- Select the file JB-SuperSU.zip which you had downloaded earlier.
- Choose ‘Yes’ to install the zip.
- Congrats! You now have a rooted Google Nexus with unlocked bootloader and ClockworkMod recovery on your hand (or on your table
 ).
).
Conclusion
Enjoy your rooted Google Nexus with unlocked bootloader and the extensibility of ClockworkMod recovery. Now you can do things such as block ads or deny apps Internet access.
[via XDA]
- EndFragment–>

 Email article


