{rw_text}Giveaway of the day for December 4, 2008 is Project Dogwaffle 2.
[rssless]————————-{/rw_text} –>
{rw_good}
- Has GIMP/Photoshop like features.
- Has a built in animator.
{/rw_good} –>
{rw_bad}
- ~4 year old version.
- You can only work on one image at a time.
- You are not prompted to save image when you close program/load new image.
- Some key ‘panels’ are not turned on by default.
- Most plugins are not self explanatory.
- Eats up more memory then GIMP.
- By default, when you open the program, you are always prompted with the “buffer size” window.
- Lowest ‘zoom’ setting is 25%.
- By default, each image that is opened in the program is viewed at 100% ‘zoom’.
- Cannot load .gif images.
{/rw_bad} –>
{rw_score}
{for=”Features as Described” value=”10″}
{/for}
{for=”Ease of Use” value=”7″}
{/for}
{for=”Usefulness” value=”8″}
{/for}
{/rw_score} –>
Ignoring the fact that it is something like 4 years old, this program is actually pretty nice. Installation was easy. Registration I am not so sure, because the place where registration information is usually listed (Help -> About) there is no mention of registration. But there does not seem to be a trial version of this software, and when you run the software there is prompt telling you it is a trial so i assume it registered correctly. A lot of people are complaining about problems with Vista but I had no problems. It installed and ran fine. I did not even have to run as Administrator…until I installed the patch that is.
As everyone may of noticed, the developer was gracious enough to make patch 2.1b freely available to us. You can download it from here. As many people mentioned, you have to enter some personal information to get the patch link. You can enter all fake information and it should still give you the download link. Or you can also skip all the steps and get the download link from GOTD comments (#51). Once I downloaded and installed the patch, I got an error when trying to run the program: “Unexpected error”. A simple solution to this problem is just run as Administrator. You only have to run as administrator once, then after that you can run it normally (thank you Mike12489).
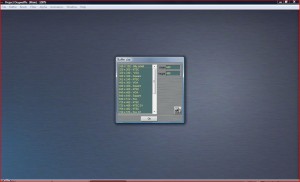
When you open the program you will be prompted to choose your “Buffer Size”.
As far as I can tell, this “Buffer Size” just means the size of the image you want to create. There are a bunch of predefined values you can choose from, or you can type in your own values into the Width and Height boxes. The little button that is in the bottom right of that window just swaps the values that are entered in the Width and Height boxes. Every time you open the software you will be prompted with this window; you cannot bypass it – you must create a new buffer. So, to avoid this once you get to the ‘main window’ of the program, go to File -> Prefs -> General. Under “Startup” check “Bypass buffer size request”. This will make it so you are not prompted with the buffer size window everytime you open the software.
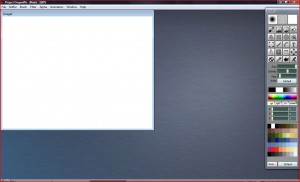
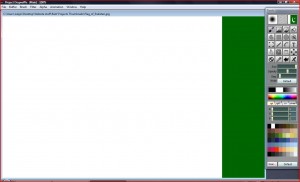
This is the ‘main window’ of the program:
The big white box on the left is the image that I created when prompted to by the program. The size of my image is 640×480. You can drag it around by clicking on the blue bar where “Image1” is. You can also change the size of the window by click + dragging at the sides but note this will not resize the image you have loaded. What it does is sort of just resize the window you see the image in. Meaning the image will still be the same size/zoom, just your window will be smaller/bigger. This is what I mean:
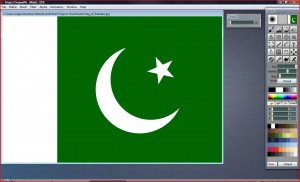
I have the Pakistani flag loaded into the program at 25% zoom (more on this later):
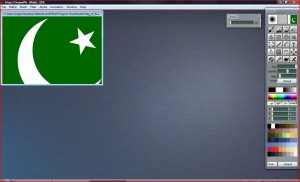
Now I clicked + dragged the image window to make it smaller:
The image did not scale with the window. The window just became smaller and now I have a “cropped” view of the image. If I click the “hand” icon on the right tool bar, I can move the image around to view a different part of the image.
While on topic, there are a few things I should point out. Whenever you open an image in the program, it will open it at 100% zoom. What I mean is if you image is 2000×4000, the program will show it at the resolution instead of scaling the image to fit your window. For example, the Pakistani flag, that you see in the above screen shots, is a 1600×1200 image. When I opened it in the program, it looked like this:
In order scale the image to fit my screen, I have to change the “zoom”. You can either go to “Buffer” -> Zoom -> Fit Image to make the image the size of your window, click the “fit image to screen” button in the Tools panel (4th row down, all the way to the right), or go to Window -> Zoom Panel. A small panel should now show on your main screen. By default it is set at 100%. By moving the slider around, you can change the scale of the image. The lowest possible is 25%; the highest if 600%. I thought that if I checked “Smooth Scaling” under Prefs -> Display, the program would automatically scale the image to fit my window, but that is not the case. In my opinion, this ‘problem’ will turn off a lot of image/graphic designers because many people work with really large images.
Once you have an image, or a blank image, you can choose many different tools from the “Tools” panel (should be turned on by default): paintbrush, paint bucket, free select, rectangle select, zoom, text etc.; in other words, the usual stuff you would expect to find in an image editor. Be sure to right click onto each button to open up more options for that button/feature. There is one thing I would like to point out though. That hand button that is in the 4th row down, first icon. That hand button enables you to move the picture around, i.e. pan the image. But in order to do that, you can click + hold your click on that button and move your mouse around. Just clicking the button and then going to the image to try to pan it does not work. At the very bottom of the Tools panel, you will be able to select different colors that you want to use for your paintbrush, pen, text, etc.
As you may notice there are plenty of panels you can turn on/off from “Windows”. I am not a graphic designer, so I do not know what a lot of these panels are, but I will try to explain the ones that I do understand.
- Alpha Panel – it turns the “Alpha” menu that you can access from the top bar into a panel. What exactly is “Alpha”? Good question; I don’t know. This is what I found in the FAQ on their website:
- In a typical computer graphics system, an image is contained in 32 bits per pixel, where each channel is 8 bits. There are 3 channels for color (red, green, and
blue) and one for transparency. This 4th channel is the alpha
channel. It is typically represented as a greyscale image with black
being completely transparent and white being completely opaque (or
the other way around). In the case of painting programs, the alpha channel is used as a
mask, to define where paint can be applied.
- Brush Settings – opens a panel where you can mess around with the brush settings, lols.
- Brush Images – opens a panel where you can add an ‘image’ to your brush. Meaning whenever you use the paint brush, the image you select will show instead of the default round color/dot thing.
- Display Settings – opens a panel where you can add ‘rulers’, enable a ‘grid’, or enable an ‘artist guide’ for the image.
- Fill/Gradient – um, I believe from this panel you can mess around with the settings of your paint bucket. Not 100% sure.
- Info – opens a panel that 1) displays the current position of your mouse (X, Y) 2) Shows your Paint, Brush and Fill mode.
- Layers – opens the panel where you can see the ‘layers’ of your image. Layers are basically an image ontop of an image.
- Media Manager – this panel allows your to choose a “media”. As far as I can tell, a “media” is a set of predefined values that are applied to your paint brush – they change what your paint brush will show when you use the tool. A lot of predefined media come with the program, or you can add your own.
- Optipustics – no idea.
- Paper – no idea. Click here for more information.
- Plugin – opens a panel where you can launch (“execute”) the plugins you have installed.
- Zoom – opens a panel where you can control the “zoom” of the image.
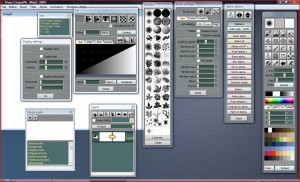
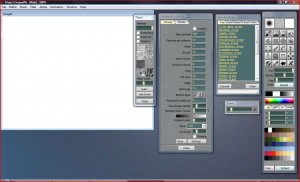
Here are what the panels look like. I could not fit all the panels onto the window at once, so I split them up.
(Alpha Panel -> Media Manager)
(Optipustics -> Zoom)
Besides all the options that you can access via the panels, you can also add filters to images (the usual blur, sharpen, noise, distort, etc.) by going to “Filters”. Under “Buffer” you can flip, rotate, resize, invert, crop, etc. the image. Under “Animation”, you can create an animation of your image. To learn more on how to work the Animator, click here.
Obviously all I explained above is non-inclusive – this article does not do justice to the program, there are just too many features to write about. To read more on this program, or to get help, I suggest going here. Now that link I just suggested to you is supposed to be for the Pro version, but it can help you understand features for Dogwaffle 2 also.
There are a few problems I have with today’s giveaway.
- It is 4 years old =X. This means that this program is not being developed anymore (this version I mean). In 4 years a lot has changed, primarily Vista. Although the program works on Vista, mostly, I really wish the developer had run the newest version of the software instead of giving us a 4 year old version. But the program is not bad for being 4 years old.
- Some of the panels, panels that I consider ‘key panels’ such as ‘layers’ are not turned on by default. You have to turn them on by yourself.
- You can only work on one image at a time. I was really surprised when I found this out. I had tried to open another image while working on one image and instead of opening that new image, I was prompted to make sure I wanted to replace the image I was currently working on.
- .GIF images will not load. It does not ‘recognize the extension’. When you tell it to try to load it anyway, the proper image is not opened up.
- The ‘zoom’ problem I mentioned above.
- A lot of the plugins are not self explanatory. The names really do not explain what they do; if you are lucky you will figure out what they do once you run them.
- The program eats up more memory then GIMP. I had a 160×120 blank image loaded into both. GIMP used ~25 MB, while PD 2 used up ~50 MB.
- Whenever you close the program, you are told that you will lose the changes made on the current image but it does not prompt you to actually save the image. Same thing happens when you try to load a new image.
Free Alternatives
Often referred to as the “little brother” to Photoshop, GIMP is a free advanced image editor. It basically does everything Photoshop does, but just in a different way. It is an excellent program for people who need Photoshop abilities but cannot, or do not want to, afford Photoshop.
Relative to today’s giveaway, this program is excellent. It is constantly being developed and has a ‘complete’ feeling to it. It has fine-tuned features then PD 2, uses less memory, and in my opinion is more easy to use.
Paint.net is an excellent free program that was intended to replace the default Paint program that comes with windows. It is very light on resources and it can do basic photo editing in a breeze. Some people compare it to GIMP and Photoshop. I have been using Paint.net for quite a while and I can swear by it – really great program.
Best way to describe this website is ‘online photoshop’. It has many features that can be compared to GIMP and Photoshop, but it is online so you do not have to install anything – just launch the program from the website.
Beneton Movie GIF is a free animated GIF editing tool. It is simple, quick, and effective. This is supposed to be the ‘free alternative’ to the ‘animator’ option of PD 2.
Features
- Supports 48 file formats such as BMP, GIF, JPG, PNG, and AVI
- Multiple frames selecting
- Drag and drop frames for a quick editing
- 20 different effects, divided in 2 big categories: normal and animated
- Supports individual frame properties: delay and transparent for each frame
- Save and load a batch of frames (frame1.bmp, frame2.bmp, etc.)
- A complete built-in image editor with many tools (pencil, shapes, airbrush, alpha brush, fill, selection, text)
- A simple preview window that previews individual frames or the animation with options such as zoom, loop, etc.
- Many others!
-Beneton Movie Gif Developer
PMnet Verdict: Overall, I think this program is pretty nice. Some people are comparing it to Photoshop, but I do not think so. Photoshop is more advanced and more user friendly to this program. If I were to rank this program with other popular image editors in terms of features and user friendly-ness, it would be like this:
Paint.net < PD 2 < GIMP < Photoshop
The one feature that I did like about PD 2, though, that I believe Paint.net and GIMP do not have is the animator. That being said, the differences between the software are not so significant that you should just dismiss one of them. For the average user, all four programs mentioned above will do fine. I personally think you should try out Paint.net, PD 2 and GIMP and see which ones you like but if you have Photoshop you can save yourself the time and just stick with it.
Overall, this is what I suggest: if you need to do basic image editing, Paint.net is better for that purpose then PD 2 because it is more user-friendly. If you want to do more advanced work, GIMP is better then PD 2 because it is more user-friendly and is being constantly developed – there is a lot of support out there for GIMP. On the go editing can be done on sumopaint.com. Beneton Move GIF can be used to create animated images if you use Paint.net or GIMP.
[/rssless]

 Email article
