 Email article
If you, like me, have not chosen to move all of your data to the cloud, instead opting for the ability to access data regardless of internet connection via one or more USB drives, you might be tired of the typical removable drive icon. This guide shows you way to customize how your drive will appear when viewed in the file explorer in Windows.
BEFORE WE BEGIN
The following guide is written with Windows in mind; it should work on Windows XP, Vista, Windows 7, and Windows 8 but I tested it on Windows 7 only.
Take note this will work with any drive that connects to your computer via USB, including flash/thumb drives, external hard drives, etc.
How-To Assign a Custom Icon to Your USB Drive
- Find an icon (.ico) file that you want to use for your drive. (I chose the blue vinyl from this icon pack, since the USB drive I am using for this guide is going to house my media.)
- You must name the icon file “autorun.ico” (without the quotes), and place it at the root, or highest level folder (e.g. G:/), of the drive you want to set the icon for.
- Open Notepad
- In Notepad, insert the following:
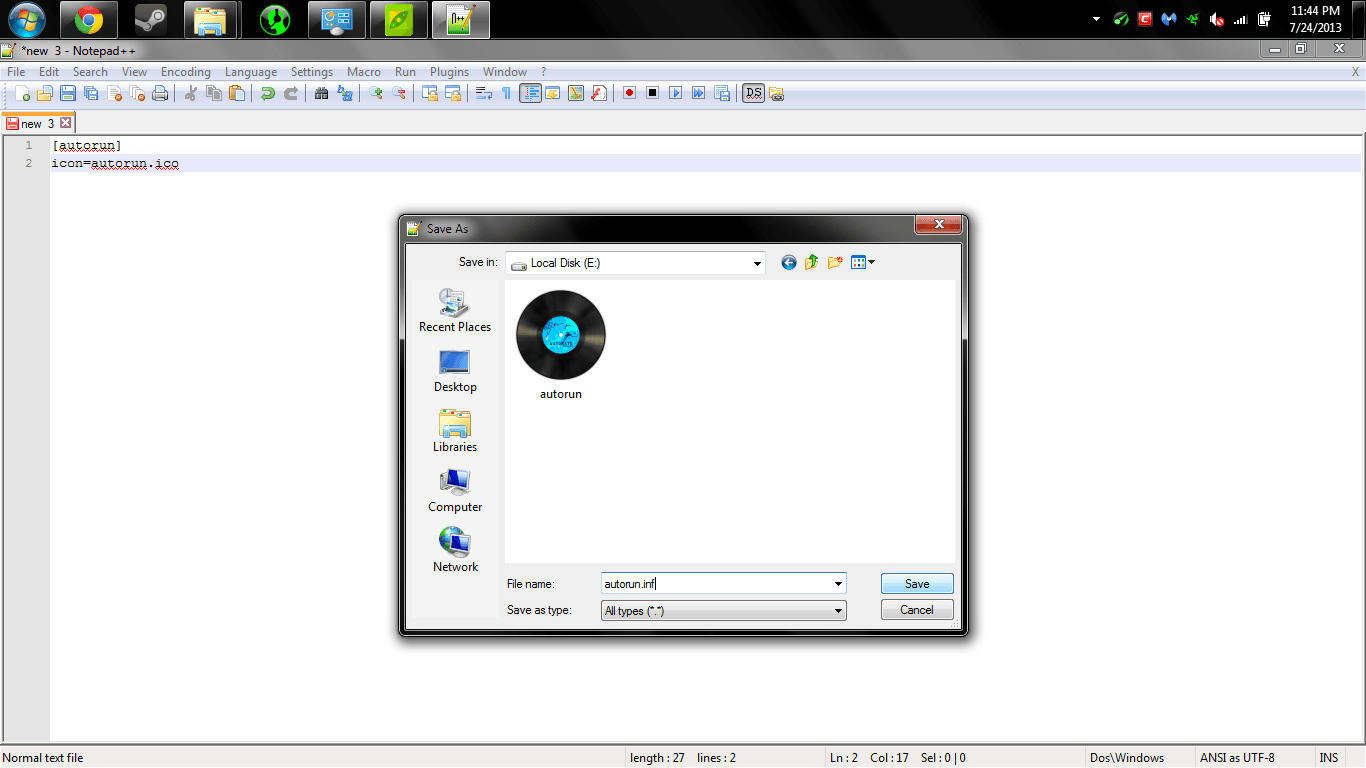
[autorun]
icon=autorun.ico
- Now save the file as “autorun.inf” (without the quotes) in the same root folder as where you placed autorun.ico. When saving, be sure to select ‘All Types’ from ‘Save file as’, before naming and saving the file in NotePad — see screenshot below.
- Done!
Now all you need to do is unplug your device and plug it back in for the icon to take effect. If you followed all of the steps properly, you should see your new icon appear instead of the traditional removable drive one.
Enjoy!


