 Email article
Disk partitioning is the act of dividing a hard disk drive (HDD) into multiple logical storage units referred to as partitions, to treat one physical disk drive as if it were multiple disks, so that different filesystems can be used on each partition.
Partitons come handy if you want to have more than one operative system installed or if you prefer to keep your important files safe by having a partition for your OS and another one for your documents and media in case your system ends damaged.
Whatever the reason may be, it’s always good to know how partitions work and to be able to partition your disk in case you need to split it into a couple partitions. I used to keep my media and operative system in the same partition, and formatting was real hassle because I needed to backup all my media to an external hard drive – until I discovered what disk partitioning is.
BEFORE WE BEGIN
Although this guide will be focusing on Windows 7 and 8 users, the disk manager utility we discuss in this article is available on Windows XP and Vista also (although disk manager on XP/Vista is slightly different, it basically does the same things). So the same principles can be applied on Windows XP/Vista. Feel free to ask me about anything on this subject and I’ll try to answer.
Take note though it’s possible to mess up with your partition(s) and therefore lose your existing data, it’s not a risk if you proceed with caution and since this tool is included on Windows by default, it’s unlikely to damage your partitions because Windows won’t allow modifications if it considers that a certain action could be risky. However, be careful with what you modify. Proceed further at your own risk, and always have a backup of your data.
HOW TO CREATE, FORMAT AND MANAGE PARTITIONS ON WINDOWS
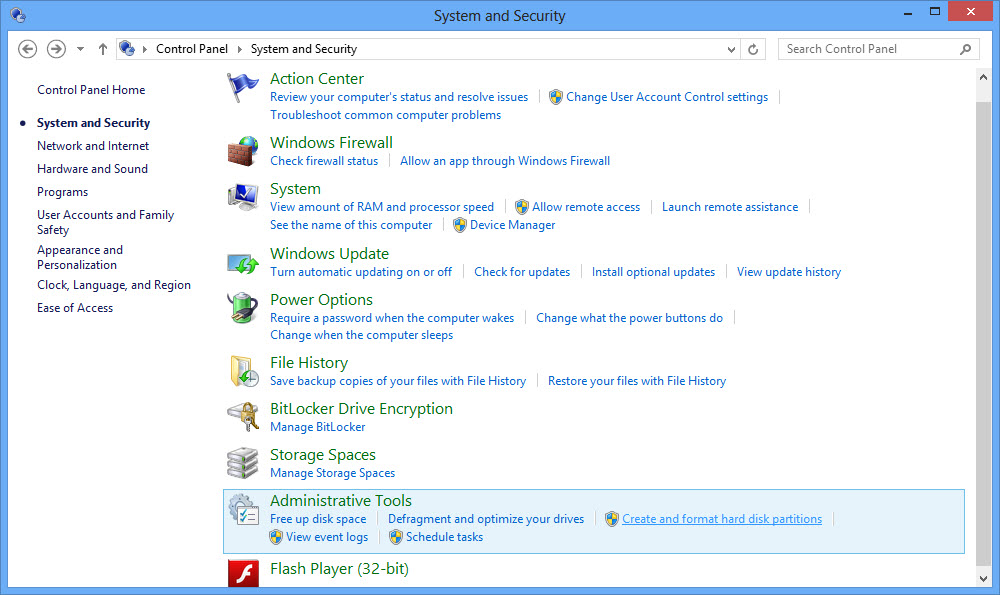
First, you need to locate where is this tool located. Go to Control Panel, System and Security and locate Create and format hard disk partitions that is under Administrative Tools.
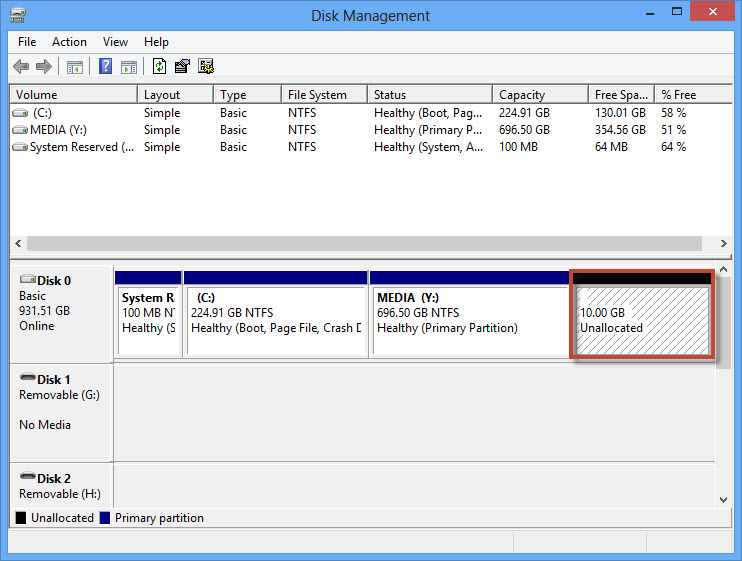
The main window will look like the following:

Here’s where the magic begins. You can right-click any of your current partitions on different hard drives (I only have one as shown in the picture) and you’ll see different options, some available to use and some unavailable (grayed out).
- Shrink Volume. For example, let’s say you only have one partition at the moment in your operative system and you want to create another one to store your documents, photos and music but this only partition is using all your hard disk space. You can use the shrink fuction to reduce (or extend in a given situation) the disk space a partition is using so you’ll be able to create another one.

In this example I want to shrink my Y: partition of around 700GB to free up 10GB (10240MB) of space. Windows tells me I’m only able to shrink up to around 350GB of space because that’s the data I’m not using in my disk. So basically you just set the amount of storage you want to free up in MB and this utility will take care of it.
Remember that the process for extending a partition follows the same procedures. Right-click and select Extend Volume to try it out!
- Create a new partition. Once you shrunk your partition, you’ll see unallocated space on the disk and it’s now possible to create new partitions. Right-click the unallocated space box and click in New [Simple] Volume; a partition creation assistant will launch.
Take note: If there are three existing Primary partitions on the HDD / SSD already, the fourth partition created using this Windows tool will be an Extended partition by default. If it’s not your case and you don’t know which one to choose, I’d suggest you go with an extended partition for daily storage and backup needs, unless you want to install another OS along with Windows, then it’s better to get a primary partition.
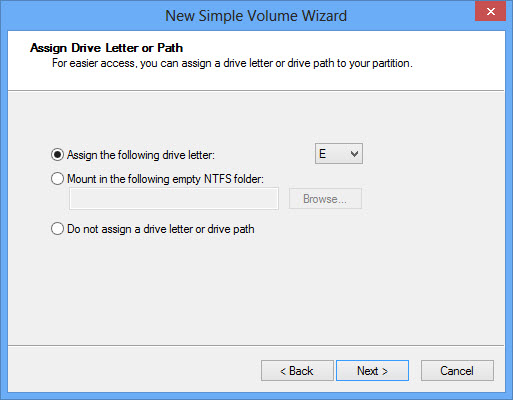
That said we are now looking at the simple volume wizard. Here you select how much space you want to assign to the new partition.

You can assign a letter to every volume and device detected on your PC. Choose any available letter.
Like I mentioned, if you want your new partition to be for storage purposes only, go with NTFS file system (as it allows to store files larger than 4GB rather than FAT32). Leave allocation unit size as default and label your new volume as you like. Perform a quick format is desired if you’re not dealing with errors on your hard drive.

Click Next and then Finish and you’re all set.
CONCLUSION
Partitioning comes in handy on situations when formatting or installing a new OS is needed; no more burning disks or spending hours transferring files to an external drive. Maybe a lot of you already knew about this wonderful possibility, but there’s also a lot of people that could be enlightened with this guide!
There’s a whole lot more to say about partitions and their management but this quick guide should give you practical tips about some basic editing and creating functions. Any doubts or comments about this subject? Let us know in the comments below!


