If you have more than one user set up on your Windows computer, you are probably using the Switch User Account feature built into Windows 7, 8, and 8.1 pretty often. Normally, you could either select the Switch User option from the Power Menu or press Ctrl + Al + Delete and then select Switch User from the resultant screen. But did you know that you can also create a desktop shortcut to switch user accounts? Read on to know how.
How to Create A Desktop Shortcut To Switch User Accounts in Windows 7, 8, and 8.1
- Go to C:\Windows\System32
- Look for an exe file names tsdiscon.exe. This is the exe for a system utility called the Session Disconnection Utility which disconnects the current logged in session and allows you to switch to a new session
- Time to create the shortcut. On your desktop, right-click and select New > Shortcut
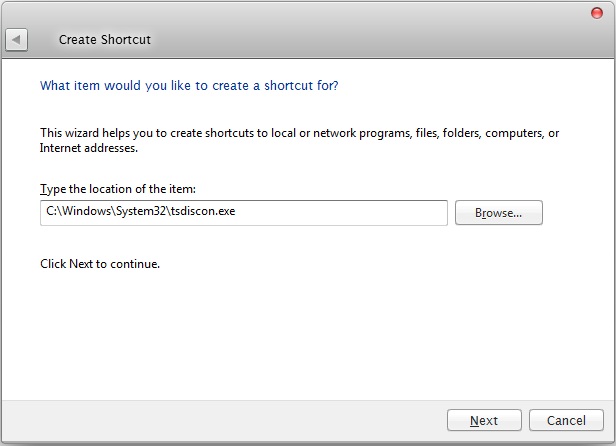
- Type in the target path for the shortcut as C:\Windows\System32\tsdiscon.exe and click Next

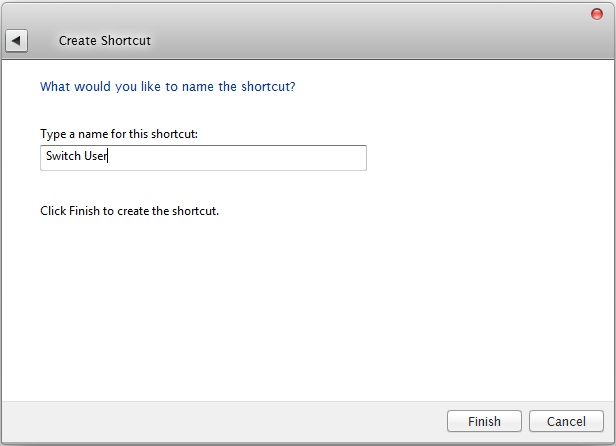
- Name the shortcut as Switch User, or whatever you prefer and click Finish

- You should now see a new shortcut named Switch User on your desktop
- Right Click the Switch User shortcut on your desktop and select Properties
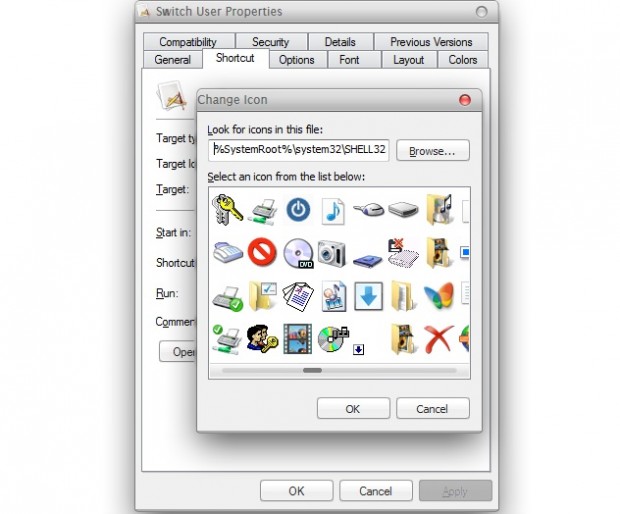
- In the properties window, click Change Icon and then click OK

- Select the icon of your choice for the shortcut and click OK, and then click Apply
That’s it!! You now have a brand new shortcut on your desktop which will allow you to switch user accounts with a click of your mouse.

 Email article


